No. 14…Learning to Love Learning

Well, as I’m sure you can see, I wasn’t able to get a post out in a few weeks. That is entirely due to having started my new job! I’ve been on a bit of a brain overload, honestly. It’s been nearly a decade since I started a new job, so learning a whole new system, lingo, and figuring out my work day and tasks has definitely left me unable to do much processing once home, if I’m honest. It’s taken me a few weeks to sort of get back into the routine and find a bit of equilibrium.

The new job is going well, though, but it has been a bit bumpy in places. Like I said, there’s SO much information, and just when I think I have a handle on things, something else comes up. Some of those things were weird one-offs, but either way, it would open up a whole other set of things to learn. This is not a bad thing – I’m not complaining – but it has been a big adjustment. Kind of, re-learning to go with the flow and fact check things before I make a decision. It’s been tough, because I’m still being on-boarded, but it’s all self-led for the most part. So sometimes I don’t know what I don’t know yet. LOL.

It’s been a great experience, though. I’m learning a lot about domestic and international shipping and the mechanics of the machine we sell. I’m already starting to build customer service documents and record best practices for the business. It’s exciting, and busy, and it’s a really great, small team of dedicated people.

I’m also driving into work each day, which is different. I used to pretty exclusively ride the bus and walk, but now, it’s basically driving from door to door. Partially because I no longer have a bus pass, but also because I do have a car, and it actually saves me a inordinate amount of time to drive verses bus, since my new job is so much farther away. The good thing, is because of the pandemic, the traffic is nearly non-existent, and I really hope (as does everyone in the Seattle area) that the traffic won’t ever come back to how bad it was before. Both for the sake of a nice commute, as well as environmentally.

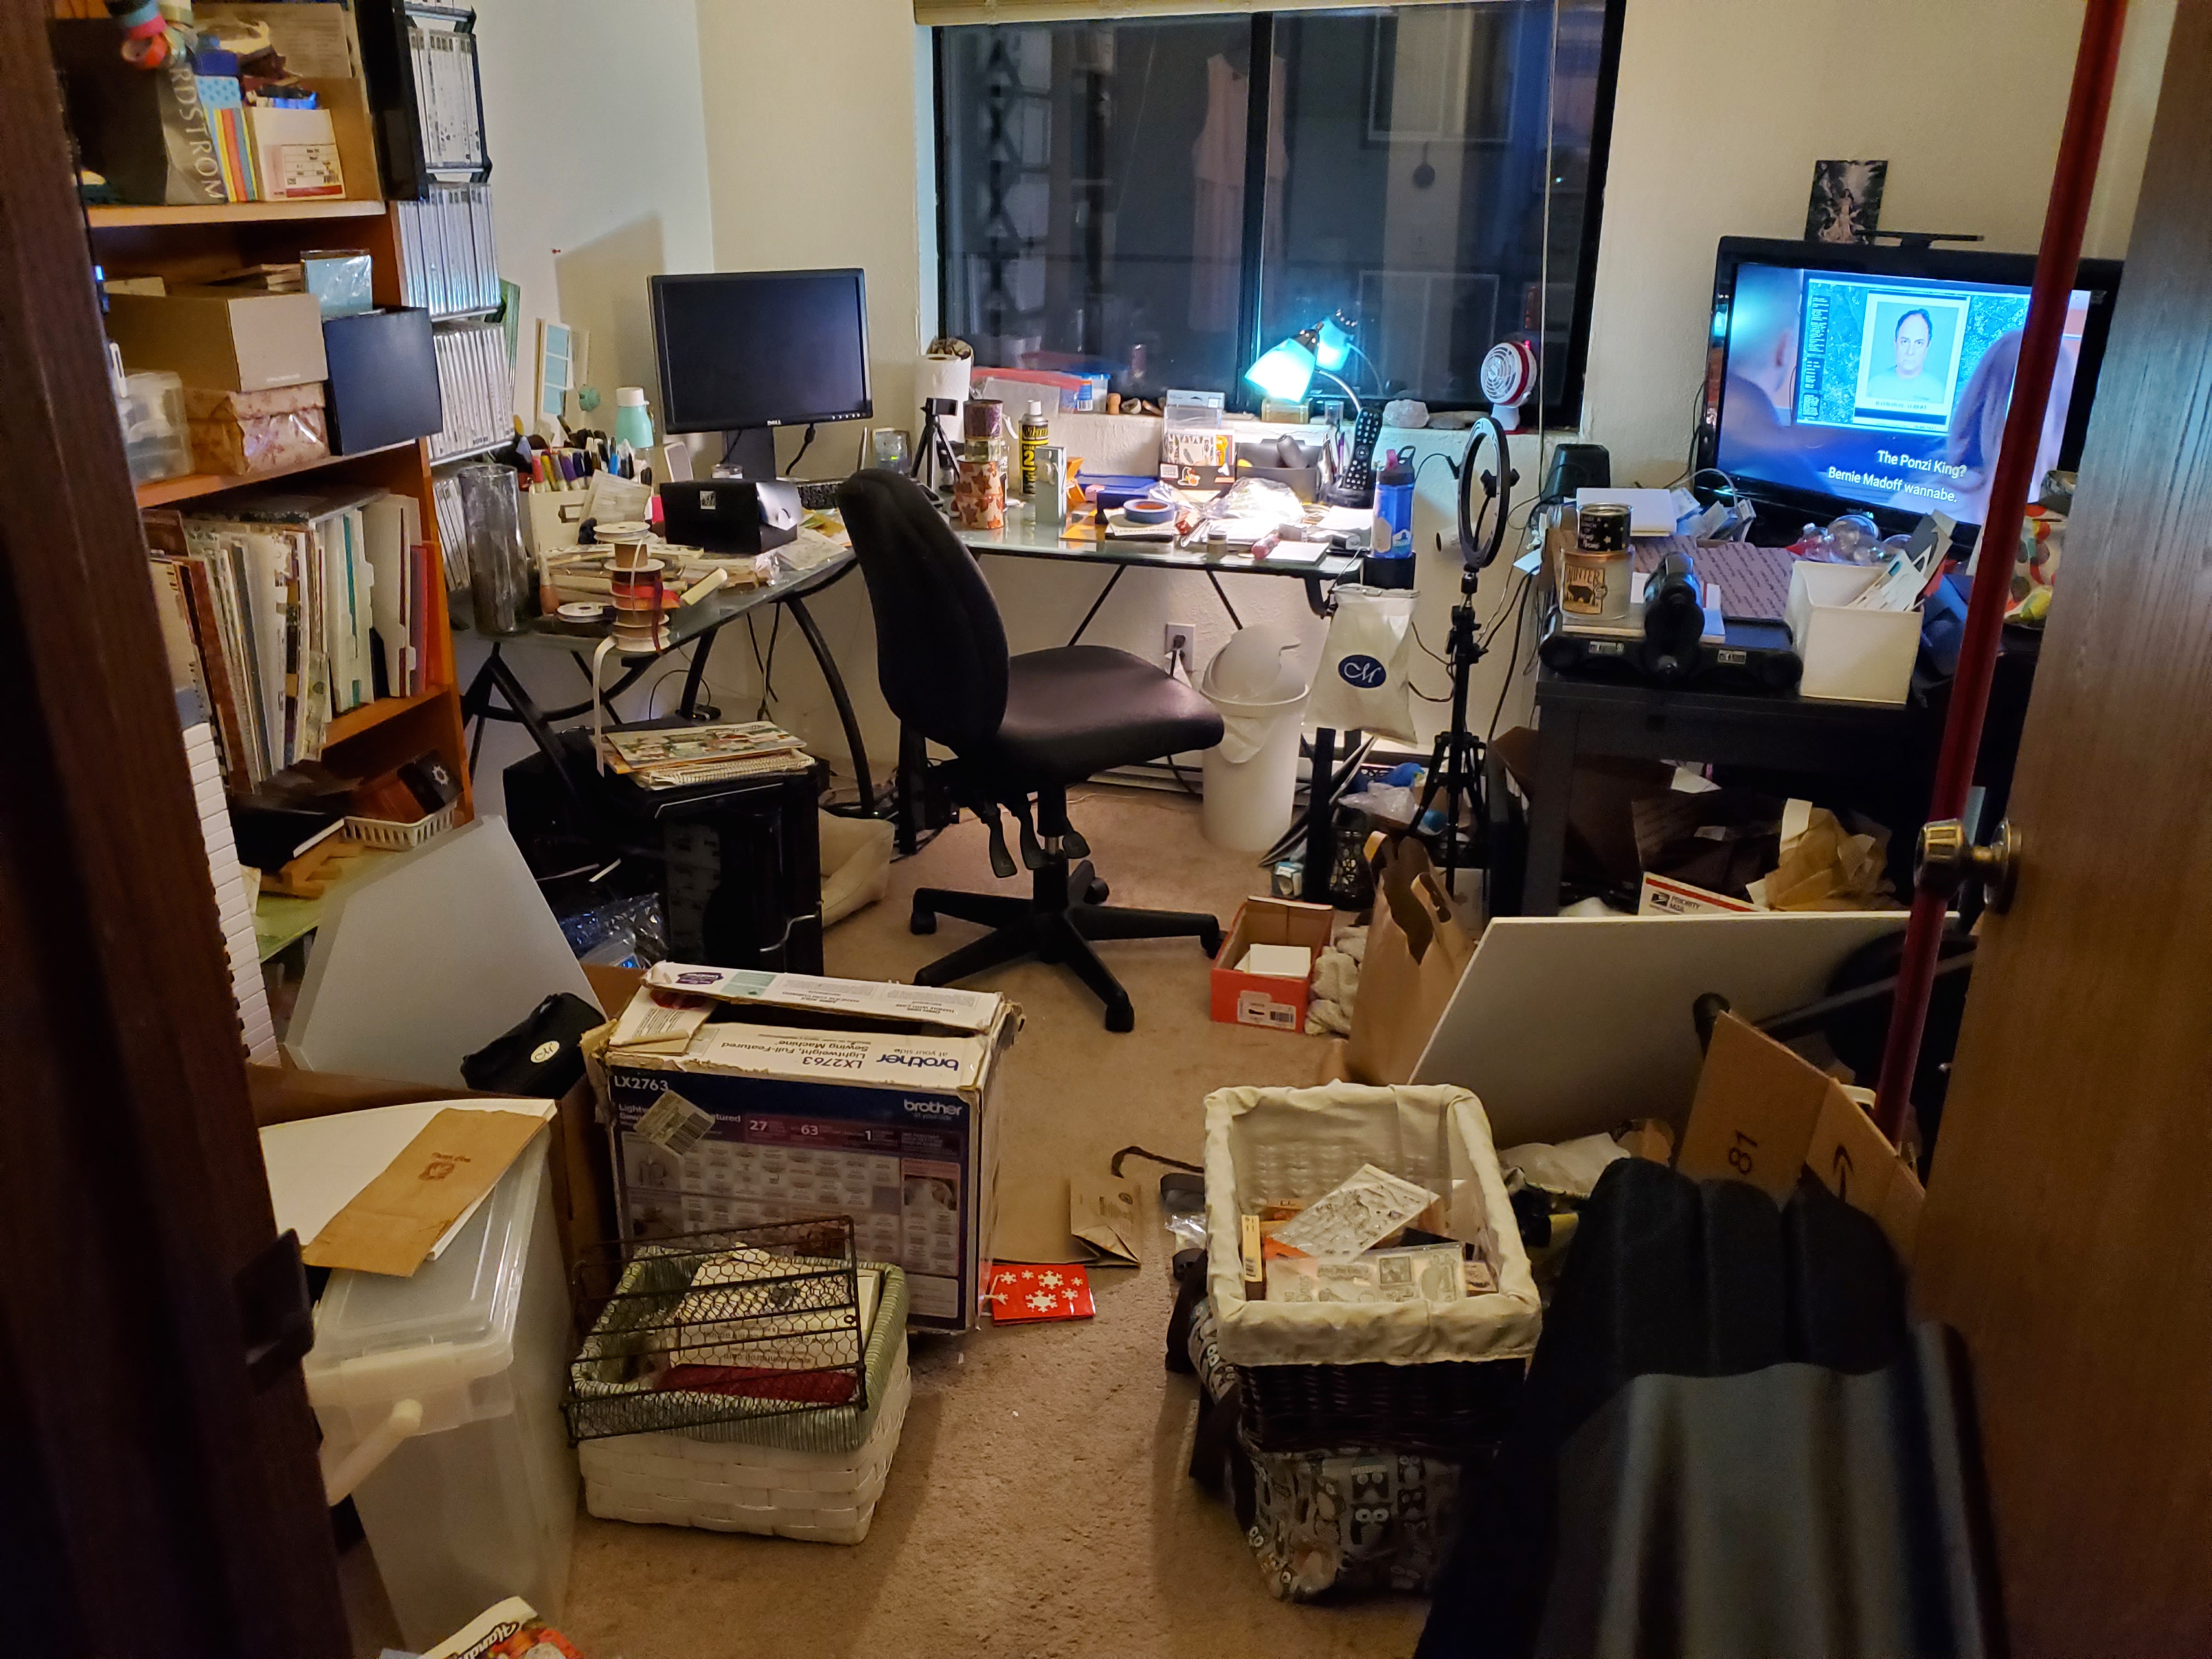
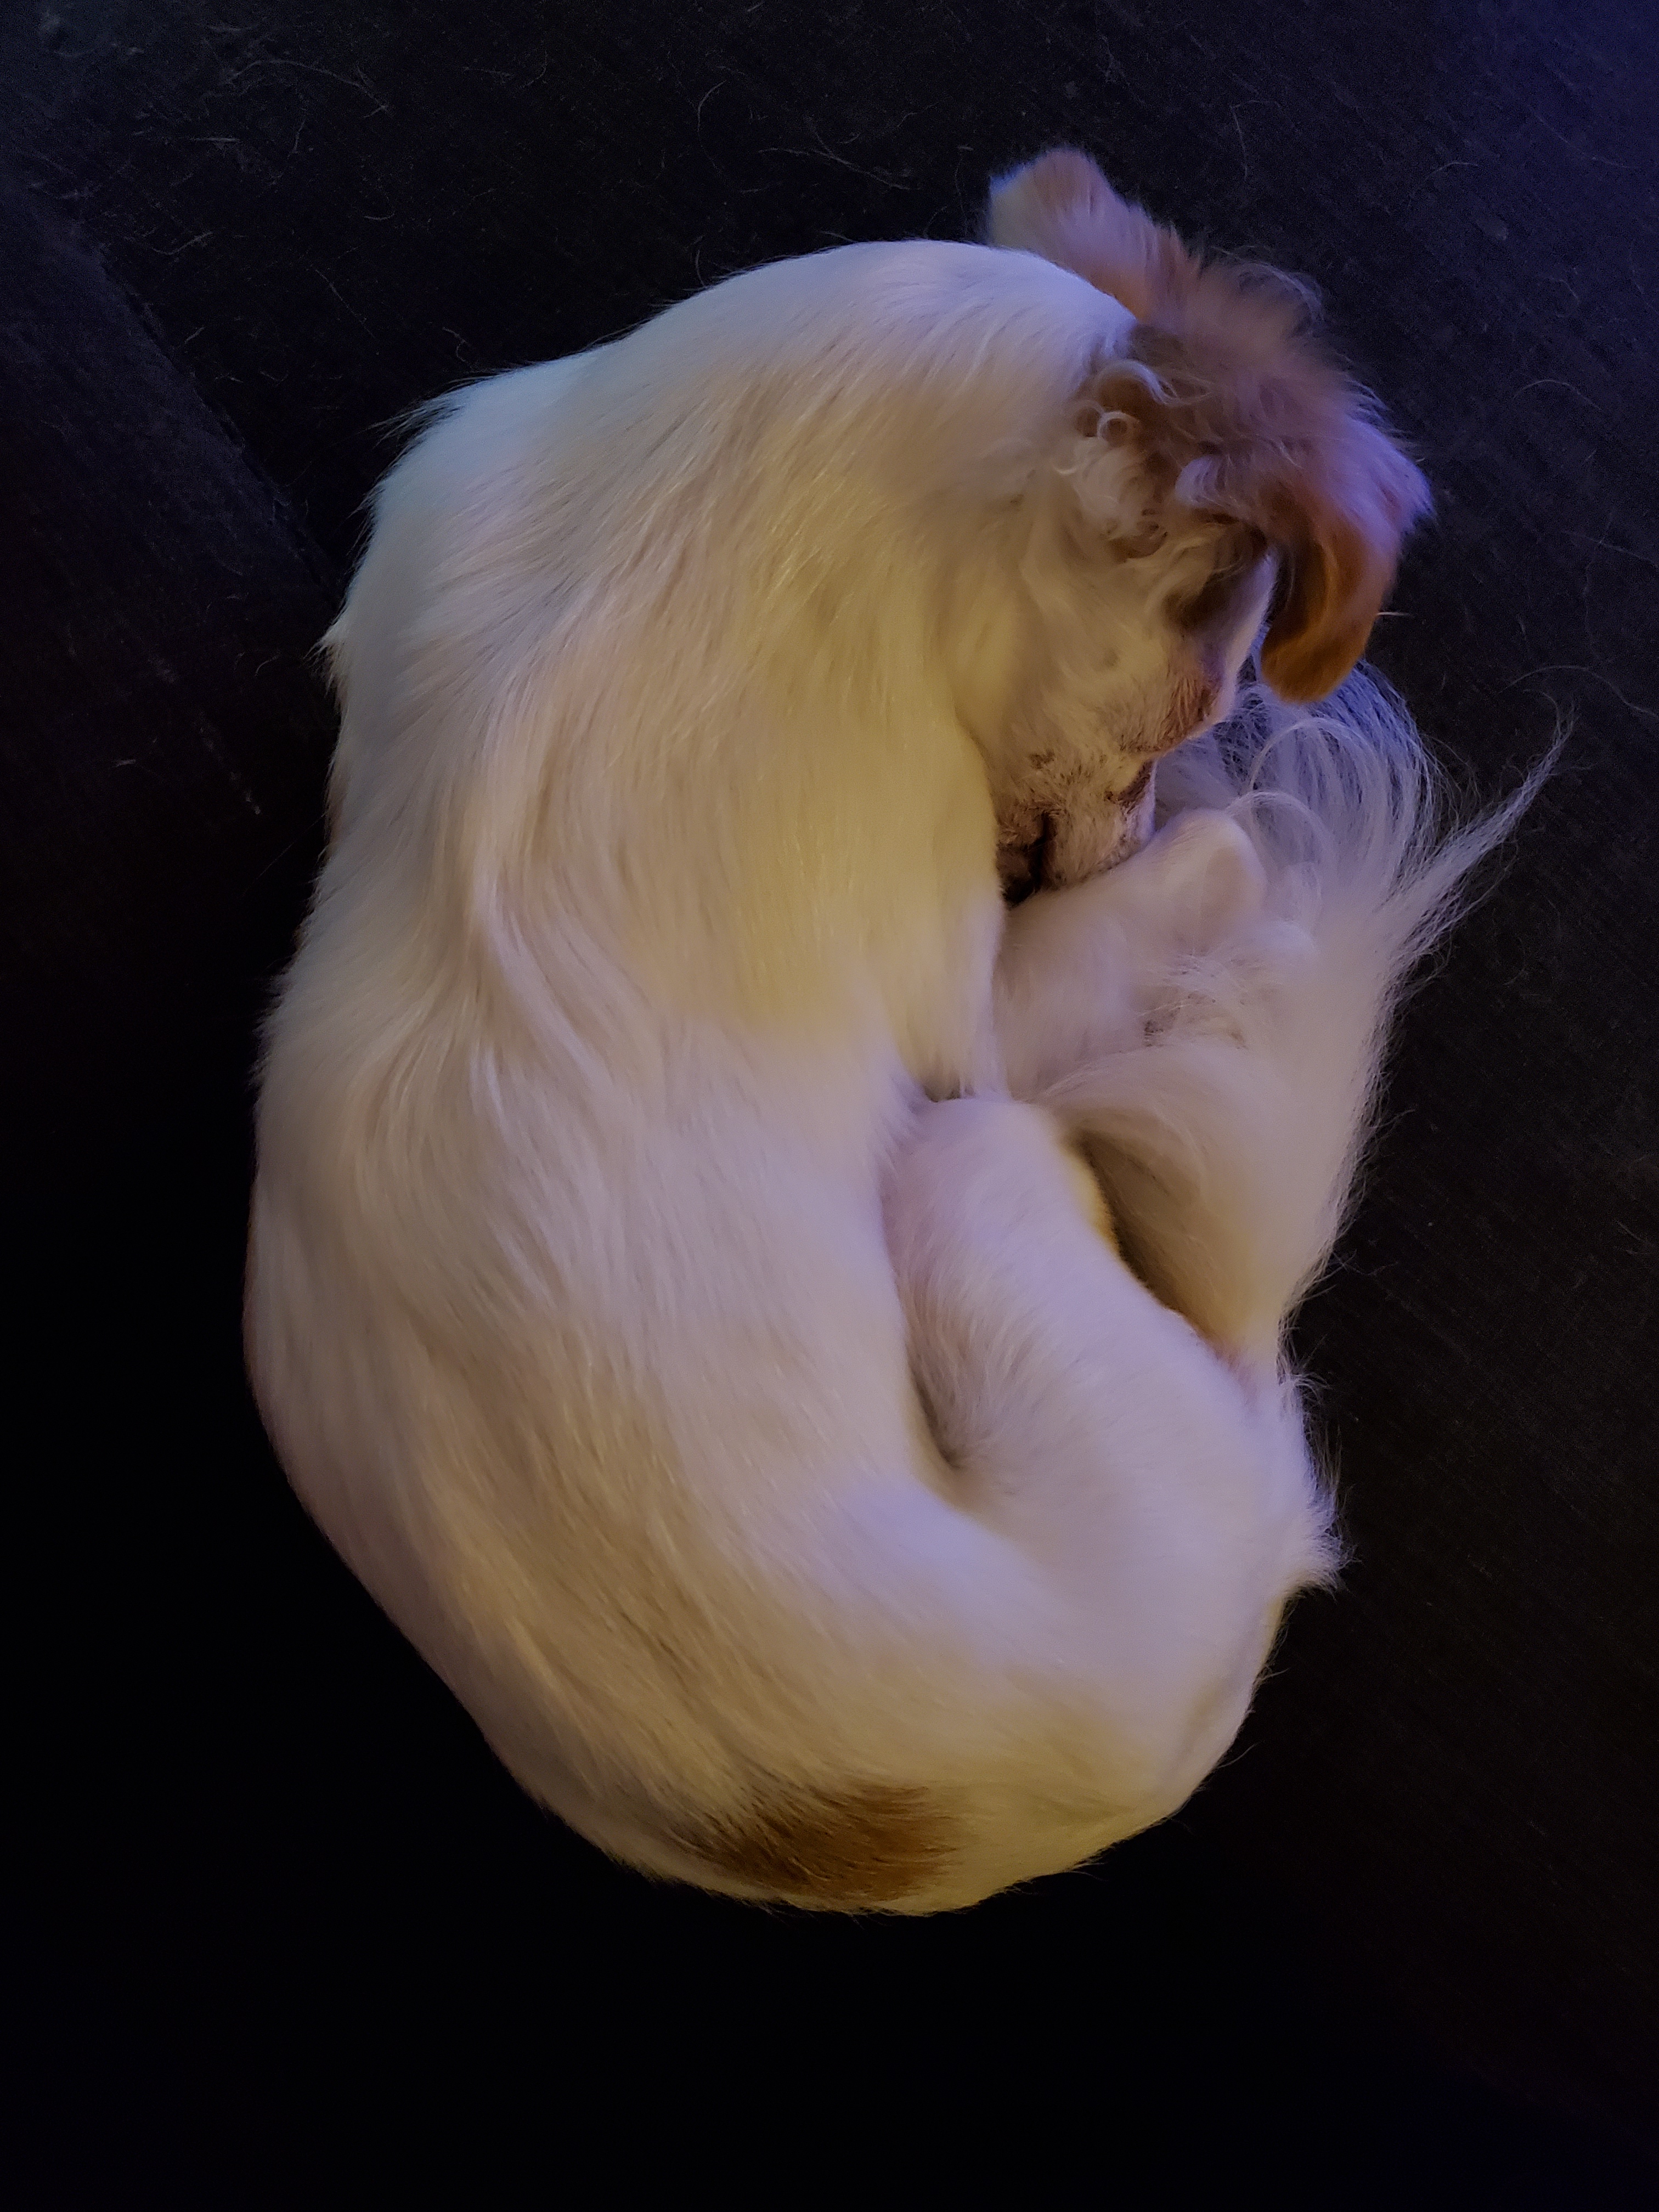
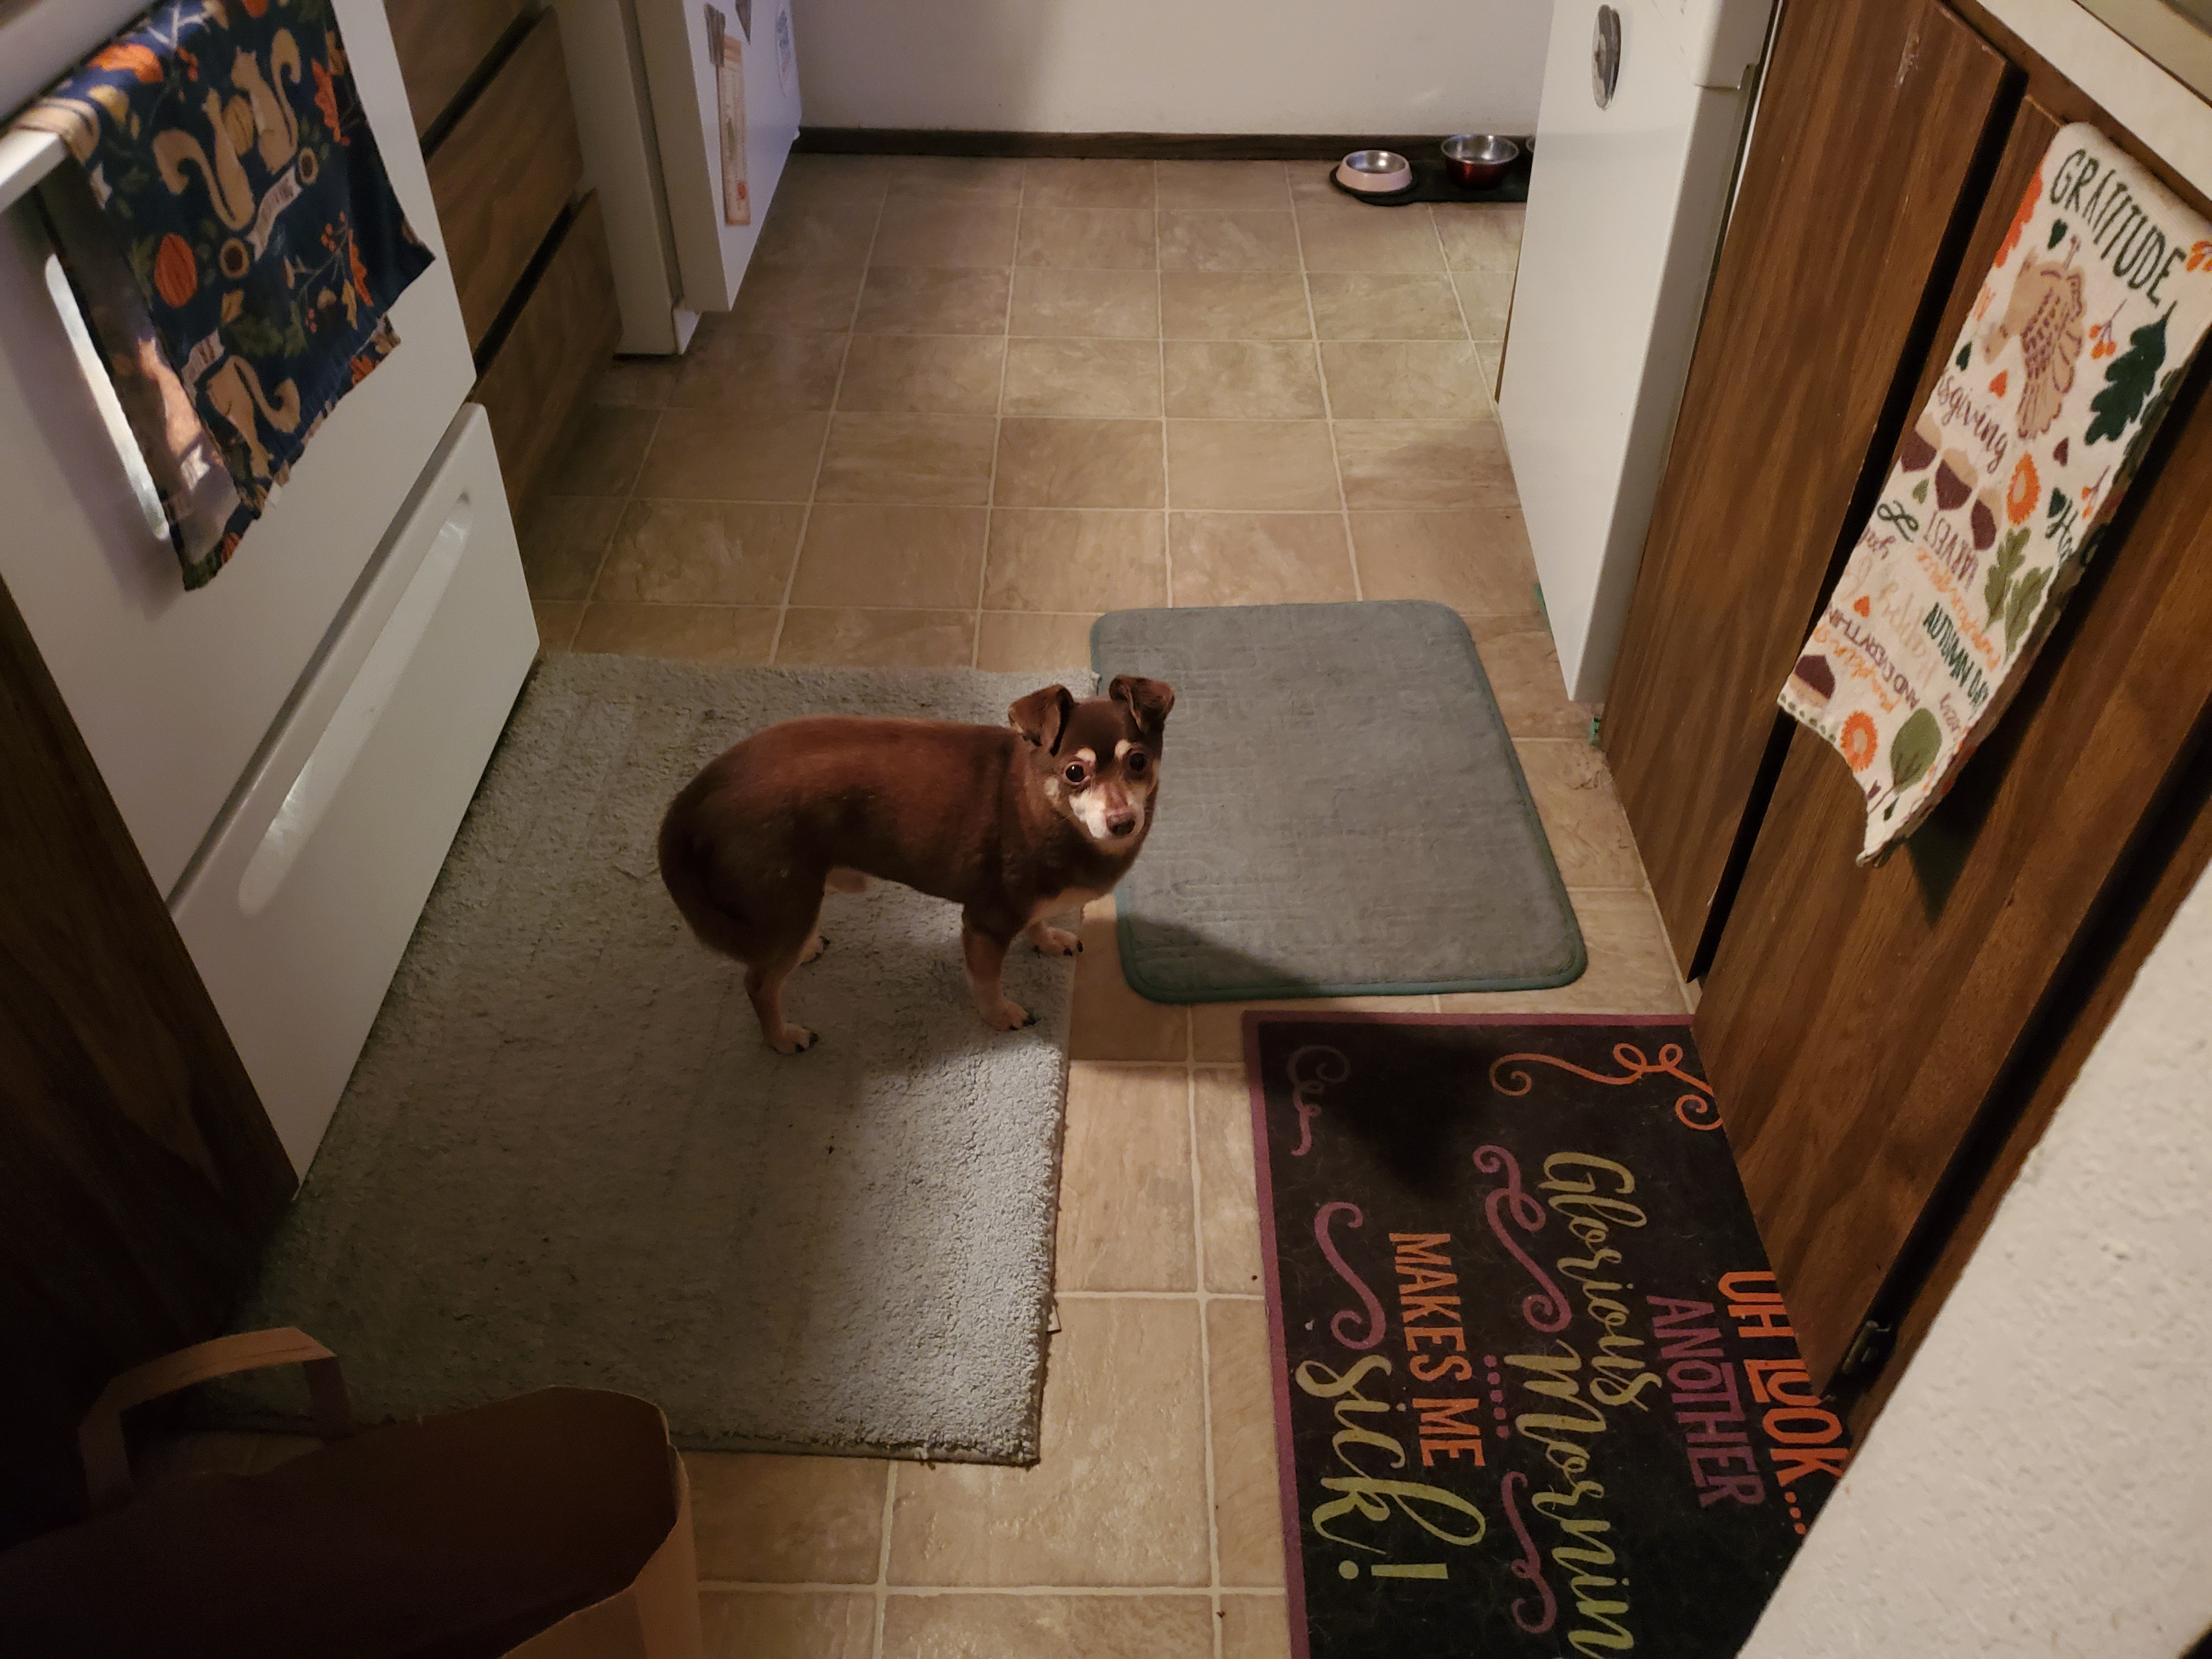
Another great thing is I’m able to work from home if needed. I’m also in charge of my own schedule, but since I’m in charge of customer service, I do kind of need to be mostly available during those hours, which do align with our general hours of operation. I’m really glad it’s so much more flexible than my last job, because it’s nice to be able to work if the doggos need me at home, or if I’m not feeling well enough to physically go in, or, like in this past week’s case, there was a bunch of construction going on in my office, so I couldn’t really work in there all week. LOL.

Anyway, new job is good, and I think I’m doing okay still being able to balance my food intake, which I was expecting to have issues with, but I think I got so used to only eating a few main meals, that I’ve been good about eating healthy snacks and not letting everything fall apart. That doesn’t mean I haven’t had some not-great food choices when I’m tired and brain dead after work, but at least I’ve put myself in a position that I can make healthy choices in the morning and at work. I don’t know how many of my readers have issues with their weight or food, but it’s been a life-long issue for me.

I’ve also started going back to the gym, now that they’re open again. I like that the new mandate required people to wear masks while exercising as well, which isn’t the way it was before when they reopened. I know it makes it harder to take big, deep breaths while running, or working hard, but I have better peace of mind, honestly. I’ve been going and walking on the treadmill for 10-15 minutes, just to get my heart rate up and get a little more limber, and then I stretch, and then do some weight lifting. It feels really good to push myself. Though, I might have pushed myself a little too hard on Saturday. >_< I surprisingly, haven’t been sore, but I did some pull downs and rowing and a few other arm exercises on Saturday, and legs today. But on Monday morning, as I was getting ready for work, I pulled a muscle in my neck and shoulder, and man, it hurts like the dickens! I was in so much discomfort all day Monday. It’s a lot better today, after a bath, Tension Tamer tea, hot and cold therapy, tens therapy, and some good old fashioned Advil. lol.

But, it has reminded me that I’m a little bit slower to recover than when I was a bit younger, and, that I might have done a little too much too soon. I’ve been largely sedentary, as I’m sure just about everyone can sympathize with, so I might need to stretch a little longer, and see if I can keep myself from messing up my shoulder while I sleep, which is largely up to my subconscious, so…

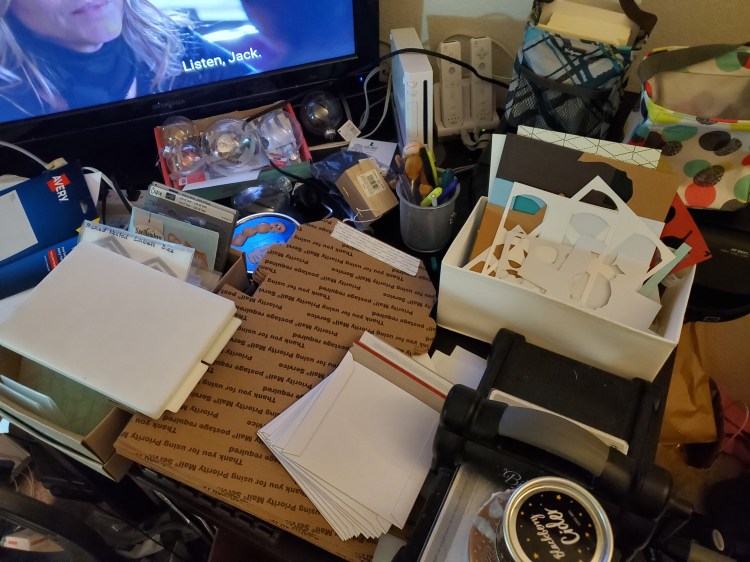
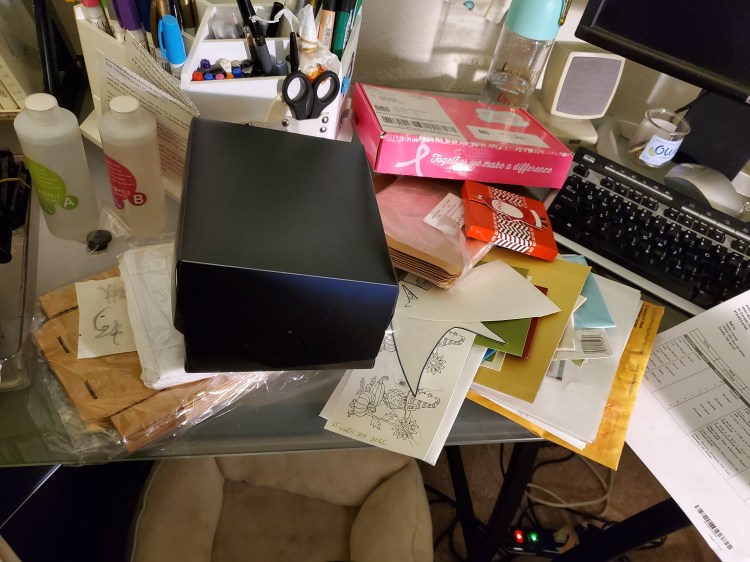
Anyway, as you can see, I’ve been very busy…so busy, I’ve barely been able to work on much of anything, let alone the blog. HOWEVER, I do have a few things I want to show you.

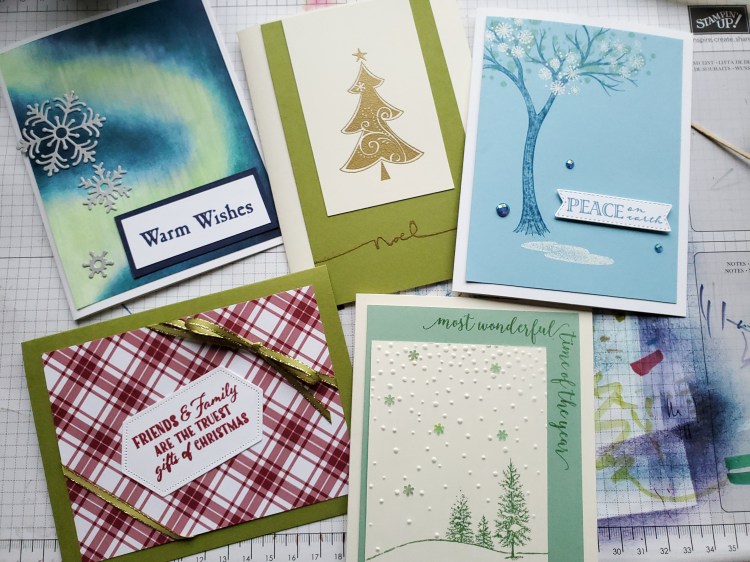
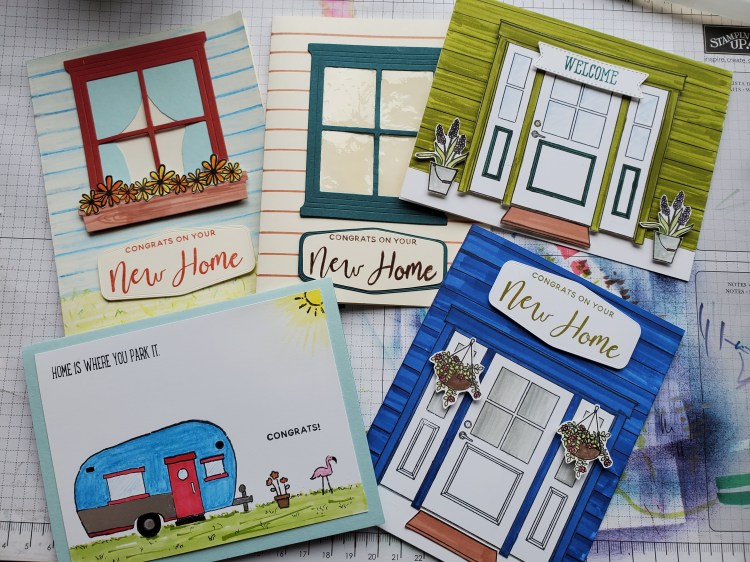
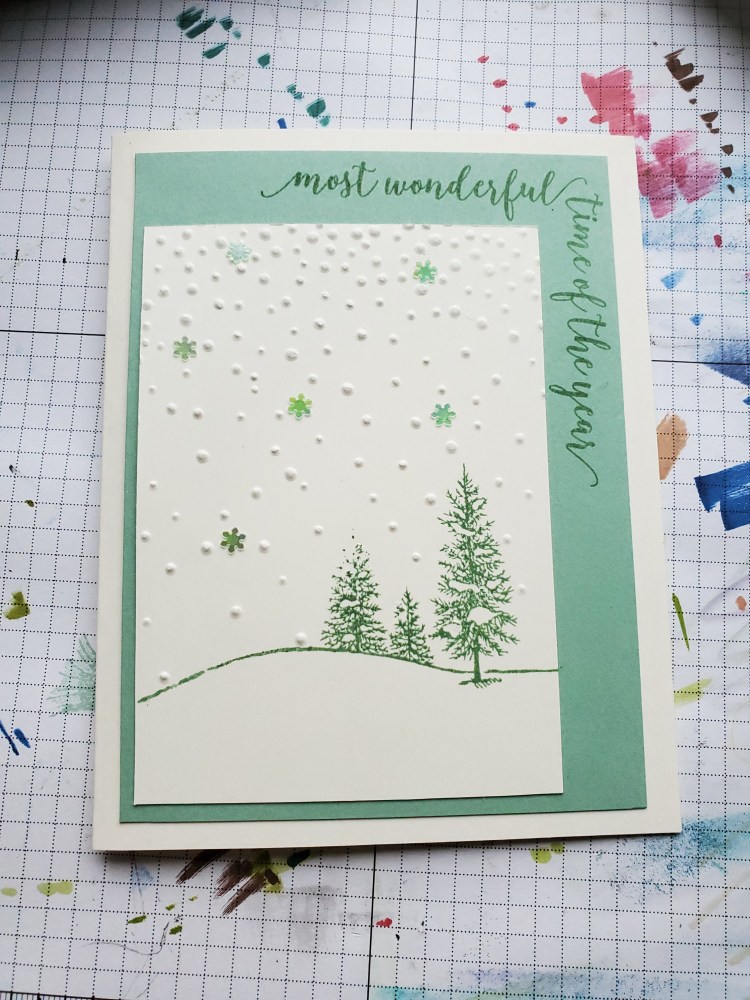
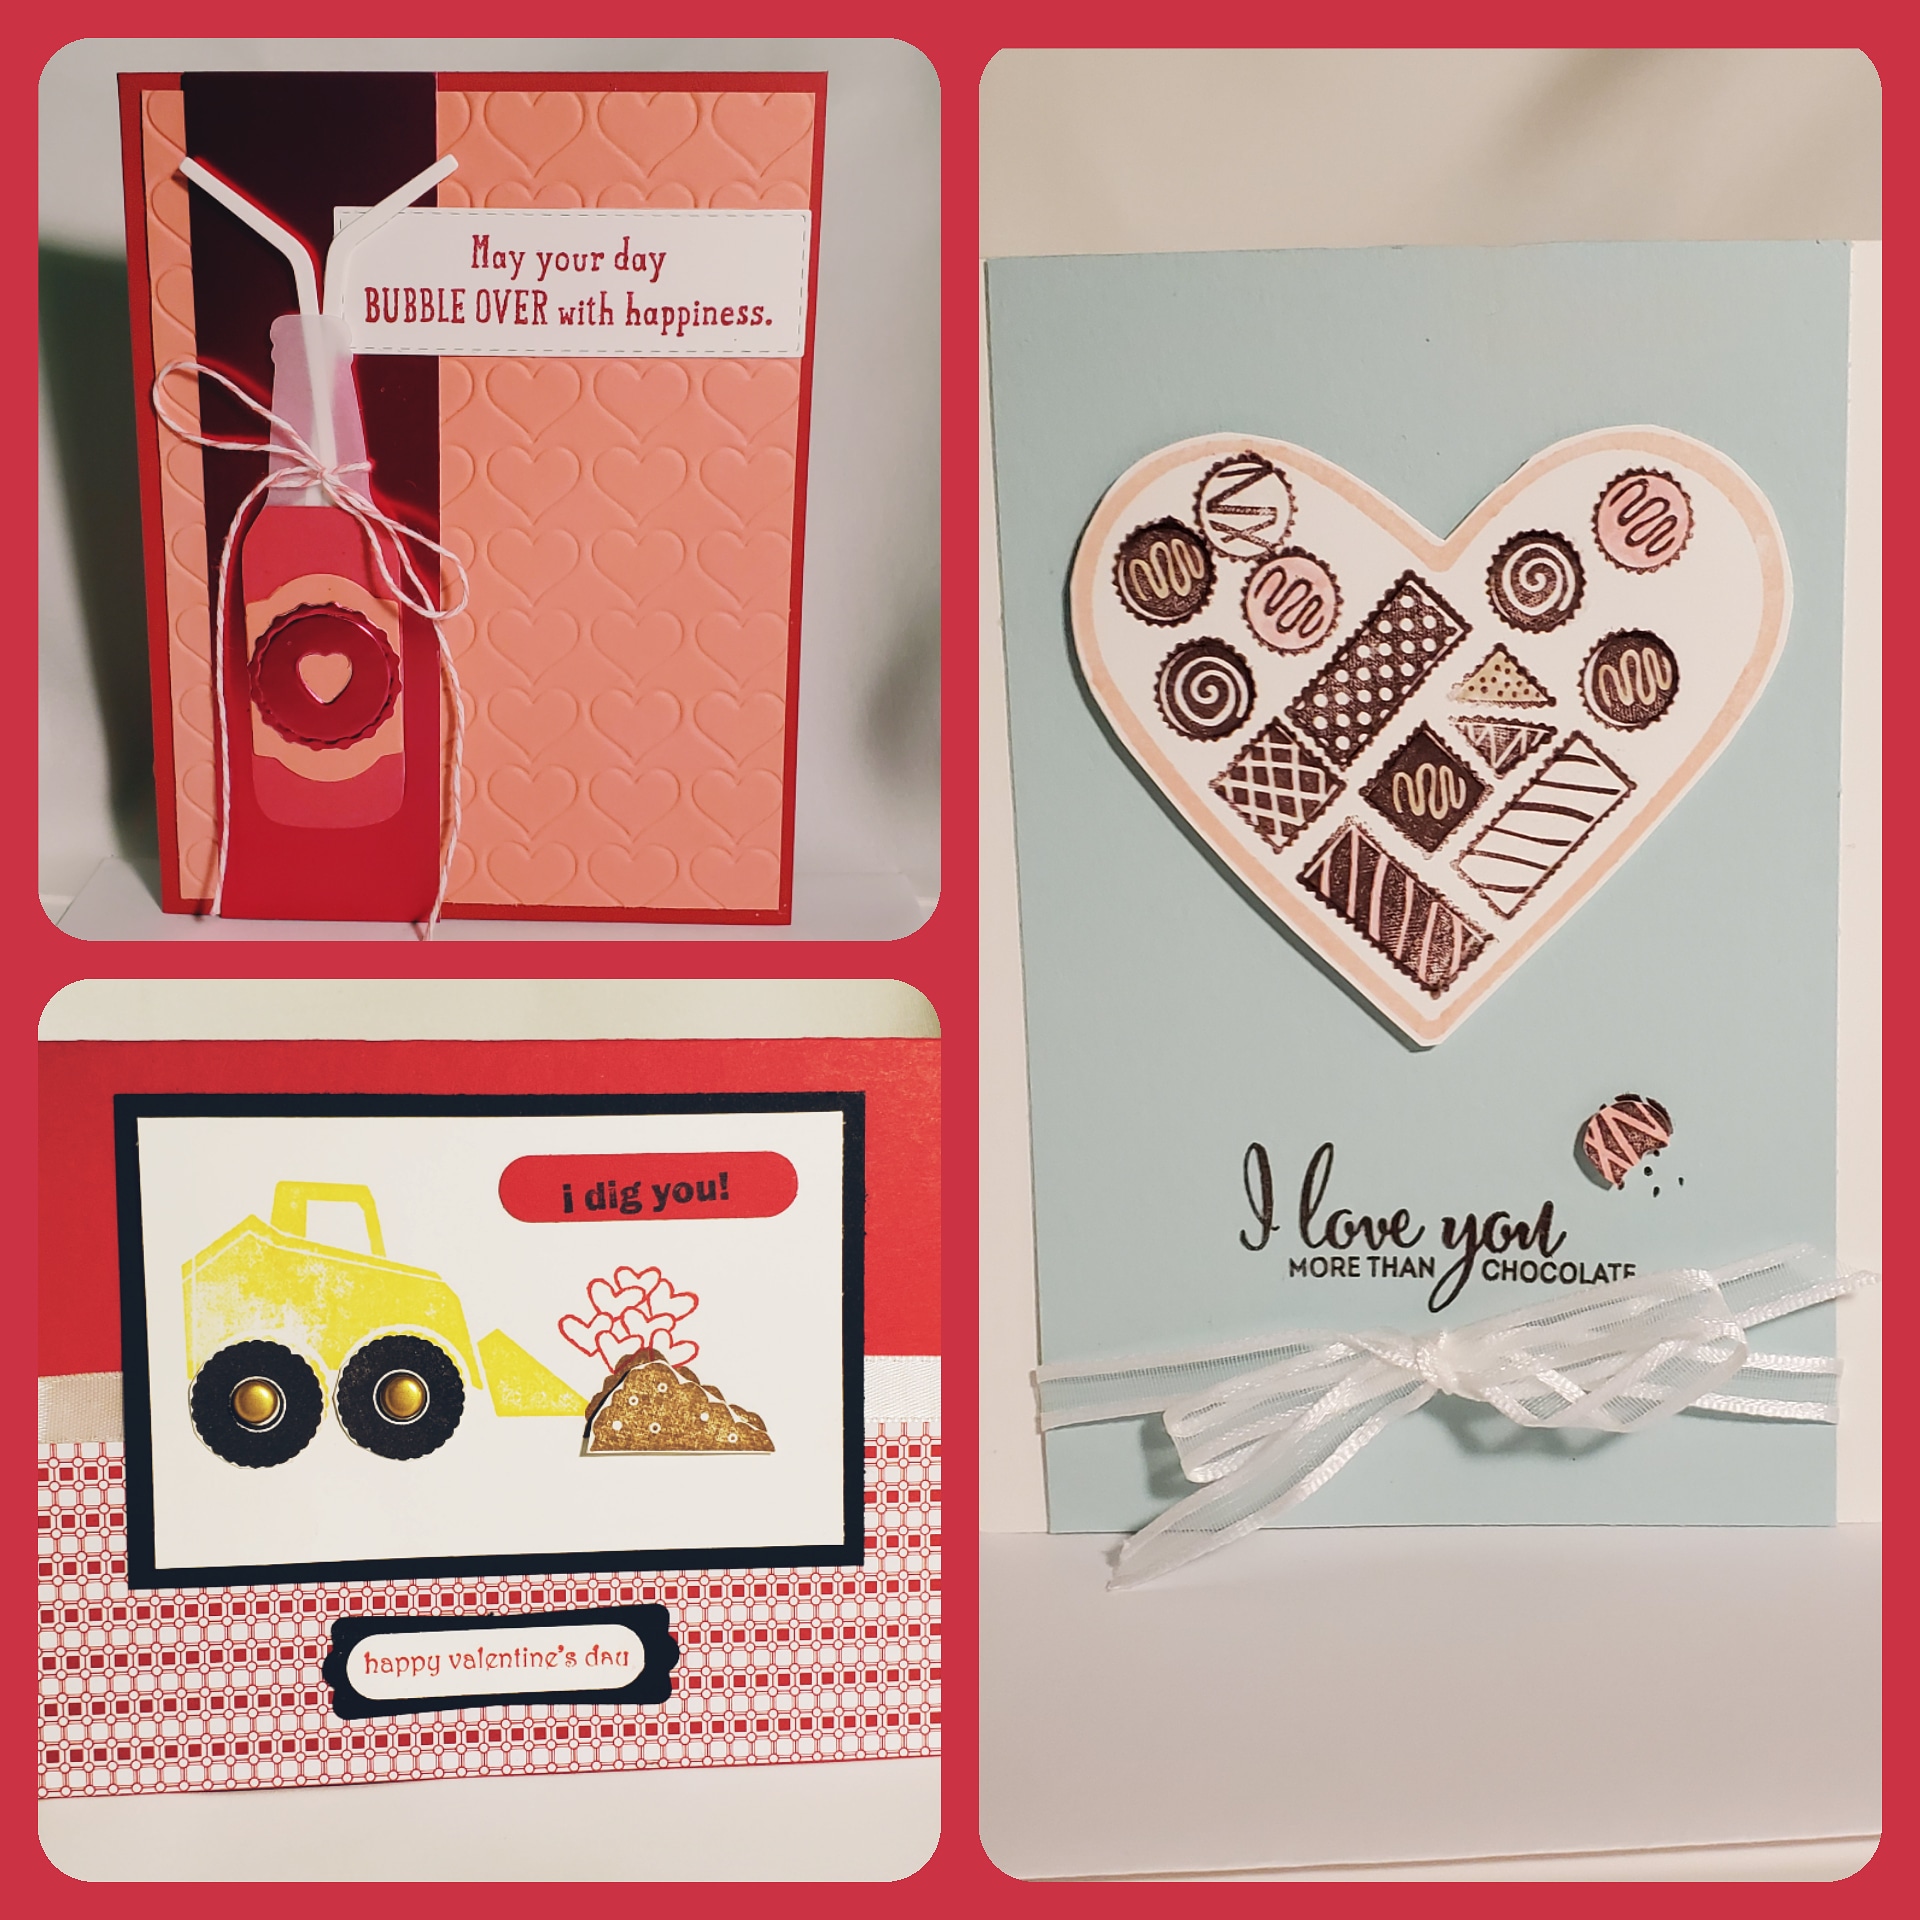
I have Valentine’s Day cards available in my Etsy store! I have a couple of others I’m going to try to finish and put up, but if you need a card to tell someone that you care, I have a few available! And not just exclusively Valentine’s Day…there’s a few that can be used any time of year as well!

I’ve also been working on some art…I’m exploring the dichotomy between nature’s love of curves, and the inorganic-ness of man-made things like buildings. I also really love the impressionists, and want to see how I can blend impressionism with watercolors. Here’s some pics of my latest attempts.
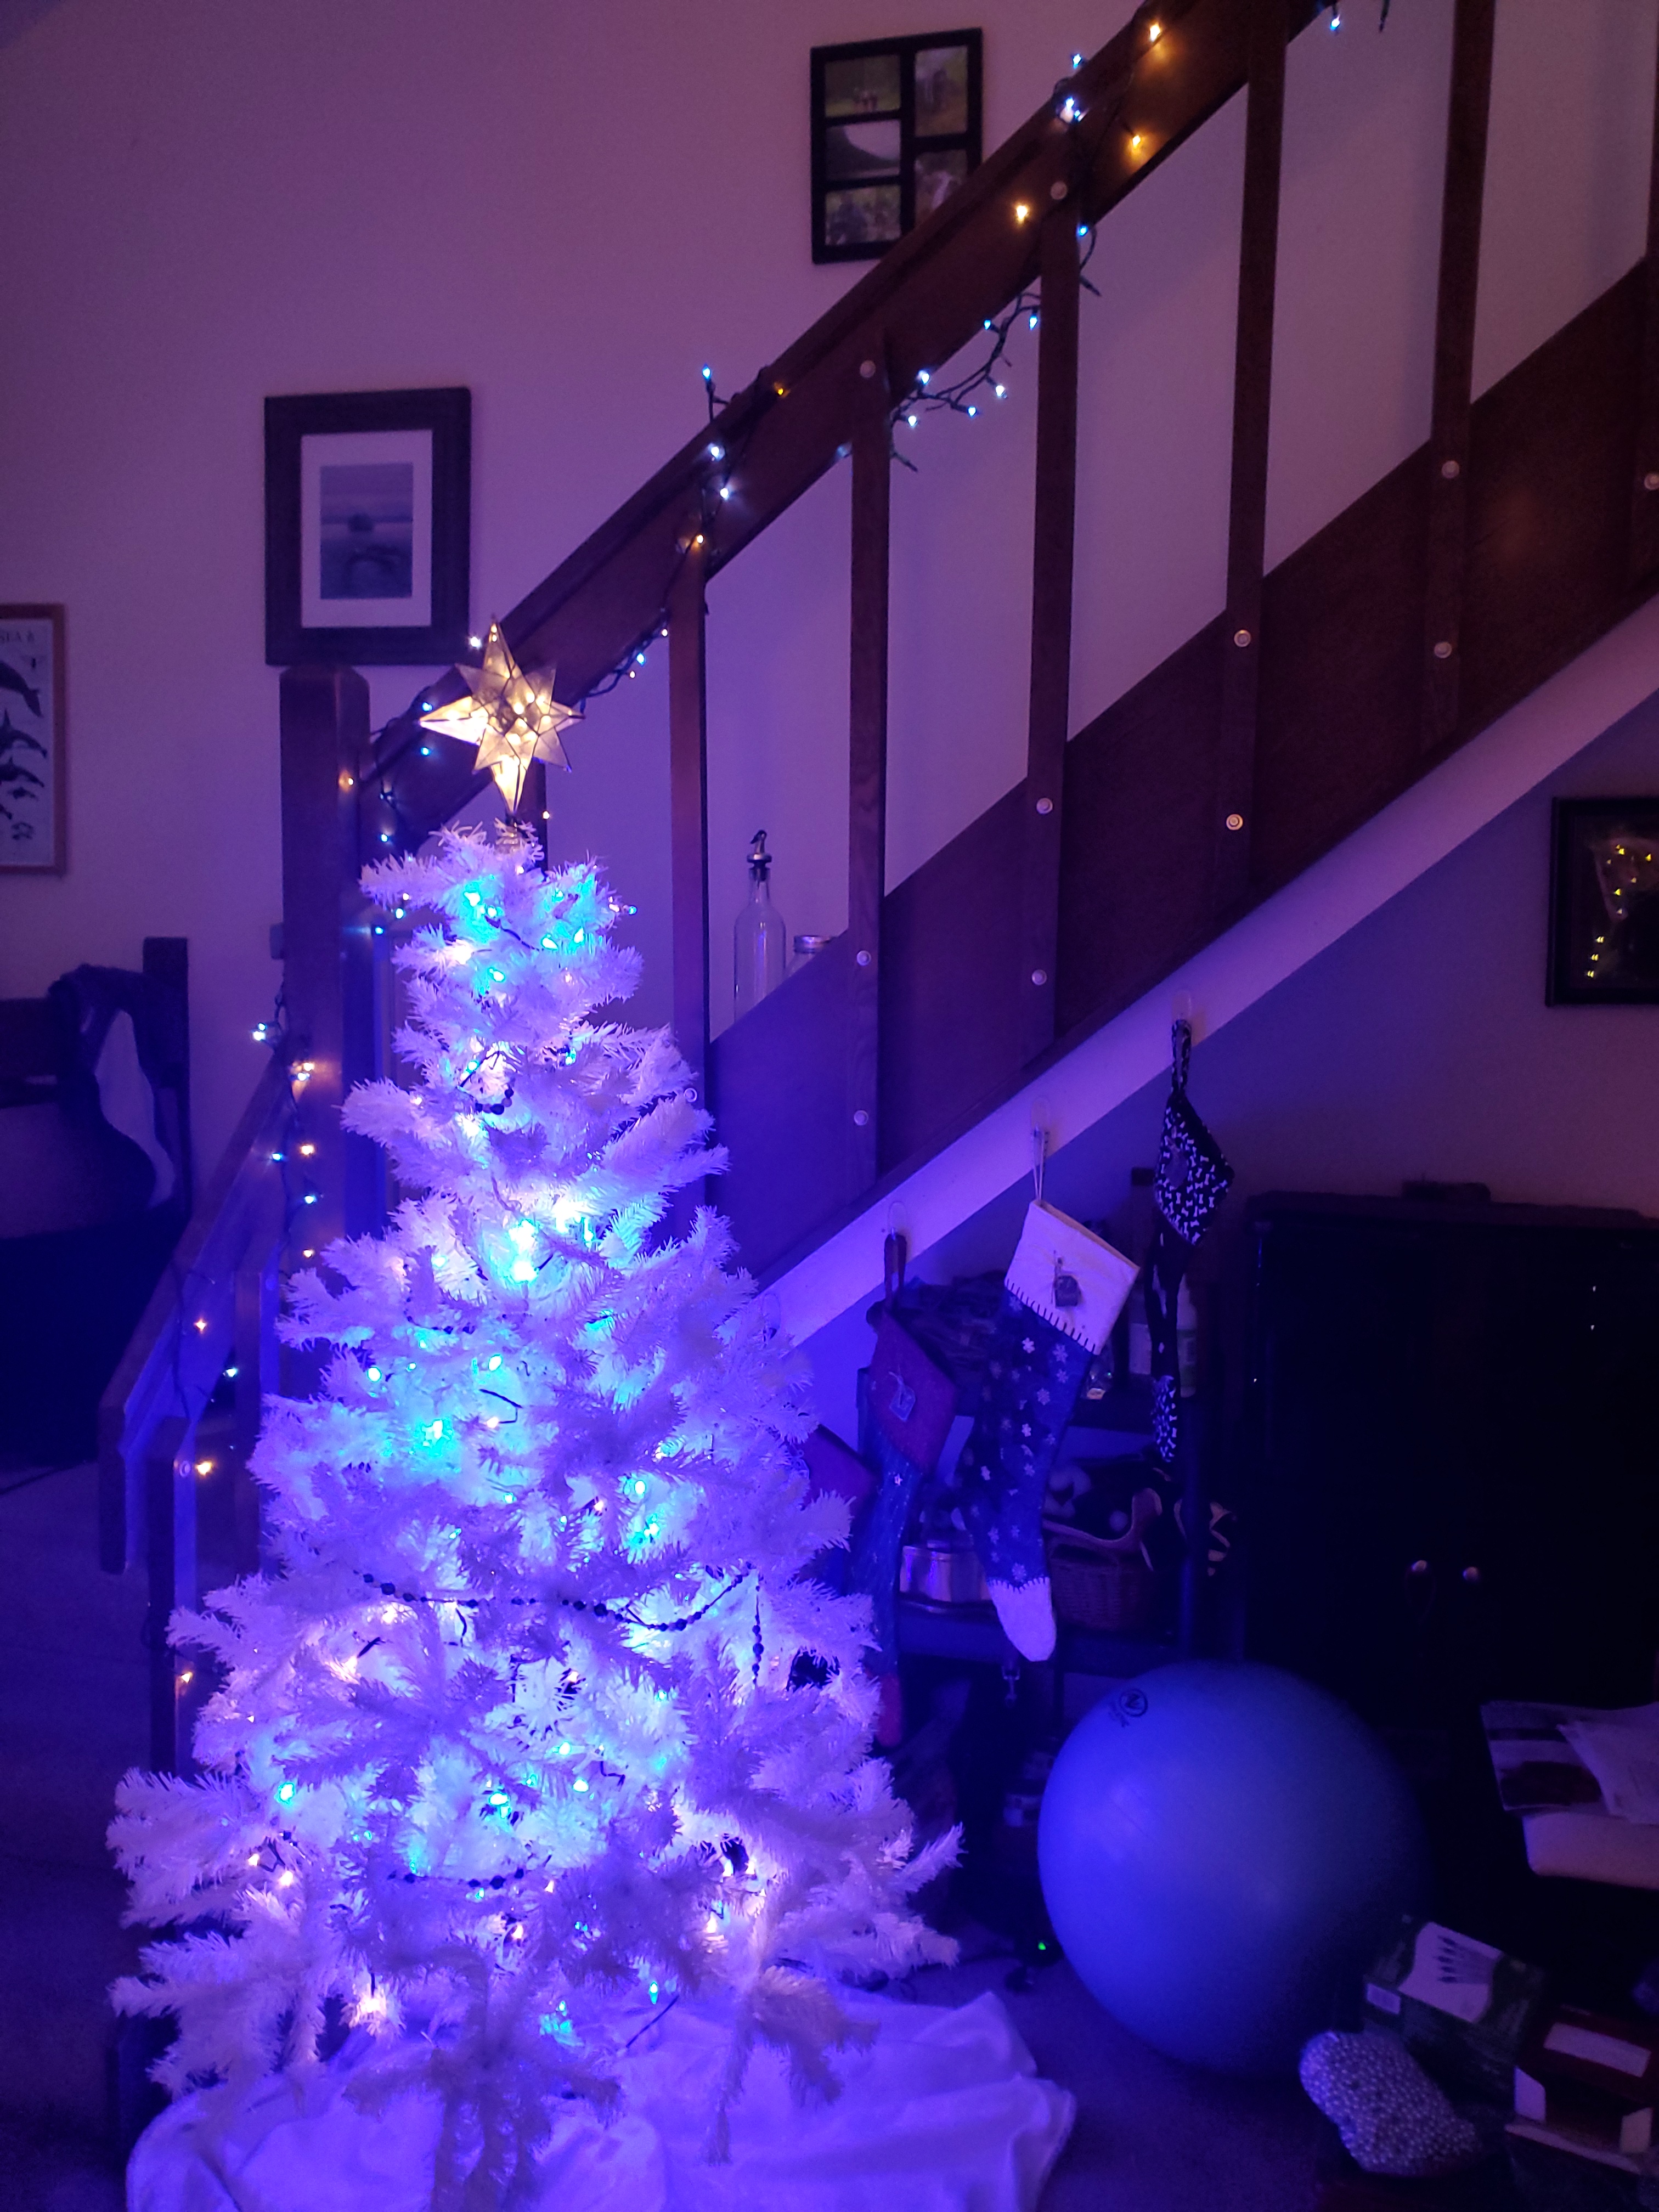
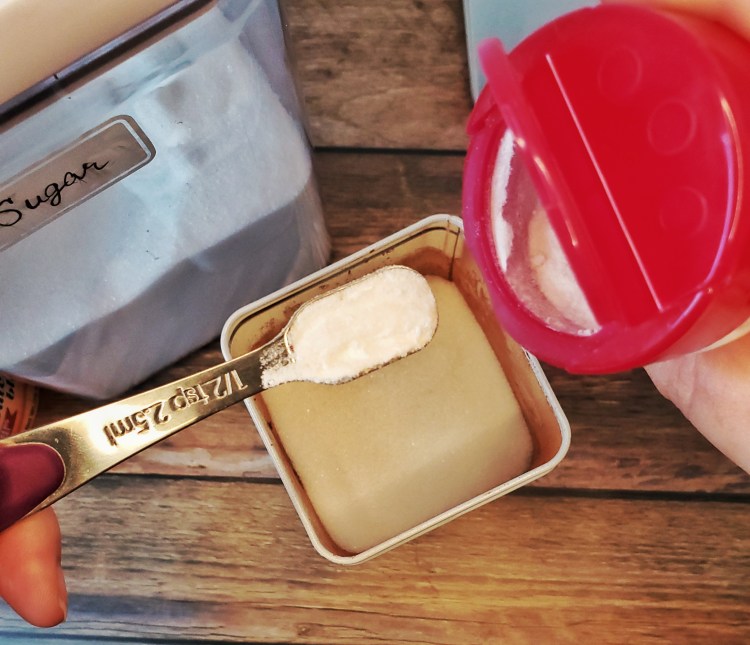
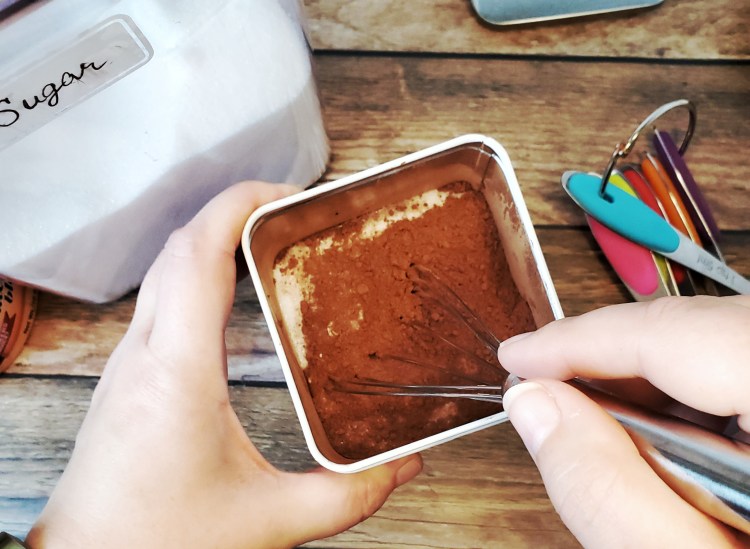
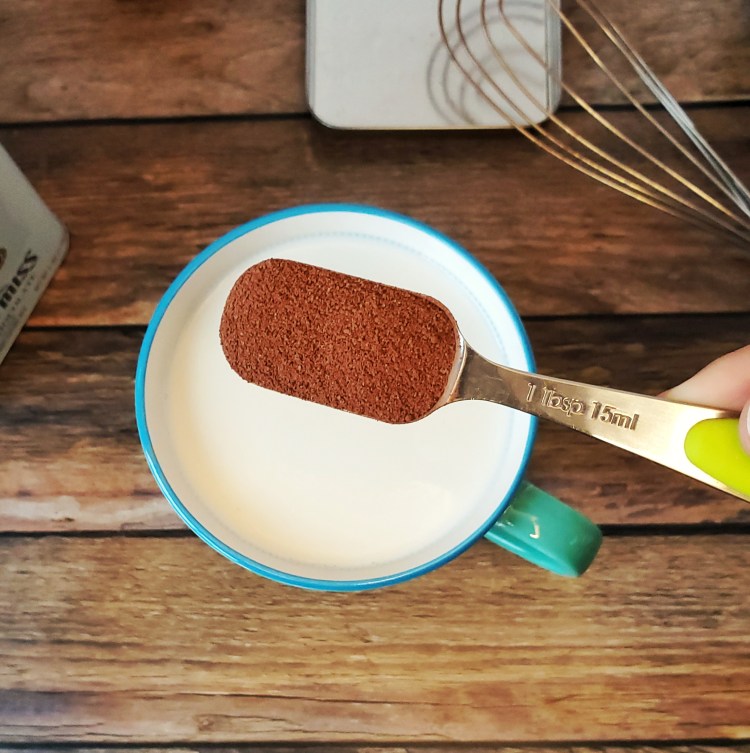
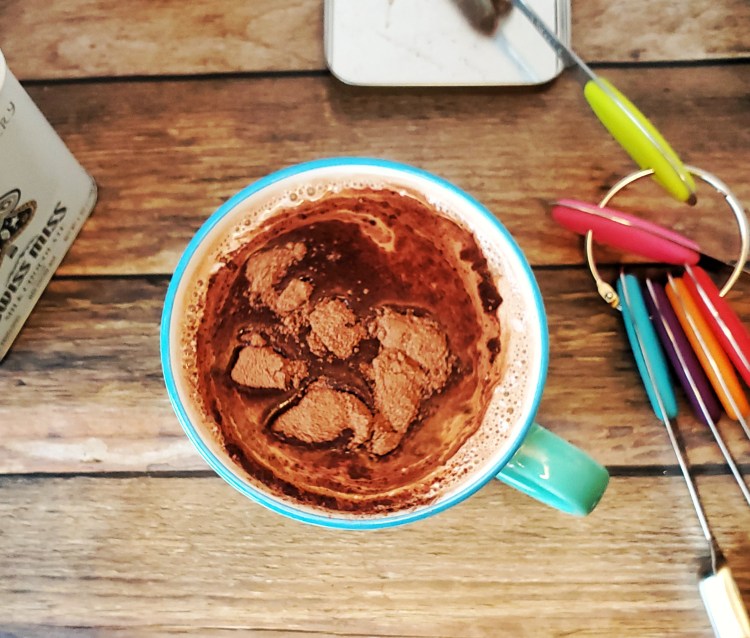
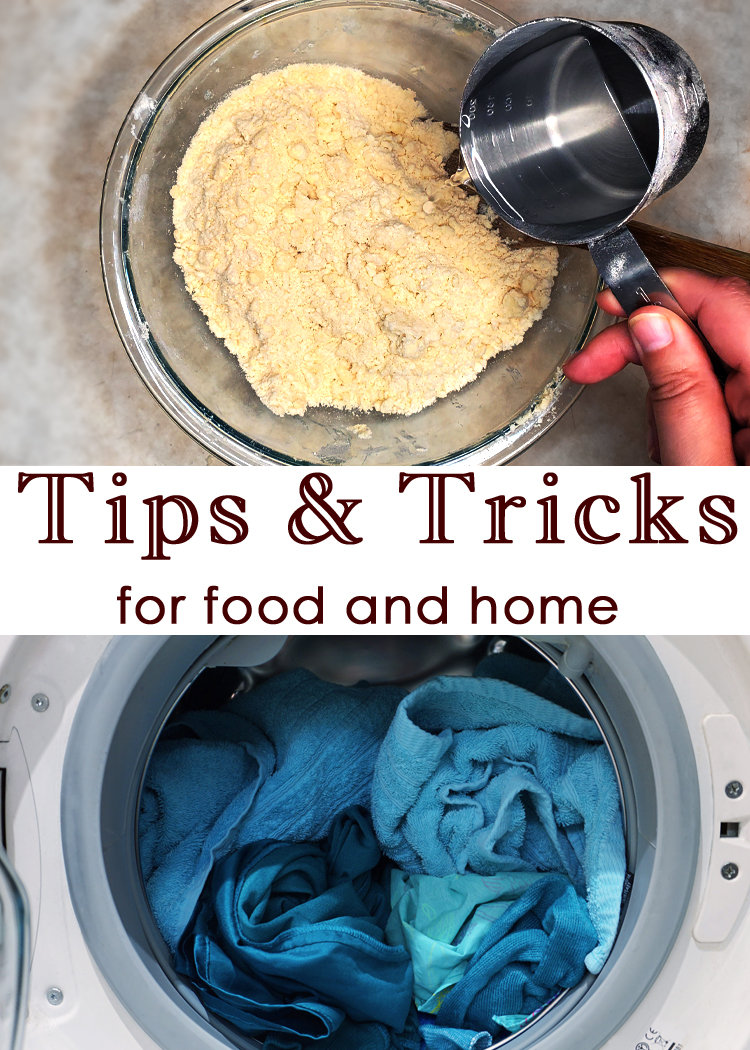
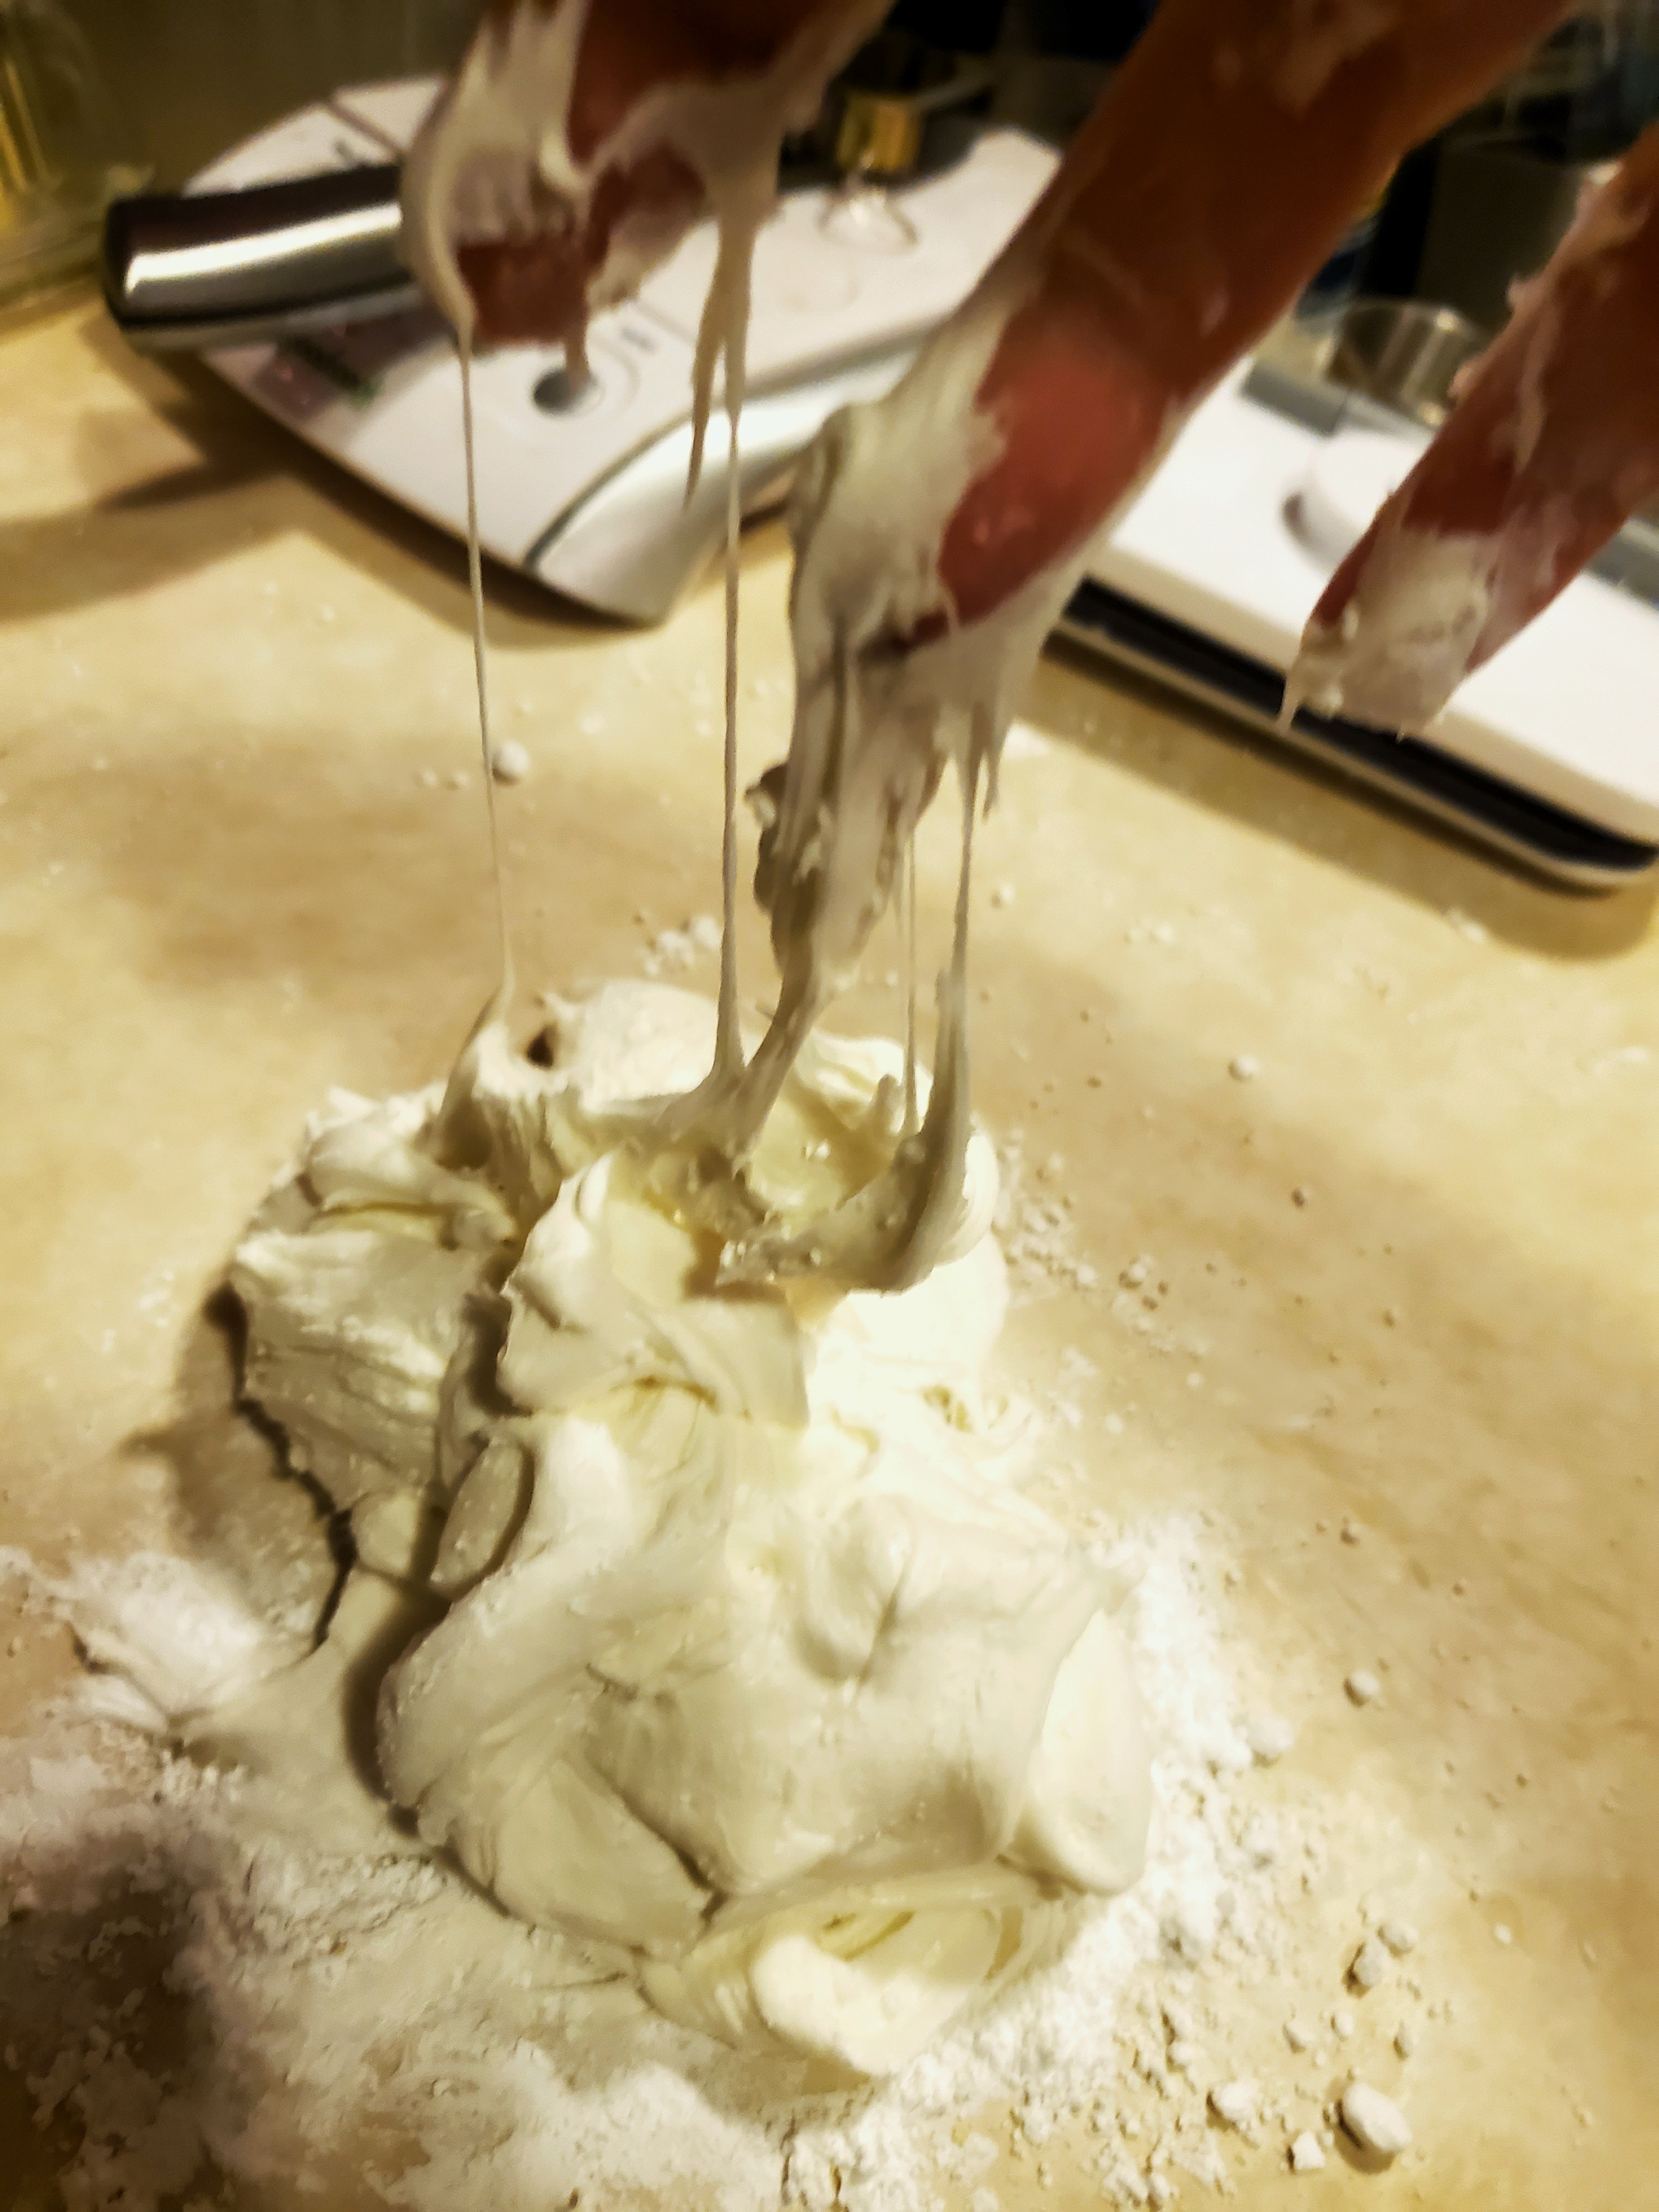
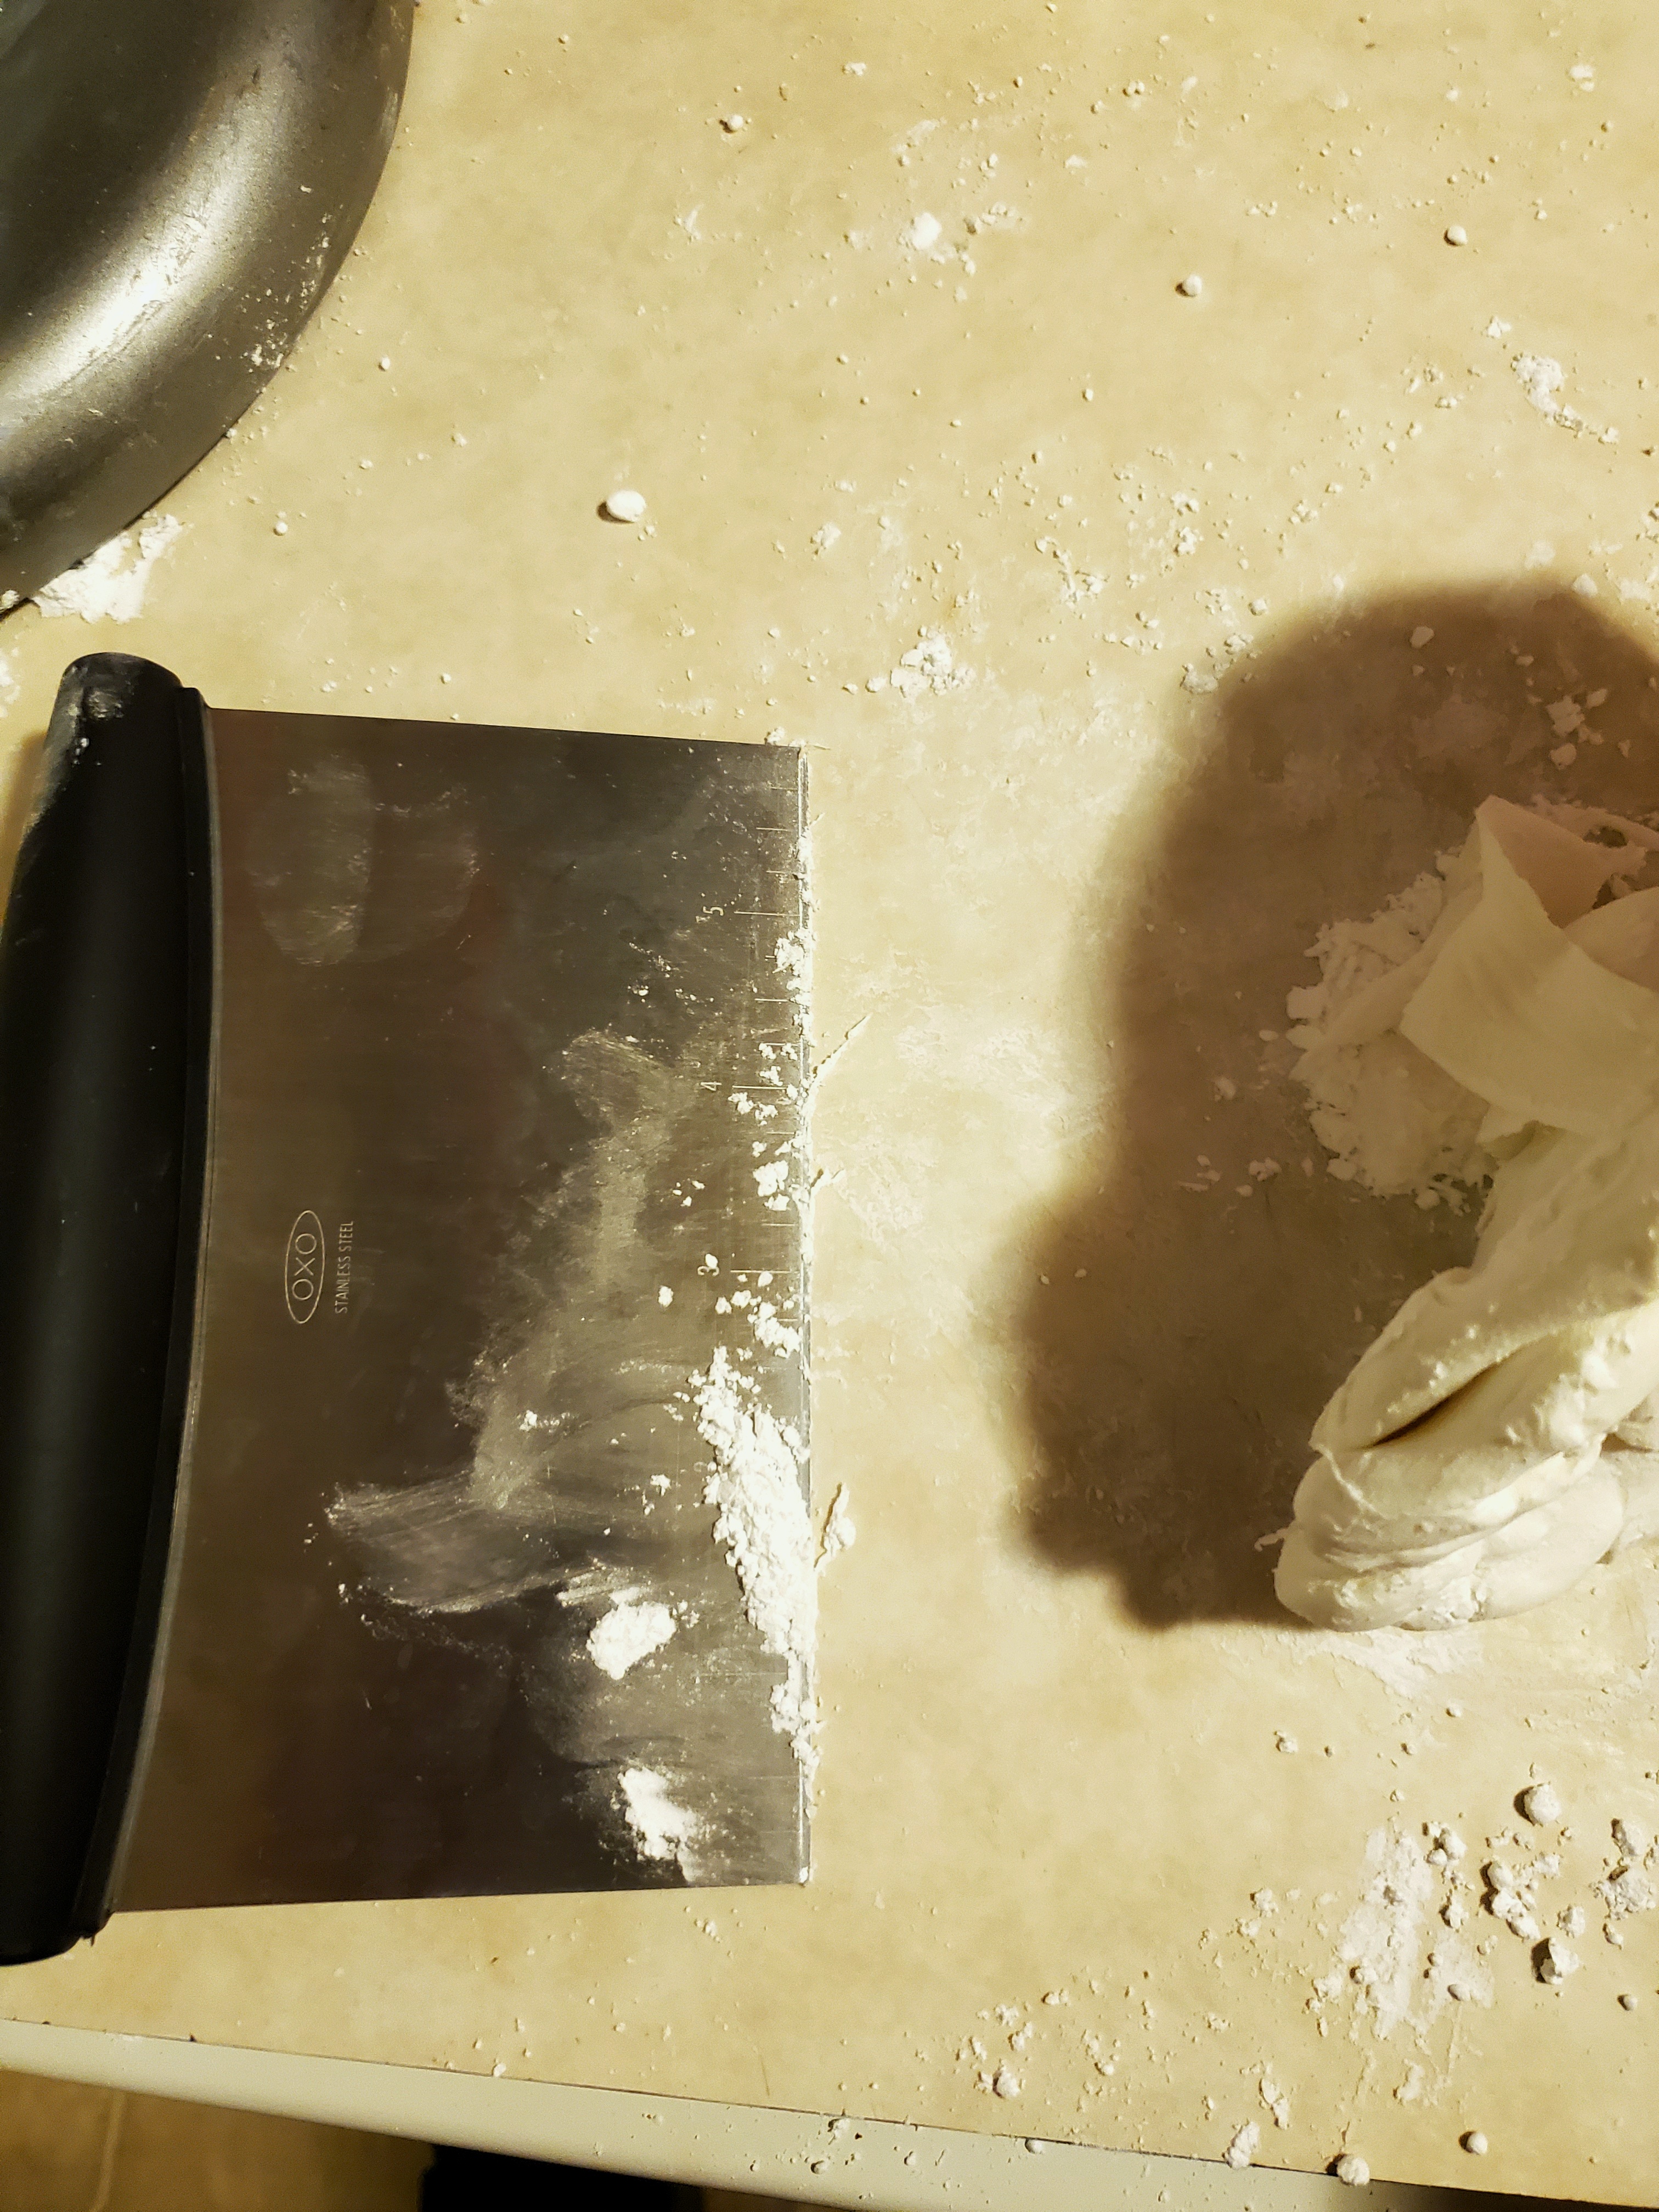
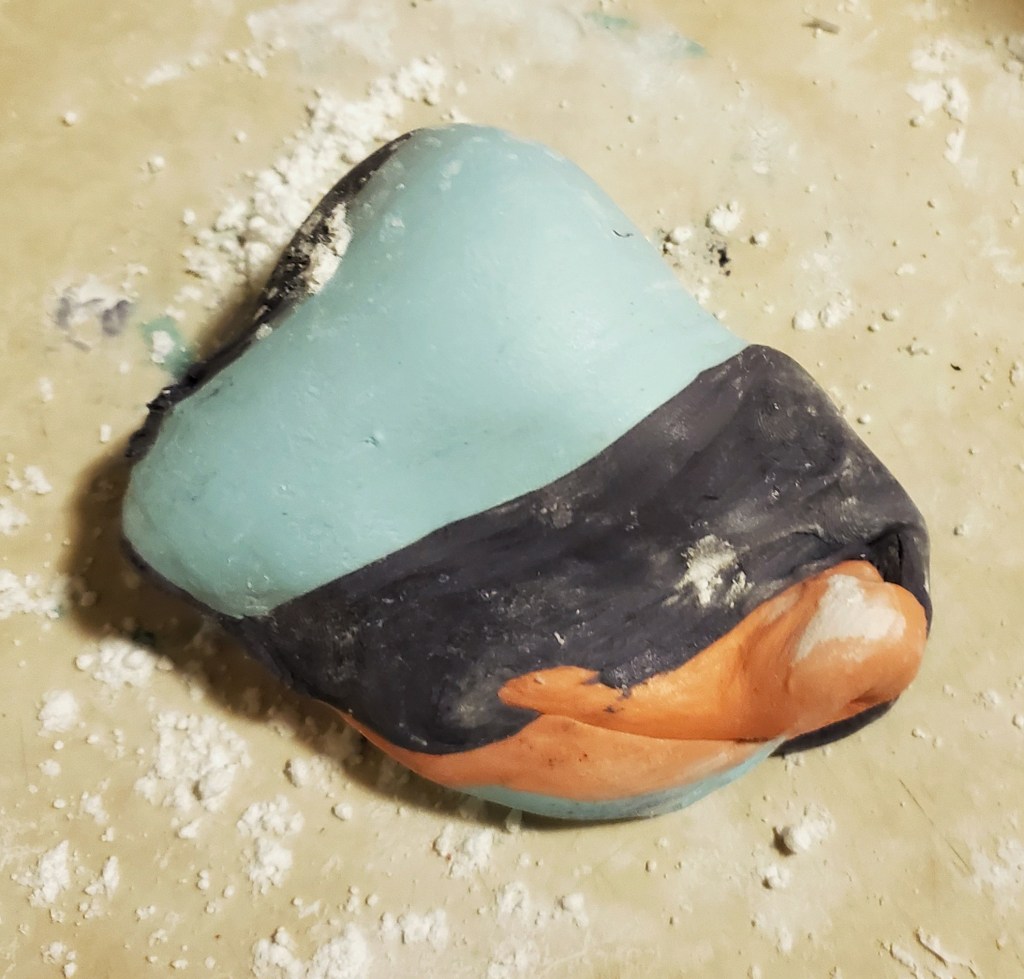
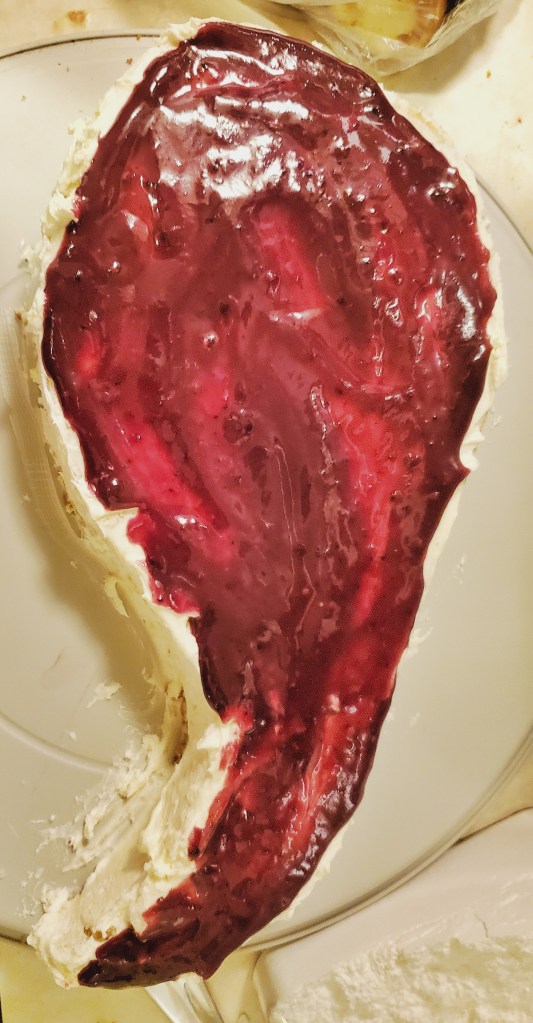
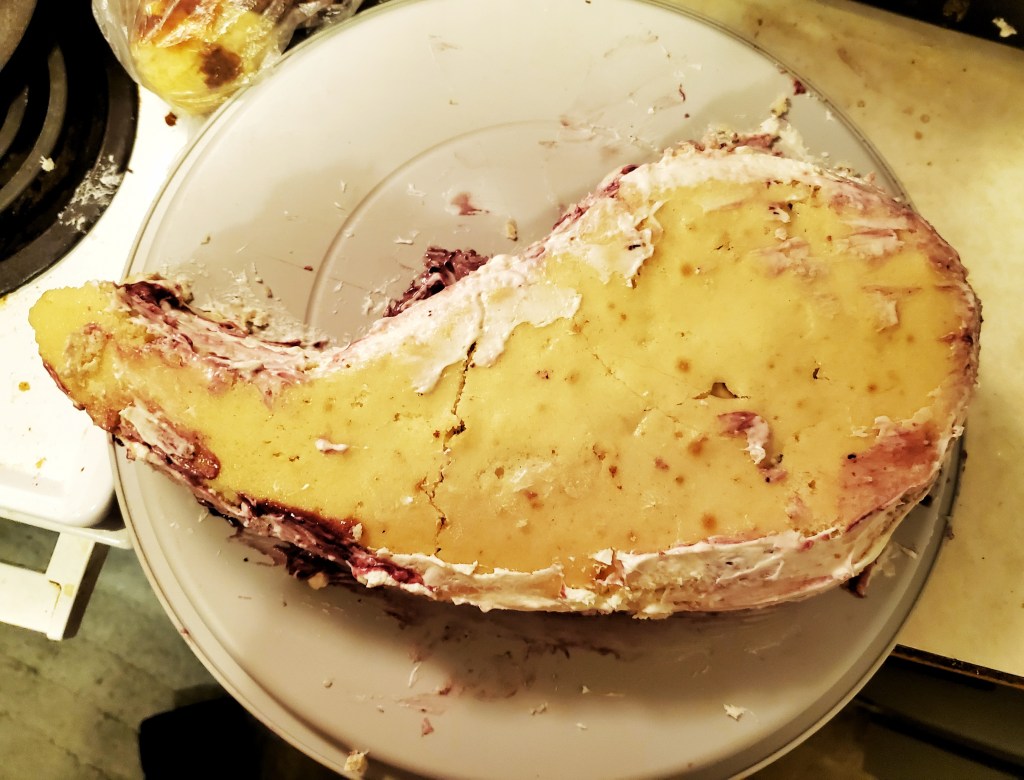
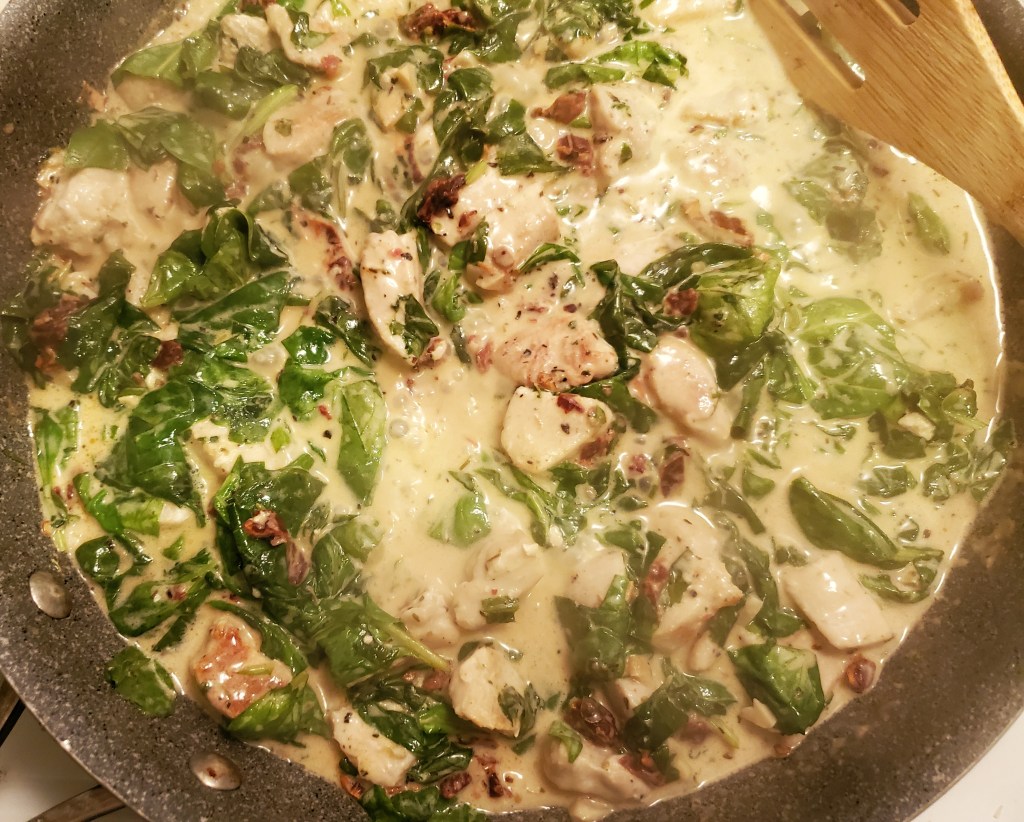
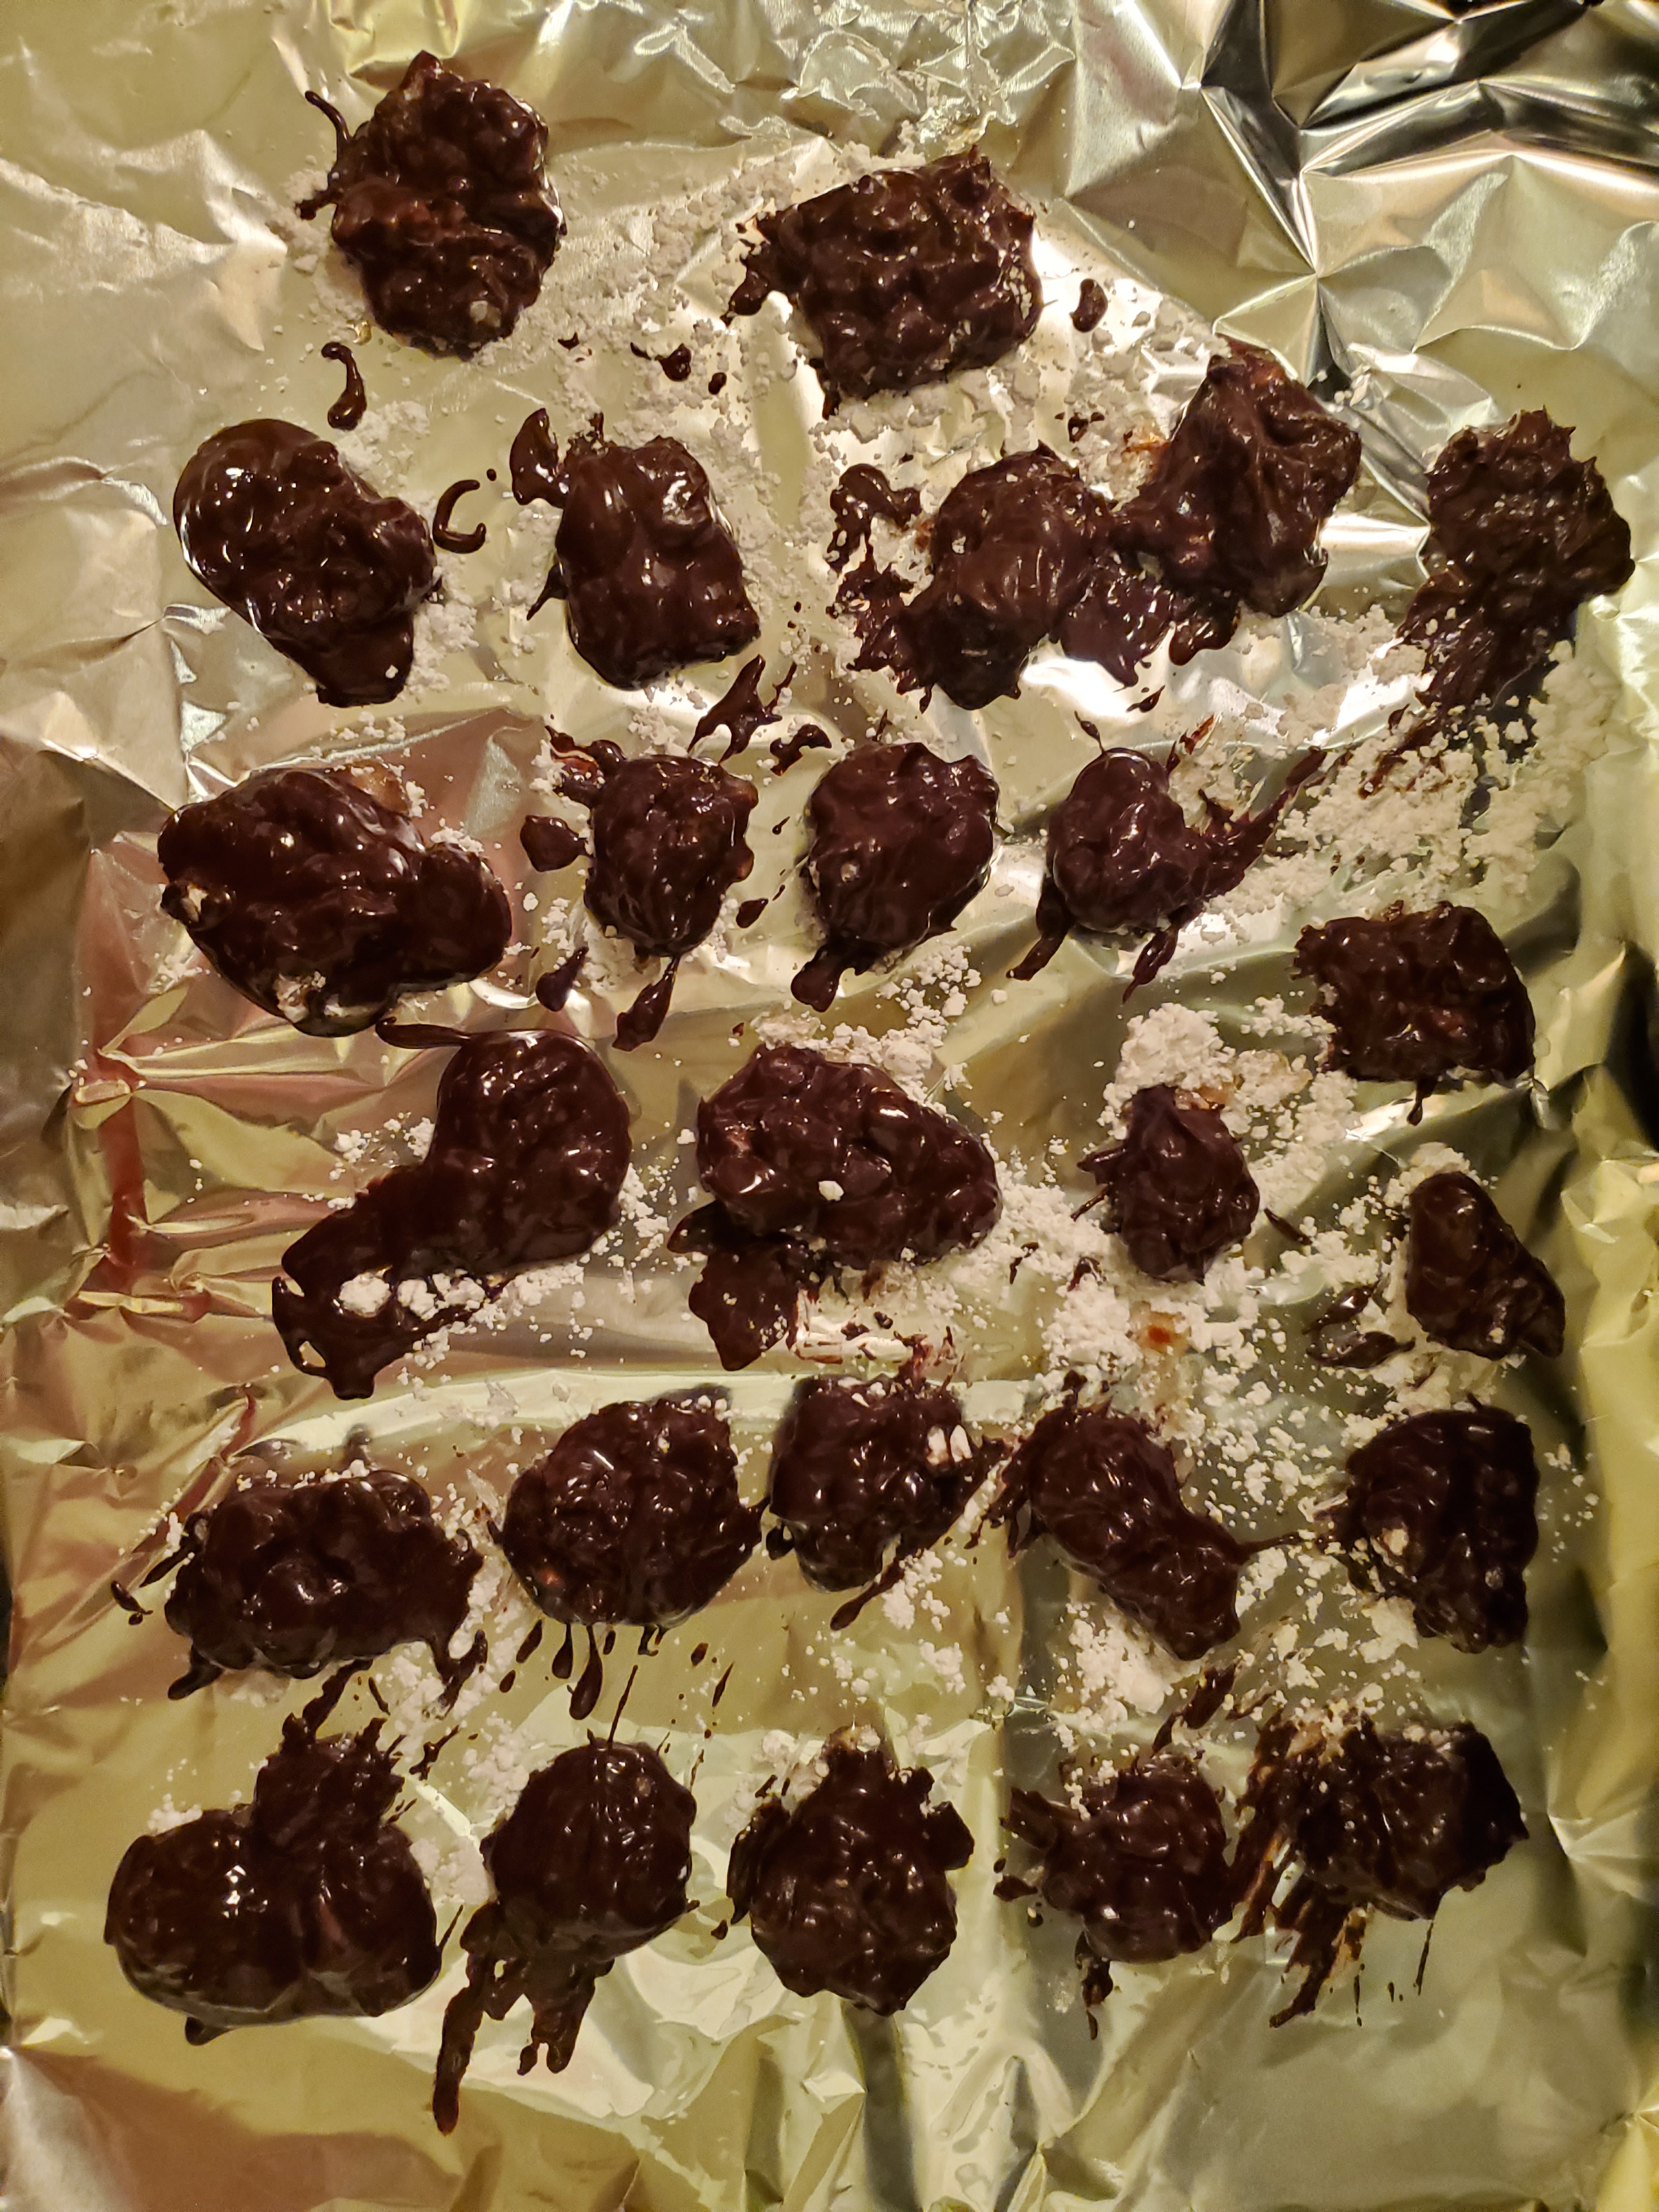
I’m also working on figuring out how to make nut clusters like the ones in a P3 (Protein Power Pack) snack that I really like. It’s the “turkey, cheddar, and nut clusters” one, and I wanted to recreate it (for cheaper). So I thought I’d try a nut cluster recipe I saw online.

Unfortunately, it didn’t turn out quite how I wanted it. I wanted to make crunchy clusters of nuts, with a drizzle of dark chocolate. What I got was something that was, even after putting it in the freezer overnight, a sticky mess. =/ They still taste good, though! But because I must have messed up the amount of corn syrup in the recipe, they never really hardened. So I rolled them in a powdered sugar, to keep them from being too sticky, then dipped them in melted dark chocolate. Probably not as healthy as I was hoping, but they’ll make a crunchy sweet treat, anyhow. I think next time, I’ll just use sugar, and melt it, and hope it doesn’t crystalize while I’m making them. :D

chocolate covered nut clusters
Well, the chocolate helped, but they are still a bit sticky, and the melted chocolate didn’t help keep the clusters from falling apart – just made the syrup more liquid.. haha.

Additionally, I have some great books and some recommendations for reading I plan on putting aside time for – especially this month. I think it’s important to acknowledge that February is Black History Month, but additionally, that we can’t just regale the whole history of a people to a month. I try to do everything I can to learn more, any time of the year. And I encourage you to do the same. There’s too much out there – history, culture, food, fashion, art, scientific contributions…that are not spoken enough about, and certainly not celebrated enough. So I encourage you to pick a topic – any topic you’d like to learn more about – and see what you can find out about it – that isn’t about white people. I’m going to be over here, finishing (hopefully), How to be an Anti-Racist, by Ibram X. Kendi, and starting on White Fragility, by Robin DiAngelo. I also plan on watching whatever I can out of the Black Representation collections that streaming sites like Netflix, Amazon Prime and Hulu have. Because there’s no reason not to continue my education, even though I’m not in school! :)

Also, I need to mention that if you buy anything when you click on the above book links, I get paid as a member of the Amazon Associates Program.

Anyhow, I hope you all are having a good start to 2021, and have some hope or good things coming your way, since the world around us is still struggling. I hope to write at least one blog a month (maybe more, we’ll see), and do more on social media, now that my job is taking up more free time. I hope you all have a good love-day (or month!), and I’ll see you next time!

Keep it crafty!
– Raven

No. 13…No Resolutions, Just Intentions

Hey blogosphere friends! Hope you all had a wonderful Diwali/Christmas/Yule/Hanukkah/Kwanzaa or whichever holiday you celebrate, if you celebrate any at all. I find this time of year very magical, but also know that it’s not for many people, and this year in particular, I’d like to extend a hand if anyone is going through a rough time. I mean, I’m always here to lend a hand or an ear, but it’s easy to actually see the magic and happiness around you and be sad, too. I’ve been there. I understand. So feel free to leave me a comment if you need anything! Sometimes, just someone to talk to is very helpful.

In fact, while I have some great news to share, I also have been feeling a little strange the past few days. At night, when I’m trying to fall asleep, images of my friends and science center co-workers flash in my head, and I feel a sudden loss and loneliness. I’m fairly well connected to everyone on Facebook or Instagram, but it’s not the same as seeing them every day, and, if we’re honest, on social media, you’re only interacting with what they share with the world. What any of us post is the only thing people who aren’t part of our day to day see. It’s not a bad thing, necessarily, but not everyone is super-prolific. Heck, I’m not! I got through phases, where I’m sharing things I find, or posting my thoughts, but I go dormant for many days at a time, too. And, because of Facebook’s algorithms, we’re also only likely to see a fraction of our friends’ posts, and, we’re more likely to see friends’ posts that we interact with more often.

All of this is to say, that even though I’m an introvert, I still love spending face to face time with my friends. And nearly all of my former colleagues were definitely like a family. It’s hard to say goodbye to that. It’s hard to think that I might not ever go back there, except as a guest. Some of my most impactful and meaningful friendships have come from working there, with the most amazing, magical, intelligent people. I can say in all seriousness that I would not be the person I am today without their influence. Things also feel un-finished. Like, a project that was started, but never really seen through to the end. I mean, let’s get real. There’s always one more project. In life, at work…

Which leads me to my good news. I got a new job, which I start on Monday! I’m quite excited, as it’s for a small company that one of my former colleague’s partner is founder of, and it’s quite a step up from what I was doing, though totally still in my wheelhouse. Especially since it involves a lot of moving parts and hat wearing, if you know what I mean. I’ll be an Office/Customer Service Manager. So, more staff-related responsibilities, but still very much in the vein of the work I did at the science center (which was daily and staffing operations based).

So what does this mean for the blog? Well, the last time I started this project of mine, when I became full time, I wound up dropping this fairly quickly. Then I picked it back up as both a way to drive my creative outlet, and potentially work from home, since I was unemployed. I didn’t expect it to take off right away, so this new job might be a bit of a good test, so to speak, to see if I can balance both this and work. I think I can.

I feel a renewed sense of purpose. Not just because I have a new job, but because I have a lot of autonomy in my life at the moment. A lot of unknowns, too, but both in the new job and my creative life, I have something driving things as well as some control over them.

I still have a lot of things I want to share, and new things I’m learning. I’m still figuring out exactly what I want out of blogging, what exactly I see the purpose as being, or if it’s actually contributing something to the world, or just more of the same. I don’t want to be like every other lifestyle/food/craft blog out there. At the same time, if you don’t have a solid focus, it’s harder to concentrate on what people like about what you have to offer. From a business perspective, at any rate. I mean, if I just wanted to blog to share the ins and outs of my life, I could probably just write a journal. And I’m not funny/interesting enough to form a readership based on my life alone. lol. But, I also think it’s important to keep it real and not be afraid to show the struggles of life, too. So we’ll see how this blogging thing all pans out. Any feedback you give me, is, of course, invaluable. I was hoping to get a few posts ahead so I’m not, sort of, scrambling to finish a post each week, so that’s definitely going to to be something to work on. I don’t want to be so many months ahead of things, but with a full-time job, I might have to figure out a good balance of the types of posts to share – crafts, food, life stuff, etc. And, maybe how often. It might be easier for me to focus on social media, and only post a new blog a few times a month. We’ll see!

One thing I wanted to share before I sign off for the week is the progress I’ve been making on cleaning up my craft room! I wish I had taken before pictures, but in all honesty, this room has been in a state of flux since I started using it. lol. Do you ever have a project like that? Something that, no matter how much you do, it still feels unfinished? I find this a lot with cleaning. As you clean, you basically have to make a bigger mess in order to remove or organize it. I find both my bedroom and my craft room to be the types of spaces that have this “issue”. Some parts stay the same, but how clean or organized they are tends to always be changing. There’s always a pile of papers and books and clothing items on the floor in my room, for example. Usually clothes that need mending or donating. Bills, papers to save, magazines, books, journals…yep. It’s all there. I’m looking at it right now. Why do you taunt me, pile-o-stuff? WHY?

But back to the craft room. I started using this room as a craft room not terribly long after our last third roommate moved out. It opened up some loft space for my other roommate to go to town with her fish tanks. However, the layout of the room, and how I wanted it arranged, has changed a few times. I’m also using my older computer desk that I’ve had since I worked at Microsoft, and could afford such things, as well as our old kitchen table (sans the chairs), because we don’t really have a dining space anymore. That table has been my craft table since we moved in here, around 9 or 10 years ago. It’s now lived in all three usable corners of the craft room. lol.

Tiny, tiny path from the door to my main work area. lol.

I originally had my computer table, which is in an “L” shape, in two pieces, thinking I could use them better that way. And it worked, for a year or so. But then I wanted to buy a small rowing machine, and needed to think better how to arrange the room so I could make space for it. So then I put my desk back together, and had the table in a different corner, using it essentially as a glorified TV stand, and my desk as both a desk and a craft space. Then I moved it all again, and shortly after doing that, realized my desk would be in the way of the air conditioner if I ever needed to put it in the window (it gets very hot in our apartment in the summer, on the top floor). So I had to swap which corner everything is in. And that’s where we are now. And where we’re going to stay, because I’ve tried every other configuration. lol.

Additionally, I wanted to free up even more open floor space, so I could start using my old Wii again. I’m not 100% satisfied with my work space nearly parallel to the TV (I like to watch shows while I work sometimes), and I’d like to better arrange my craft supplies, but I am really satisfied with the natural sunlight I get, and actually enjoy using my desk as a craft space as well.

As you can see from the pictures, I’ve had a tiny little path to my desk. It used to be worse! I’ve actually taken out some recycling and garbage in the past week. I also, well before the holidays, spent some time organizing my colored cardstock. And before I took these pictures, I did some organizing of the three upper shelves, and swapped out my old DVD stand that was holding my stamp sets to one that holds more (though not quite all of them, as you can see in the picture where I have three baskets full of wooden stamps). *facepalm* I really need to pare down some things, or use them all more regularly. This, my friends, is how crafters die. Buried beneath their multitudes of craft supplies they just had to have, because OMGSOCUTE! or OMGSOPRETTY! or OMGIDON’THAVEANYTHINGLIKEITIMUSTHAVEITORDIE!

Little do we know…

Anyhow, I’ll do some posts in the future with more specifics on how I organized some things, as I’m quite proud of what I’ve accomplished, even though, as you can see, there’s still a lot of mess. The mess has got to get bigger before it can get smaller, after all.

Oh, and I suppose I should talk a bit about New Year’s or something. It’s strange – as much as I love the fireworks displays and hanging out with friends, I don’t really care about this holiday so much. Like, it doesn’t really have an impact in the grander scheme of my life, if that makes sense. It’s kind of like President’s Day or something. Doesn’t hold any particularly special meaning for most people. I also have a love-hate relationship with fireworks, because one of my dogs, Dobby, isn’t a fan, and there are a number of veterans in our neighborhood, and I know it must be god-awful for them.

I do like to take a moment to think a bit about what I’ve accomplished, and what I hope to accomplish, but I don’t really love using a week after Christmas in the middle of winter as a guide for when something should start or end. Life isn’t that exacting. However, I do think any time is a good time to set intentions.

Intentions are powerful. Better than resolutions. The word, resolution, has a sense of weight in a way that feels bad if you don’t live up to it. Intentions, however, are more about the driving force behind the action that creates a resolution.

For example, a resolution may be, “I want to lose weight.” Great! But why? And how? If you don’t have a why behind an action, are you really going to be motivated to do it? One of the big acronyms out there for goal setting is S.M.A.R.T. It’s used mostly for employee management in performance reviews, but I think it can be used (maybe with some modification) for any type of goal. I’m going to lay out those steps for you, using the “losing weight” resolution, since it’s a popular one, and one I can directly relate to.

S: Specific. If your goal is too big with too many steps and moving parts, it will seem overwhelming, and you’ll have harder time seeing progress. You might have a goal to lose 100 pounds in a year. But what’s the first step? You can always break down steps into smaller and smaller ones. What actions can you take towards your goal? Take 1000 more steps each day? Measure your food portions? Eat fruit with each meal? Pick a few that are easy and small (again, if it’s too big, your motivation is likely to wane). I also like to call this one Small.
M: Measurable. How are you going to measure success in your goal? Is it the scale? The fit of your favorite pants? What are the other ways you can see progress? How are you going to keep track of that progress? Giving yourself gold stars on your calendar for accomplishing a small step might help. Or maybe put a dollar in a jar for every pound you lose. Then you can use that money to treat yourself!
A: Attainable. Is it realistic? Do you have the tools/skills you need to be successful? If not, what can you amend about your goal in order to attain the tools or build the skills you’ll need in order to do the main goal you have. Your motivation and how you approach tasks plays a big role here. I also like to think of this one as Actionable. Are there actions you can take in order to be successful, and is your goal something you can actually act upon and gain progress? Sometimes, things are out of our control, so we need to be aware of what is actionable in our lives in order to improve or change our circumstances.
R: Relevant. Don’t make a goal that doesn’t align with your values or will put yourself at risk. If you want to lose weight by running, don’t expect to be running on your first day. You need to build up to certain types of movement. Again, start small. And make sure it’s relevant to your life and your main WHY for wanting to do the thing.
T: Timely. Set a time for your goal to start and end. But don’t put too much pressure on yourself! Again, starting small is going to make it much easier to reach your goal. Losing 5 pounds in a month is easier (and lets be real, healthier) than 5 pounds each week. Setting a time-based goal can be motivating, but when it comes to something like health, you have to be realistic with your timing, and be kind to yourself if you don’t hit your mark. Read up on healthy weight loss methods, and how long, realistically, things will take. You can’t pick up a paint brush and be Monet or Degas on the first day. Changes in our habits (which is what most resolutions are inspired by) take time, and motivation is a huge factor.

Other things I think are helpful regarding this subject are, 1) sharing your intention or goal with someone, 2) finding a group of folks to support you and hold you accountable (in a nice way), 3) asking someone to do the thing with you. Additionally, writing your goal down and reminding yourself of it in whatever way works for you will help center you when maybe you’ve gotten distracted by all the other things going on in life. You could set a reminder on your phone, or put something on your calendar each week, or write sticky notes and post them around your home. Making a vision board might help, too. Find empowering phrases and print them out in big letters and pin them up on your walls.

My main intention for this year is to find balance. Balance between work, sleep, blogging, crafting, physical activity, my spirituality, and making healthy choices. I have frequently struggled with one or all of these things in the past. That’s my overarching idea for the year. Now, I need to set some small goals to help me achieve that. I think I’m going to be putting a lot of reminders into my phone. lol.

Whatever your intention for the new year is,

You GOT this!

I hope you all are doing well, and staying safe. Until next week!

Keep it crafty!
– Raven

No. 12…Dairy-Free Chocolate Velvet

CHOCOLATE.

You’re hearing me, right? That delicious, luscious, delectable, made-from-a-fruit-pod treat that’s been the source of inspiration for the most amazing dishes (and sculptures), both savory and sweet. I’m partial to the bittersweetness of dark chocolate, but all chocolate is good chocolate.

Oh, yeah.

This post, is all about a specific form of that food, the velvety hot cocoa. Now, you might not know this, but the history of hot cocoa goes back several hundred, if not thousands of years. It looked a hell of a lot different then, but making a brew of cacao, peppers, vanilla and corn was considered a delicacy to the peoples living in Mesoamerica. It was quite bitter and served cold, but sometimes honey was added. The seeds from the fruit pod were traded like gold in Mexico, Central America, and South America, and it’s thought that the sweet, white pulp around the seeds is what initially had those peoples cultivating the cacao tree.

There are a great many books on the subject of the world’s favorite sweet treat, and I’ve gotten most of my info from this one in particular: Chocolate: The Nature of Indulgence by Ruth Lopez. (I’m an Amazon Affiliate, btw, so I get a small percentage from any qualifying purchases originating from my site.)

But I’m just here to talk about the liquid version of chocolate, in the sweet American way. Additionally, I have TWO versions of this recipe – the kind to make many cups at once, or a mix where you can make a cup at a time, and keeps for weeks. This hot chocolate is sweet, but can be made less or more so, more or less chocolatey, AND it’s dairy free! Unlike most other versions of hot chocolate mix I’ve found online, which require powdered milk, this doesn’t have any dairy-derived powder, so it can be made with any non-dairy milk you like, though for the creaminess factor, I recommend cashew milk. If you don’t need to be dairy free, use a mixture of low-fat milk and whipping cream, or, use half & half. Really, any combination of milk you like that makes for your favorite level of creaminess. Of course, the higher the fat level, the more velvety it will be.

I’ve made this hot chocolate for many years, but only recently made a version where I could just heat up some milk in a cup, add some hot cocoa mix, and be out of the kitchen in 5 minutes. I’ve been drinking a LOT of hot cocoa this week to make sure my mix is just right, and makes the same cup every time. I think it works really well! And I hope you think so, too.

Velvety Hot Cocoa

Level: Easy
Serves: 4 8oz. cups
Cooking Time: 7-10 minutes

Ingredients:
– 1/3 cup unsweetened cocoa powder (I used a Dutched cocoa blend)
– 3/4 cup granulated sugar
– pinch of salt
– 1/3 cup boiling water
– 3/4 tsp vanilla extract
– 3 1/2 cups milk (or half & half)*
– 1 cup half & half*

Tools:
– medium saucepan
– whisk
– measuring cups
– measuring spoons
– cups for serving
– small ladle or deep spoon for serving


Method:
  1. Boil a little bit of water in an electric kettle or in a small pan.
  2. In a medium saucepan, add cocoa powder, sugar, salt, and hot water. Stir with a whisk to combine.
  3. Turn on burner to medium-low, and gradually add milk and cream (or choice of dairy-free option) and stir in between each addition.
  4. Heat the cocoa gently until desired temperature, stirring continuously, being careful not to scald the milk.
  5. Once heated, divide evenly between cups. Top with whipped cream, marshmallows, or a sprinkle of cinnamon and serve!


Notes:
  • You can use any milk or milk-substitute in this recipe. I recommend cashew milk, because it has a similar creaminess to dairy milk. I use a combination of 1% milk and half & half, but have used all half & half, or all 1% milk, and while it’s creaminess factor is changed a little, it doesn’t affect the taste.
  • I don’t know about you but the mugs in my house are definitely bigger than 8 oz. LOL. So feel free to scale the recipe to make enough for the size of your mugs, and the number of people you’re feeding.
  • Don’t be afraid to spice things up and add your own spin! Peppermint syrup, chopped chocolate or chocolate chips, ground cinnamon or nutmeg, coconut syrup…the customizations are endless! With syrups, I’d recommend adding them at the very end or in each cup – as heating them over a burner for long periods could affect the taste. However, chopped chocolate or ground spices can be added early on to the whole batch. Same goes for extracts, if you’re using those instead. They can replace the vanilla extract in this recipe.
  • Feel free to play around with the sugar in this recipe to your liking. I sometimes find it too rich, so I’ll add more milk.

Now, the dry mix is a little different. The ratios are about the same, but there’s one ingredient which is different: the vanilla.

The dry mix uses vanilla powder, which I was able to find at my local Fred Meyer. If you’re unable to find it, I would leave it out, and add in 1/8 to 1/4 tsp vanilla extract per cup.

a bottle of Cook's Vanilla Powder.

For this mix, make sure you have a good container to keep it in! My aunt sent me this container of Swiss Miss packets a few years ago, and I’m reusing it to hold my hot cocoa mix, since it already says that’s what’s inside!

tin container that has a decorative tree with "Swiss Miss" on the side.
It actually holds more of my mix than was in the 6 packets it came with!
Velvety Hot Cocoa Dry Mix

Level: Easy
Serves: 4 8oz. cups
Time: 5 minutes

Ingredients:
– 1/3 cup unsweetened cocoa powder (I used a Dutched cocoa blend)
– 3/4 cup granulated sugar
– pinch of salt
– 1/2 tsp vanilla powder

Tools:
– container with lid
– whisk
– measuring cups
– measuring spoons


Method:
To make mix:
  1. Measure out dry ingredients into container, mix with a whisk or fork until well blended.
  2. Seal container until ready to use. This mix should last for quite awhile as long as it’s kept away from moisture. It might need stirring if it’s been sitting for too long, as the cocoa granules are smaller than the sugar ones, and might settle closer to the bottom.
To make a cup of cocoa:
  1. Fill mug with desired milk, and microwave on high for 2-3 minutes (watch to make sure it doesn’t boil over). You can also heat the milk in a saucepan over medium-low until desired temperature.
  2. Starting with 2 tbsp of mix, add to your cup and use a fork or small whisk to blend between scoops. Add less or more based on your desired chocolatey flavor, or the size of your mug. My 16oz. mug needs about 3.5 tbsp.
  3. Top with whipped cream, marshmallows, or your favorite topping and enjoy!


Notes:
  • I recommend heating the milk first, since adding powder to cold liquid doesn’t work very well.
  • You can use any milk or milk-substitute in this recipe. I recommend cashew milk, because it has a similar creaminess to dairy milk.
  • I don’t know about you but the mugs in my house are definitely bigger than 8 oz. LOL. So feel free to play around with how many tablespoons you add to your milk. I’ve also found that if the powder has little clumps in it after stirring, heating hte milk for one more minute will help dissolve it.
  • Feel free to play around with the sugar in this recipe to your liking. I sometimes find it too rich, so I’ll add more milk.

This mix will make a great gift! Put it in a decorative mason jar or container, add some pretty ribbon, and some directions!

I hope you get a chance to make some of this yummy hot cocoa this winter! I’ll be taking another break this upcoming week because of Yule and Christmas, but I’ll probably be posting on Instagram and Facebook, so please follow me there for non-blog updates!

Stay cozy, safe, and happy! And keep it crafty!
– Raven

No. 11…Cookies for Days

It’s that time of year! Cookie time! I’ve been baking up a storm this past week – mostly cookies, but also a gooey brownie peanut butter bar that is as delicious as it is messy.

I’ve also finally gotten all of my Yule decorations up! Which is always a bit of challenge for me when I’m working, but that was less of an issue this year – the only thing hampering me was my motivation, and anything else I was trying to get done. Maybe I’ve been giving myself too much to do. LOL.

I’ve been working on cards for the Craft Fair, and handling greeting card orders (yay!), and I just sent out all of my holiday packages to friends and family. I always try to send something homemade, like cookies, jam, bath salts, lotion, etc. The shipping is honestly about all I can afford most years. This year, I sent cookies and some blackberry jalapeno jam I made with the blackberries I picked this fall. I only sent the packages out yesterday, and one already made it to it’s destination!

The person who received this package is my oldest friend – we’ve known each other since we were 5! She loved the gift – and mentioned that the small gifts I sent for her kids are a grateful gesture – both her and her husband have been laid off due to COVID, and the tree might be a little light underneath this year. She’s also dealing with all the feelings I think we’re all dealing with this year. I wish I could go visit her, but of course, I can’t. But thankfully, we can talk on the phone, or chat online, and help each other get through everything together. It’s been a horrible, terrible, no good year, and I’m glad to spread a little extra love when and where I can. The world could use more of it!

I might have mentioned this already, but I tend to spread my love through food. And I’m here to share some of that with you! I made several different types of cookies this year: sugar, snowball, ginger molasses, chocolate brownie peppermint, snickerdoodle, and the one I’m going to share with you today: my Raspberry Holiday Cookies!

These are my roommate’s and her mom’s favorite – akin to thumbprint cookies, but a little more fiddly. :) With a buttery short-bread like base, and a generous dollop of yummy jam, these are a great addition to any cookie tin, and will go quickly, so I suggest making a double batch!

Raspberry Holiday Cookies

Level: Easy/Medium
Serves: ~32
Prep Time: 75 minutes (60 minutes of that is chilling time)
Cooking Time: 7-10 minutes per batch
Total Time: ~2 hours (plus more for cooling)

Ingredients:
– 1 cup (226g) unsalted butter, softened
– 1 cup (226g) white sugar
– 1 egg
– 3 cups (325g) all-purpose flour
– 1/2 tsp salt
– 8oz raspberry jam (or your choice of preserves)

Tools:
– various sized mixing bowls
– wooden spoon
– measuring cups
– measuring spoons
– cookie cutters, one slightly smaller than the other (2″ diameter max)
– wire cooling rack
– small spoon (about 1 tsp holding size)
– baking sheets
– parchment paper
– plastic cling wrap and/or silicone baking mat
– rolling pin


Method:
  1. In a large bowl, cream together butter and sugar until light and fluffy. Add egg and beat thoroughly.
  2. In another bowl, sift flour and salt together. Add, one cup at a time, to butter sugar mixture, mixing all the way in before adding more. The mixture will be stiff as it comes together, but pliable.
  3. Roll dough out to 1/4″ thickness onto a silicone baking mat or between two sheets of plastic wrap. Place on empty baking sheet, and place in fridge to chill for up to one hour. You may have to divide dough into two, and can stack the rolled out dough out between plastic wrap to keep them from sticking to each other while chilling.
  4. Once sufficiently chilled, preheat oven to 375℉, and line baking sheets with parchment paper.
  5. Using cookie cutters, use the larger of the two to cut bases for the cookies, and place on the prepared cookie sheets.
  6. Using a teaspoon or a small spoon, place dollops of jam in the center of the bases. Use the back of the spoon to gently push the jam out, leaving a 1/4″ border.
  7. To make the tops of the cookies, use cookie cutters to cut the same size as the base, and then cut the center out of them to create a “wreath” like top. Using a spatula, transfer tops to the prepared cookie bases, nudging them into place gently with your fingertips.
  8. Bake cookies for 7-10 minutes, until the edge of the bottoms of just starting to brown, and jam starts to bubble. Let cool on sheet for a few minutes, before transferring to wire rack to cool completely.
  9. Continue to roll, chill, and cut out cookies until all the dough is used up.
  10. Store finished cookies in an airtight container for up to a week (but they probably won’t last that long).


Notes:
  • I highly recommend rolling the dough out before chilling it. I learned this trick when reading a blog about sugar cookies – and it makes total sense! Roll out the dough when it’s more pliable, then it’s ready to cut, and easier to move the cutouts without distorting the shape! Depending on how warm your kitchen is, you’ll likely have to roll out and chill the dough between each batch.
  • You don’t want to skimp on the jam! It’s going to bubble up and help fill in the window made in the cookie top. Plus, you want a good cookie-to-jam ratio.
  • I found a metal spatula was easier to slide under the cutouts to lift them up as the dough started to warm.
  • Depending on the shape of your cookie cutters, the tops might be a little fiddly to place properly on the bases – chilling the dough will help a LOT with this, so don’t skip this step! When the dough is soft, it doesn’t like to keep it’s shape, and will be much harder to pick up and move into place.
  • I haven’t tried them this way, but I bet you could make thumbprint cookies with this recipe, which will give you the same yumminess with less work. :)
  • Set the jam out to warm slightly before using. If it’s warmer, it’ll be easier to scoop and spread.
  • if the size of your cookie cutters is different, you’ll get a different amount of cookies. For me, using two inch cookie cutters for the base, this recipe yields about 32-40 cookies. I sometimes don’t roll out the dough as thin as I should for the first batch, so I sometimes get a little less than 40.

Hope you’re able to try these treats! I made an extra batch the other day, because we’d already went through quite a few, partially because I sent some out. I think I’m going to go eat another one right now, though, now that I’ve been talking about them. LOL.

Keep it crafty!
– Raven

No. 10…A Time for Reflection

I hope you all had a great Thanksgiving, if you celebrated. I usually spend this holiday with my aunt and uncle, on a peninsula across Elliot Bay that I have to take a ferry to get to. It’s one of my favorite things to do each year, starting the day before – grab a Chestnut Praline Latte from Starbucks on my way to the docks in downtown Seattle, position myself in a good spot to get my choice of seats with the walk-on crowd, and settle down on a cushy bench seat to watch the view of the water and land as we slowly make our way into Bremerton.

It’s a great view, depending on the weather, and the low hum of the ferry’s engines is a pleasurable constant, even below whatever music I’m in the mood for. It’s usually rainy and windy this time of year, so I don’t spend any time on the decks, but there’s always a cold rush of air from people going in and out. It’s an hour-long ride, so there’s always a book, a pre-downloaded Netflix episode, a half-finished ferry puzzle on the table… There’s no cell-phone connection in the middle of the water, so you have to be prepared to keep yourself amused during the ride. There’s always a few children running around, some families piled around a table, a number of singles with airplane tags on their rolling suitcases, and passengers with shopping bags from downtown Seattle’s line of high-priced stores, or smaller market vendors. It’s clear everyone is on their way home.

Once we’re moored, the walk-on passengers crowd around the doors to depart. The cold air is rough, and I usually wish I had better gloves. As we all walk quickly off the boat, we get sprinkled on by rain before being covered again by the slip ramp. Then it’s outside again to find our rides. I walk all the way to the end of the sidewalk. Usually, my aunt or uncle is waiting in their truck, or waiting in the Starbucks on the corner for me. I’m always carrying a bag of clothes, and some crafting supplies, as well as my purse. I like to be prepared, which makes it hard to pack light. lol. There’s always a few errands to run, then it’s home to relax for the night with a pizza.

The rest of my stay involves helping in the kitchen, eating too much, napping, and conversing with my cousins and their kids. My aunt and I always watch “Home for the Holidays”, spend some time crafting, and head out late on Friday to do some shopping at the craft stores. We also always bring a plate of food to my grandma, who’s now in an assisted living home.

Opening credits to the 1996 classic, “Home for the Holidays”, which I watched this year at home.

I’m sad, this year, that due to COVID-19, I couldn’t go over there. I’m sad that none of us can go see Grandma. I know it was the best thing to do, both for them and me and my roommate, but with cases rising, I couldn’t even see people in my own bubble. Which would have been the first Thanksgiving I’d have with my bubble people in several years, since my uncle retired from the Navy, and I started going back over there, seeing as the rest of my family is in Alaska.

But I’m thankful for many things this year. Thankful that I was able to work through most of the year. Grateful for the opportunity that unemployment has given me to focus on my crafting and baking and sharing of these things. Grateful for the stability and privilege to be able to do so. Thankful that my friends and family are largely healthy, and I haven’t lost anyone to this horrible virus rampaging across the world. Grateful for my puppies

Despite missing all of this, I had a very pleasant Thanksgiving, just my roommate and our dogs and I. It was very chill, but not the same as other days my roommate and I are home at the same time, I think mostly because I was cooking for an occasion, and my roommate became investing in helping me fix my long-messed up laptop.

See, roughly a year ago, there was a power outage. My roommate wanted to hang a flashlight from the chandelier that hovers above our couch/coffee table. She had one foot on the coffee table, which was wobbly, and one on the edge of the couch. Unfortunately, her foot slid off the couch, and as she fell, her weight flipped the coffee table…on which my open laptop was sitting. >_< I made sure she was okay first, and then checked my laptop. It wasn’t physically broken, as far as I could tell. The screen was fine, the case was fine…but it wouldn’t boot Windows.

I tinkered around with it off and on for a while – but it was the busy season, and there wasn’t much time to work on it. I tried EVERY repair/recovery option available to me. And, nothing. So I set it aside for another time, and wound up using my super-old and slow Dell laptop, and my roommate let me borrow her newer Chromebook.

Recently, she started using her Chromebook to write, since her gaming laptop overheats easily (I have the same problem with my old Dell), and so I decided it was time to re-connect with this old thing and see if I could get it to work.

So re-tried a few of the options, just to make sure it really wasn’t working, and was stuck again. I tried some different commands in the command line prompt, but it wouldn’t really execute anything. I remembered I had an official copy of Windows 7, and thought maybe I could install Windows 7 from the disc, and then upgrade to 10. But I couldn’t get the computer to read the disc. I changed the boot order via BIOS, and was able to get it to load the disc, but it wouldn’t install with out a operating system, which the computer seemed to not have. At one point, I tried the custom install option, and tried to format the drives – but it still wouldn’t install. At a certain point, I started getting busy making all the sides for Thanksgiving dinner, so my roommate took over trying to troubleshoot. We realized we’d been asking the wrong question. It wasn’t, “How do I fix ‘Operating System Not Found’?” but it was “How do I install an operating system when the system won’t let me?” Turns out, the solution was to delete ALL of the partitions, build new ones, and install on one of those. So now my computer works again!

IT LIVES!!!

TL;DR is that my computer was not loading Windows, and my roommate poked around while I was making Thanksgiving dinner, and helped me fix it, because I was at a loss of what to do next!

Anyhow, dinner was delicious, and I have some really terrible photos to share with you (because I wasn’t planning on show you all what I ate, but here’s something).

I made roasted turkey breasts, carrots roasted in honey butter, dinner rolls from scratch, green bean casserole, stuffing, and turkey gravy and mashed potatoes. I used the butter left over from the carrots to baste the rolls I made. I also baked a Marie Callendar’s Razzleberry pie. I had already made those pumpkin pies a few weeks ago, which we still had a few slices left, and I honestly wanted to not go too crazy and make everything myself. lol. So I bought a ready-made frozen pie that I knew would be delicious and I wouldn’t have to spend too much time on.

I’ll also admit to not making the gravy or the potatoes. I knew I wasn’t going to get enough drippings to make the gravy from scratch (though, on hindsight, I might have had enough), and so I went with the packet stuff. I also realized, right as everything else was finished, that I forgot to boil the potatoes, so I resorted to quickly boiling water and milk for some potatoes out of a box. They’re probably less nutritious than fresh potatoes, but they do the trick in a pinch, and, they’re super-easy to make when I either can’t figure out what to eat, or don’t have a lot of time.

So, other than those little blips, I’m really happy with out dinner turned out. The puppies sure didn’t mind – they were under my heels all day, wondering where all the wonderful smells were coming from.

But now it’s on to cookie-baking season! I have a few recipes I’ll be sharing later this month, but right now, I’m working on making around 5 or 6 different types to send out to loved ones. I tend to make things to send to people in lieu of buying gifts – especially my older family members – they aren’t in need of more things most of the time. So I usually send some homemade treats and maybe a small gift. This year, it’s cookies and jam! Though my mom’s cat is getting a new toy I hope he’ll like.

Maybe it’s a combination of this tumultuous year and the season, but I find myself being particularly contemplative and introspective about how life and things are going. That’s probably why the beginning of this post has been more story-telling than instructive. But I’m a story-teller at heart, and miss writing, so perhaps that’s where this post came from. I’m also anticipating a hopefully delightful Yule. Even if my bubble people might not be able to come over.

What are you guys looking forward to most during this time of year?

Keep it crafty!
Raven

No. 9…Perfect Pumpkin 3.14

I couldn’t help myself on the title. If you don’t get it…uh… Well, I don’t want to spoil it. You’ll figure it out really quick. :)

American Thanksgiving is right around the corner, and there’s at least two main dishes that almost everyone associates with this holiday. Turkey and Pumpkin Pie. Everyone has their own take on the rest of the sides, or how much whipped cream goes on a slice of pie (the answer is: a lot), but most people don’t make their pies from scratch. And that’s okay! Sometimes I don’t make things from scratch either. But if you’ve always wanted to make a scrumptious pie from scratch – pumpkin pie is a really easy and great one to start with!

It’s essentially a custard pie, but with fruit puree. The reason this recipe is so easy, is it can get even easier if you don’t make the crust, or used canned pumpkin puree. In the pictures, I’m using canned puree, but I’ve also made this with fresh pumpkin, and it’s worked great!

Basically, you measure all the filling ingredients out and dump them into a bowl, mixing until smooth. Then pour into your preferred pie shell, and bake! There are a few little things to keep in mind, though, which I’ll lay out below.

Picture of an bowl with pumpkin puree, spices, sugar, 3 eggs inside. A whisk is seen resting in the bowl.
The ingredients for a perfect pumpkin pie!
  1. I found it easier to get the texture I wanted by adding the evaporated milk after mixing everything else together. This was due to the canned puree coming out of the can slightly chunky. Depending on the brand you use, and how fresh it is, you might not have this problem.
  2. My 9″ deep dish pie plate is VERY DEEP. Even though it measures the same as any other deep dish pan out there, I always have issues with deep dish pie fillings not being quite enough. Like, even with this recipe, I had to make another batch of the filling to fill it properly, and used the remainder to make another smaller pie. However, it does fill it enough, so if you’re okay with a little extra crust at the top, or if your pie plate is not as deep, you should be fine. This should make two smaller pies if you have non-deep dish pie plates. I have yet to take the time to figure out how to make this filling in one bigger portion to fully fit my pie plate, since just using a bigger can of puree will change the texture and flavor profile a bit.
  3. The pastry recipe I have below makes enough for two one-crust pies, or one double-crust pie. I use it for basically all of my pie making, including savory fillings, like curries or shepherd’s pie.
  4. Be careful moving the filled pie shell into the oven. Before it’s cooked, the filing is really liquidy, and might spill over. If you want, you can pour the filling into the shell as it sits in the oven, but you risk letting the temperature of your oven drop too much.
  5. You want to pull this pie out of the oven when it still looks like the middle is not done. It will be pretty jiggly if you shake the plate gently. If you lightly touch the middle and there’s a skin formed, you should be good – in a stoneware pie plate, the pie will continue cooking, and will continue to fully set as it cools down. I haven’t made this pie in a different type of pie plate in a LONG time, so I don’t remember there being an issue with under cooking, since it’s also likely to take less time, being shallower in depth than the stoneware plate.
  6. If you want to ensure a crispy crust, you can blind bake (pre-bake) the crust before adding the filling. I find this crust, in this pie plate, with this filling does okay without blind baking, with maybe an inch in the middle being slightly underdone. Since you pull this out of the oven when the middle is still a little jiggly, it’s hard to ensure that it’s perfectly cooked underneath the wet middle. I’ll admit to not doing blind baking before on this recipe, but I think I’ll try it next time!

Some pictures below of the process.

I also used this cool pecan crust I found at the store, and I thought it added a pretty interesting pecan-y crunch and flavor to the final product. They also have a walnut crust. I think I’ll try them again with something like a quiche or another sweet pie! It also was the perfect size to put the remaining filling that didn’t fit in the deep dish plate.

picture of a commercially made pie crust by Diamond brand, specifically a pecan pie crust, ready to use, with nutritional information on the label.

Also, I’m excited to debut the use of my new photography helpers! I got a 3-setting light that has “cool”, “natural” and “warm light” that’s also on a tripod AND has three different clips I can use with my phone. I also bought some backdrops from Ink&Elm that you’ll probably see a lot more of in the future. I’m really excited to use these tools and hopefully make videos now that I can do most things hands-free!

Perfect Pumpkin Pie

Level: Easy
Serves: 8-10
Prep Time: 75 minutes (60 minutes of that is chilling time)
Cooking Time: 50-60 minutes
Total Time: 2.25 hours (plus more for cooling)

Ingredients:
Crust
– 2 1/2 cups all-purpose flour
– 1 tsp salt
– 1 tsp sugar
– 1 cup cold butter, cut into cubes
– 1/4-1/2 cup cold water

Filling
– 1 cup brown sugar, packed
– 1 tbsp cornstarch
– 1 tsp ground ginger*
– 1 tsp ground cinnamon*
– 1/8 tsp ground cloves*
– 1 1/2 cups (15oz.) pumpkin puree, fresh or canned*
– 3 large eggs, lightly beaten, plus – 1 egg for glaze – 1 12oz. can of evaporated milk

Tools:
– various sized mixing bowls
– electric mixer (hand, and/or standing)
– measuring cups
– measuring spoons
– knife
– wire cooling rack
– spatula or spoon
– 9″ pie plate (I use a deep dish, but this filling recipe can be used for a normal one)


Method:
For Crust
  1. Combine flour, salt, and sugar in a large bowl. Add butter, and either with your hands, a fork, or a pastry cutter, work the butter into the mixture until it is crumbly and some pieces resemble tiny pebbles, and others, flakes.
  2. A little at a time, add water and work the mixture into a ball. Add more water as needed to wet all ingredients, but not so much that the dough is sticky. Only knead enough to have all of the mixture come together.
  3. Divide dough in half, and flatten each piece into a disc no more than 1 inch thick. Wrap discs in plastic wrap, and chill in the refrigerator at least one hour.
  4. Once you’re ready with the filling, roll out one disc until it’s about 1/4 inch thick. You may have to let the dough sit for a minute before rolling if it’s been chilling for longer. Gently, lift the crust and rest it over your rolling pin. Move crust into pie plate, adjusting it so it sits nicely in the angle of the bottom. Trim the excess with a knife or kitchen shears, and save for decoration, or use to patch holes.
  5. Using your fingers, pinch the edge of crust into decorative edge, or use a fork. You can also add other flair, like leaves, braided crust or other shapes to the edge.

For Filling
  1. Set prepared pie plate on a baking tray lined with parchment paper. Preheat oven to 425℉.
  2. In a large bowl, combine sugar, cornstarch, salt, ginger, cinnamon, cloves, pumpkin puree, and 3 eggs. Beat well.
  3. Add evaporated milk and blend. Set aside.
  4. Using a pastry brush, brush beaten egg onto edge of crust, and on any other decorative elements.
  5. Gently pour filling into pie shell, wiping away any drips or spills with a paper towel.
  6. Very carefully, move baking sheet with pie from the counter to the oven. Bake at 425℉ for 10 minutes, then reduce heat to 350℉ and continue baking for 50 minutes, or until middle jiggles when shook, but rest of filling stays still. Place on wire rack to cool completely.
  7. Place pie in fridge once fully cooled and keep chilled until ready to serve. Refrigerate any leftovers.


Notes:
  • If you don’t have one or all of these spices, you can use 1 tablespoon of Pumpkin Pie Spice instead. I like to spice things individually, when possible, because I can control how much of something goes into my food.
  • I kept the crust in the fridge for days before rolling it out. You may have to let it warm up slightly before you roll out, but not too much! We want the butter to stay as hard as possible so it gets that perfect, flakey crust when it bakes. This crust recipe can be kept in the freezer for up to one month.
  • When I made my leaf decorations, I didn’t place them on the filling while it baked – this is because the filling is quite liquidy before it cooks! So I baked those separately, and pulled them out when they were done, and added them to the pie afterward. If your pieces aren’t too big, you can probably add them to your crust without them sinking into the filling while it bakes.
  • To make your own fresh puree, take a sugar pumpkin (these are smaller, and labeled as sugar pie pumpkins typically), and peel it. Cut it into quarters and scrape off any inside seeds and stringy bits with a spoon. You can steam, boil, or bake the pumpkin until very soft, then place into a blender or food processor. I will say, though, steaming or boiling does add water to it, so you will want to squeeze out any added moisture through a mesh strainer or cheesecloth before using. I find boiling or steaming is quicker than roasting the pumpkin, and makes the pumpkin softer, which makes it puree better. Freeze any extra puree for another use, or add a spoonful to your pup’s food!

I hope you enjoy this recipe! Please let me know how it turns out! Have a great Thanksgiving, if you celebrate such things, and stay safe this holiday season! I’ll be skipping posting next week due to the holiday.

Keep it Crafty,
Raven

No. 8…The Craft Fair

Okay, so you all know I’m a crafter. I haven’t posted all that much about my crafting ventures yet – because I haven’t felt like I’ve had much to share! I do have some older projects I can talk about at some point…I just need to find the pictures. >_<

However, I have been working on some cards for a friend – she sells houses back home in Alaska, and ordered some “welcome home” cards back in the spring. She just recently asked for more cards, only five months later! That means she sold 10 houses in that time! SO impressed. Anyway, she also asked for some Christmas cards, so I’ve been working on those. Here’s a taste:

I really like how they turned out. I’m currently working on some more “Merry First Christmas in your New Home” cards for her. No pics, yet, but I’ll probably post some on Insta when I’m closer to done. :)

Speaking of cards…it’s getting REALLY close to one of the biggest card-giving times of the year! I some holiday cards going up on my Etsy store by Sunday, and will add more as I make them, including larger sets of matching cards. I currently have FREE SHIPPING for all orders over $35.00! I also take commissions, if you’re not seeing what you want, or want a different color, etc. Just contact me through Etsy, and we can chat about what you need!

But what I really wanted to talk about is, THE CRAFT FAIR. Now, my employer, (or, used to be employer, darn you, COVID-19) held a craft fair and holiday party in early December each year. It’s what really got me motivated to make cards and sell them. However, since my previous employer is effectively closed and most of it’s staff is laid off, I thought I might see if enough of my crafty friends would be interested in going VIRTUAL this year. So….I’m hosting a Virtual Holiday Craft Fair this year!

I’m really excited! I really love planning things, and I love helping to boost my friend’s crafty endeavors, so I’m hoping it goes well! Especially this year, when online shopping will be probably be at it’s highest, AND, I hope small businesses will be better supported.

Anyway, our virtual craft fair is going from Sunday, November 15th, to Sunday, December 20th. There will be all kinds of cool things, from my greeting cards, to pet collars, stickers, jewelry, paintings, mixed media art, knit scarves, wood block prints, ornaments, a coloring book, car decals, custom vinyl art, and more! Several of the artists do custom work and commissions, so you’ll want to check it out and get in orders for those things sooner rather than later!

The craft fair is primarily being hosted in a Facebook Buy and Sell group, but many of the artists, myself included, have our own Etsy stores or websites, so those will be posted in the discussion section of the Facebook group. So some will be selling directly through there, and others through their already established stores. I really hope you all take a moment or two throughout the month to checkout what people have to offer – I believe artists will be posting throughout the month, and I’ll be doing artist spotlights here on my blog as well!

Anyway, I know this post doesn’t have much to it. Time has been going oddly fast lately…I never seem to have the time I want to get all the things done. lol. Anyone else having this problem? It’s been a weird year, y’all. I hope you all are staying happy and healthy. With the recent spikes in COVID-19 cases, a lot of areas are going into some version of a of lockdown, and I know locally, we’ve been encouraged to rethink our holiday family gatherings, and close in our circles. Thankfully, my circle has pretty much remained small this whole time, so I’m less worried about that, and more worried about getting stir crazy from never leaving my house when the weather is bad. I mean, I am leaving the house, but not as much as I did when the weather was nicer. lol. At least work forced me to leave my house for several hours at a time. And the dogs, help too. I’m also taking vitamin D to help during the winter, since it’s not particularly sunny lately.

Whatever you do to stay sane during this crazy time, I hope it includes a mask. It will definitely help hinder the spread of this virus, and hopefully, we can start to minimize cases, and a vaccine will be available sooner rather than later. But until then, do what you can to keep yourself and your loved ones safe!

And in the meantime, let everyone know about the Virtual Holiday Craft Fair!

Keep it Crafty,
Raven

No. 7…Shortcuts to Knowledge

So, this is likely to eventually be a big, random post full of tips and tricks I’ve found over the years. For now, it’s what I can currently remember, and physically type, because Dobby is blocking my ability do so. I’ll continue to add to it as I keep learning!

A small, brown dog, side angle, with a tan muzzle, sitting in front of a glowing laptop screen. A red damask blanket is in the background.
Dobby, wanting Mommy to go to bed already!

However, before I get into that, if any of you are unaware, the United States, where I live, has been a huge ball of tension this entire week. We had our General Election on Tuesday, November 3rd, which, every four years, includes voting for a new president. I’m not going to get political, because that’s not the purpose of this blog. However, I will say, even as I write this, we still don’t know who will be our Commander in Chief for the next four years. It’s been stressful. So this post likely isn’t going to be up to the care and attention most of my posts are.

Additionally, maybe because of the election, I finally got around to writing up a values page for my site. Separate but as important as my about page, this page defines the things I stand for, and the values that mold the decisions I make day to day, including how I conduct The Crafty Raven. A lot of those things might be considered “political”, but as I stated above, this platform’s purpose isn’t really about dissecting politics, but I absolutely will share things I learn and experience as it might relate to my human experiences and my values.

Now, onto the tips and tricks!

pin-able image: Top is image of a bowl of flour, with a hand coming in on the bottom right to pour some water into bowl, bottom is image of blue laundry in a washing machine. middle says Tips and Tricks for food and home

I’ve put these into categories, which may evolve over time. Please let me know if something doesn’t make sense or you have questions.

FOOD

  • Never keep your apples near your onions. Oniony-tasting apples is not ideal (unless you’re using them in an onion-apple tart or something)
  • Apples keep longer (MUCH longer) in the fridge. They do lose their taste over time, though, so don’t forget about them (like I sometimes do).
  • If using active dry yeast, make sure your liquid isn’t above 110 degrees. It’ll kill the yeast, and your bread. :(
  • Cashew milk is a GREAT substitute for regular milk in recipes. It has a thicker consistency than most other non-dairy milks, and still adds a creaminess to your food.
  • Buy meat in bulk, and divide it up into smaller portions. You can even pre-cook it, if you want. I usually only use 1/2 pound of beef in any recipe, so I use a food scale, and divvy it up into 8oz. portions before freezing it.
  • Let your meat come to room temperature before you put it on the heat. It will keep it from seizing due to the drastic change in temperature.
  • Taste your food as you cook. You can always add more seasoning.
  • If you only need a small bunch of something that is only sold in bigger bunches at the store, you can do two things: One – buy the bigger bunch, and cut up and freeze the extra for another time. This works for anything – herbs, carrots, celery, rhubarb, berries…. Two – you can sometimes take less – especially if it’s by weight. I do this a lot with celery, grapes, bananas and tomatoes on the vine. Pull off only as much as I need from a bunch.

KITCHEN

  • Unless you SUPER clean your dishes before using a dishwasher, stuff will build up over time. Take a moment to check around the seal of the door, and in the drain for all kinds of gross gunk that will make it harder for your dishwasher to do it’s job.
  • If you bake a lot, get a food scraper. You’ll love it. Trust me.
  • If you ever get fruit flies, first, check your kitchen for rotting food. Dispose of it. Then, hang up fly paper ribbon. I have mine right behind my sink, because the small lip of counter behind it and out into the living room isn’t really accessible, so it’s out of the way of it getting touched, and, flies tend to lay their eggs in drains, so it’s close to where they might congregate. If you want to further attract them to that area, set out a tall glass with just a small amount of apple cider vinegar nearby. I know they say that you can attract more flies with honey, but something smelly, like vinegar is likely to work better.
  • Get a good set of knives – they WILL be sharp, and you might get cuts when you first use them – but they really will make a difference in how well you can cut things.
  • DON’T put your knives in the dishwasher. One – the stainless steel will still get rust spots. Two – the pressure of the water will shift them around, making nicks and chips in the edges of your blades. Hand wash and dry them immediately after use.
  • Calibrate your oven every so often. Get an oven thermometer, like this one, and turn your oven on to 350℉. After 10 minutes, check to see what the oven thermometer says. Check again, in 20 minute intervals, to see if your oven maintains temperature. If there’s a difference in what the thermometer says versus what the temp is supposed to be, follow your oven manufacturer’s manual to calibrate your oven so it’s actually getting the right temp. Mine was about 50 degrees hotter than what it said it was.
  • Invest in a good set of wooden spoons. Nothing beats having a decent, sturdy spoon that won’t scratch your cookware. I have a set similar to this one.
  • For quicker, more even cooking, invest in a good stainless steel cookware set. Non-stick without Teflon is the way to go. Ditch Teflon, if you can. Firstly, you have to be careful about what utensils you use with them, because the Teflon will eventually get scratched. I have some copper-bottomed pans like this, and I LOVE this J.R. Henckles International pan I have – this is not the exact model I have, but similar (different handle).
  • Cast iron. Get some. At least one 10-inch skillet. Lodge is a great brand. Make sure to season them, and keep seasoning them after you clean. I love them, because you can heat on a coil stove on medium, which is nearly the equivalent of high for those types of pans. They retain heat for a long time, so food won’t immediately get cold, and you can put them in the oven! I do recommend getting some silicone handle covers, though. And, my enameled Dutch oven has changed my soup game! I love making soup and stew in this thing.
  • Using foil or parchment paper on your sheet pans or baking dishes means for really easy clean-up!

LAUNDRY

  • Make your own laundry detergent. No, seriously! It will save you SOOOOOOO much money, and doesn’t take a lot of time. I honestly don’t even know much I actually spend per load, but probably fractions of a penny. Get an empty, clean, gallon jug (thicker plastic works best, but whatever you have left over from juice or milk or your old laundry detergent will work), and put in the following: 1/2 cup Dawn dish soap, 1/2 cup washing soda, 1/2 cup borax. Fill half-way with hot water, put on the lid, and shake to get the ingredient all mixed up. Add more warm water until the jug is full. You might have to do this in stages, since the bubbles will kind of get in the way. I make 4 jugs at a time. It lasts my roommate and I AGES. I think I only use about 1/2 cup per load, and it works great!
  • Rubbing alcohol will dissolve most stains – especially ink! You might have heard that you can use 80’s style hairspray or hand sanitizer to break up ink stains on clothing – this is due to the isopropyl alcohol! So just use some straight rubbing alcohol, which is a good thing to have around for your first aid kit anyway, and blot those stains away! Works on food coloring, grape or cranberry juice…it literally breaks apart the ink particles! Science!
  • One Thing by Jillee is one of the blogs I most love to watch for things laundry-related. She also has to live with many food-related allergies in her household, so if you need ideas there, she’s also a great resource! She just has a great blog in general. Check her out!

This is by far not all the things I’ve learned or tried over the years…I’ll definitely be adding more! Hope you have been able to get something out of my trials and successes!

Keep it Crafty!
– Raven

No. 6…A Deceptively Fishy Sweet Treat


Some of you have been waiting for this post for a few weeks. Hope you haven’t forgotten about it! I sure haven’t.

I apologize for getting this out a little late…Wednesday was a bad mental health day, and I scarfed down several shortbread cookies, and slept a lot. Thursday, I was productive, but put finishing this off until the last minute, and then it wouldn’t save and I lost all my work at 3am…hence, why it’s only going up now.

ANYHOW, THIS is the cake I made for my roommate’s 35th birthday! I promised you all on Facebook and Instagram that I’d show you the final result, and….TA-DA!!!

He’s SO CUTE!

It’s a FISH! And not just any fish…I actually modeled it after a goldfish we have:

The idea for this cake came to me as I was trying to fall asleep one night. I know my roommate loves white cake (which is basically an almond cake by another name), and I saw these funfetti chips at the store, and knew I needed to incorporate them into the cake:

Does anyone else remember rainbow chip frosting? Like, why’d they get rid of that? Even though I’m not a huge fan of most frosting, that was one of my faves.

I wanted to use this (in my opinion, too-sweet) blackberry curd I made several weeks ago after a very successful blackberry picking adventure, and then realized the cake would be really sweet, so I decided on a cream cheese frosting, adding some lemon curd I had to make it even more tangy. Lemon and blackberries go well together, after all. I love my sweets, don’t get me wrong, but I started leaning towards not-sickly-sweet back in high school, and I know my roommate doesn’t mind very sweet things, so I wanted to balance out the sweetness of the cake with my need to make things tart and tangy. lol.

My roommate works at a local (but incredibly successful) fish and aquatic plant store, so I figured I would try my hand at a showstopper-worthy creation, and make it look like a fish!

It’s a pretty good likeness, isn’t it? Kind of a more kawaii version of a fish.

Please forgive my crappy photos…I wish I had a proper set up to take good food photos – something I’m working on – but my kitchen was also a DISASTER after assembling this, and I just wanted to get some photos before I lost the will, and it had to go into the fridge. I’m getting better at taking good base photos with my phone camera’s manual settings, and editing them hasn’t been too much of an issue, given my design background, but I don’t quite have the capital to invest too much in some backdrops, a tripod, and proper lighting at the moment. I’m going to try to use natural light when I can, but my kitchen doesn’t have a window, so I’m limited when I’m doing in-progress shots.

Something I thought turned out really well, were the fins. They’re kind of flowy, more like a betta fish than a goldfish, but I’m glad they turned out so well – I was worried they wouldn’t work how I’d intended. I didn’t intend to add a dorsal fin, and I’m okay with that!

I did have to manipulate the tail a bit – if I had to do it over, I probably would have rolled out the fondant a little thicker so it would stand up a bit more.

Some other tricky things, is that while the cake was baking, I made the marshmallow fondant, which turned out to not be the best idea. ~_~ It had stiffened up while it cooled, and I still needed to knead in the color in. I warmed it up in the microwave, but it got too warm, and therefore, sticky, and I had to add more powdered sugar. When it’s sticky, it’s pretty hard to work with, like a really wet dough. In the recipe below, I instruct to make the fondant, then divide it and add the color, but you could divide the marshmallows before heating, and add the color then. I didn’t opt to do that, because I was worried about once I added the powdered sugar, it would dilute the color, and I’d have to add more anyway.

Sticky, sticky marshmallows…

One tool I think has really helped my game in the kitchen, is this scrapper:

Seriously, the best tool. My counter isn’t perfectly smooth, so this really helps me clean up messes that are stuck to the counter (usually after kneading something). It helps you cut and flip dough. Many thanks to my friend Steven for the gift!

When you add the color to the fondant, you really want to just add a little bit at a time. You will also get some color on your surface and probably your hands. Just wash them thoroughly between colors, and you should be fine.

I also love how well the fondant matched the frosting!

That black was hard to get – black “dye” tends to have a red or blue base – so it always looks more purple before it looks black.

Now, the assembly. Honestly, I added too much of the blackberry curd, and it was a bit of a mess. The curd was looser than I’m used to. Not exactly sure why – perhaps too much liquid in the recipe. Either way, it made putting the cake together and doing the crumb coat a bit hard. I also think I’m just not good at doing crumb coats. They never really seem to help, though that might be because I don’t make a separate, stiffer frosting. I’m still learning.

Let me tell ya – if I was ever in the Bake Off tent, I would probably sweat all over my bakes. I felt like I was actually doing a showstopper challenge assembling this cake! Mostly while decorating – I had to switch between frosting colors, which was a trip, and got me sweatin’. But I’m SO happy with how it turned out! And my roommate loved it, too!

Fishy Birthday Cake

Level: Easy to bake, Moderate/Hard to decorate
Serves: 10-12
Cooking Time: 30 minutes (not including the curds, which add about 30 minutes each)
Decorating Prep: 30-45 minutes
Decoration: 45-60 minutes (depending on how speedy you are)
Total Time: 2.25 hours (3.25 hours)

Ingredients:
White Cake
– 1 cup butter softened
– 1 1/2 cups sugar
– 2 teaspoons almond extract
– 3 1/2 cups cake flour
– 4 teaspoons of baking powder
– 1/2 teaspoon salt
– 6 large egg whites room temperature
– 1 1/2 cups milk room temperature
– 6 oz. funfetti chips

Lemon Cream Cheese Frosting
– 1 cup unsalted butter, softened
– 24 oz. full-fat cream cheese, softened
– 1 cup powdered sugar
– 1 cup of lemon curd
– 1 tsp lemon extract (see notes)
– gel food coloring

Filling
This Blackberry Curd recipe

Marshmallow Fondant
– mini-marshmallows
– powdered sugar
– gel food coloring

Tools:
– various sized mixing bowls
– electric mixer (hand, and/or standing)
– measuring cups
– measuring spoons
– small spoon
– piping bags, or ziplock bags
– knife
– food scale (see notes)
– medium pot or double boiler
– glass bowl (see notes) – wire cooling rack
– spatula
– toothpicks


Method:

Please read all instructions and notes before starting, including the assembly.
For Cake
  1. Grease an 11″x14″ pan, and line the bottom with parchment paper. Preheat oven to 350℉.
  2. Using either a stand mixer or a hand mixer, whip butter and sugar together until pale and fluffy. Beat in almond extract.
  3. Stir flour, salt, and baking powder together in a separate bowl. Set aside.
  4. In a liquid measuring cup, use a fork to whisk eggs and milk together. Set aside.
  5. Alternating the dry mix and the egg-milk mix, gradually add to the butter-sugar mixture, making sure it’s fully incorporated before adding more. Use a spatula to scrape down the sides of the bowl.
  6. Pour batter into prepared pan. Bake for 25-30 minutes, or until toothpick or knife comes out clean when inserted in the middle.
  7. Let cake rest in the pan for 5 minutes before carefully transferring to cool completely on a wire rack.
Frosting
  1. In a large mixing bowl, beat cream cheese until light and fluffy.
  2. Add butter and continue to beat until well incorporated, using a spatula to scrape down the sides of the bowl.
  3. A little at a time, add powdered sugar, until fully incorporated.
  4. Add lemon curd and beat until fully mixed in.
  5. Either continue to add lemon curd until the desired flavor is reached, or use lemon extract, 1/2 a teaspoon at a time.
  6. Place finished frosting in a covered bowl in the fridge until ready to use.
For Fondant

I highly recommend waiting until you’re ready to put this on the cake before starting this step.
  1. Put half a bag of mini-marshmallows in a microwave safe bowl, and microwave on high in 30-second bursts, until partially melted.
  2. Add about 1/2 cup powdered sugar, using a large spoon to mix it in. Continue to add more powdered sugar until mixture is somewhat stiff.
  3. Lightly sprinkle powdered sugar on counter, and tip the marshmallow mixture onto the surface, using your hands to knead any extra powdered sugar into the fondant. Fondant should be smooth. It will stiffen as it cools, so work fast. If it gets too stiff for the next step, you can microwave it in short, 15-second bursts, but be careful about doing it too much, as it will become sticky an hard to manage again, and you’ll need to add more powdered sugar.
  4. Using a knife or scraper, cut fondant into the same amount of colors you have. Using a toothpick, add a small amount of coloring to the fondant and knead it in, adding more color until desired color is reached.
  5. Smush your colored fondants together, and knead and turn until you have a multi-colored fondant.
  6. Roll fondant to about a 1/4 inch thickness, and cut out your fin shapes. It will be a bit floppy, but will look flowy when it’s on the finished fish cake. If you don’t want it as flowy, roll it out much thicker.
Assembly
  1. Using a paper template, cut out two fish-shaped layers from your cooled sponge.
  2. Place the first layer of your sponge on your decorating surface/cake stand.
  3. Using the frosting, put a thin crumb coat layer on the first layer. Spoon a small amount of the blackberry curd on top of the first sponge layer. Don’t add too much, or it’ll splooge out of the sides when you add the next layer.
  4. Add your next layer and put a crumb coat on that layer as well.
  5. Divide the remaining frosting into as many bowls as colors you have. Add color with a toothpick until the desired color is reached. Put frosting into piping (or ziplock) bags and snip the ends open, or fit with large, round frosting tips.
  6. Arm yourself with a small spoon and some paper towels.
  7. Starting from the ‘tail’ end, make a row of dots of icing in your desired color pattern. Use the back of your spoon to drag the frosting toward the ‘head’ of the fish, wiping off the spoon between colors.
  8. Continue, one row at a time, adding frosting and using the spoon to create ‘scales’ as you move up to the ‘head’. Decorate the head as you desire, either with more scales, or with a solid color and eyes.
  9. If you find the frosting to be a little droopy as you work on it, put the cake and the frosting in the fridge until the fat in it firms up a little.
  10. To add the fins, gently push the fondant ‘in between’ the scales. It should be a bit floppy/flowy, but if it doesn’t want to stand up and stay in the cake, you can cut a notch in the cake to insert the fins.


Notes:
  • I…actually don’t know how long this will take for you to make – sorry! lol. I have the cooking times, but the decoration prep and assembly might take you shorter or longer, depending on a lot of factors. I recommend doing as much in advance as possible, like the frosting and the curds!
  • I put lemon extract in here, because I only had 1 cup of lemon curd available, but still wanted more lemon flavor. Overall, I don’t recommend using extracts too much, as they can leave a strange aftertaste. If you don’t have lemon curd, try lemon juice, though it might mess with the texture if you use too much.
  • I found this particular blackberry curd recipe to be a little sweet for my tastes, but that’s why I used it for this cake! I wanted to balance the tartness coming from the lemon cream cheese frosting. If I were to make it again, I would reduce the sugar dramatically.
  • I try to use a food scale while baking as much as possible. It’s more accurate than measuring, and I use it for all kinds of things, including making sure I’m not over-feeding my dogs. lol. The blackberry curd recipe also happens to use grams, so it was useful there as well. If you don’t have one, this one looks pretty great, and the company has a good mission as well!
  • Glass bowl (and medium pot): I added this in case you don’t have a double-boiler to make the curds. If you’ve never used this method, you place a pot about half-full of water on high, and place a bowl that is bigger than the opening of the pot on top. Once the water starts boiling, turn it down slightly, so it doesn’t bubble up and touch the bottom of the bowl. This is a great option if you don’t have a double-boiler, and don’t have much need for one.
  • I made a paper template with half of a general yin-yang design. This was to take advantage of the size of the pan I had. I had to adjust it slightly to make sure each side was identical, so I basically wound up trimming the edges of sponge off, and kind of eyeballing the shape. I did have to trim it a bit once it was layered, though.

If you make a cake based off of this, please let me know! I’d love to see how it turns out!

No. 5…Chicken & Pasta in a Creamy Sun-dried Tomato Sauce


This post is pretty straight forward. I have a recipe that I really like, that I’m gonna share. Not a lot of story. It started with a recipe I found on Pinterest, and sort of grew from there. :)

Here’s a picture to pique your interest, followed by recipe and some step-by-step photos!

The finished product, ready for my belly!

Chicken & Pasta in Creamy Sun-dried Tomato Sauce

Level: Easy
Serves: 4
Prep Time: 10 minutes
Cook Time: 30 minutes
Total Time: 40 minutes

Ingredients:
– 2 pounds chicken breasts, cubed
– 3 cloves garlic, minced
– pinch of red pepper flakes
– olive oil
– a splash of white wine or white cooking sherry
– 1 cup chicken broth
– 1/4 tsp dried basil
– 1/4 tsp dried oregano
– 1/4 tsp dried thyme
– 1/2 cup heavy cream
– 1/4 cup grated Parmesan cheese
– 1/3 cup sun-dried tomatoes, chopped
– 4 oz. angel hair or thin spaghetti pasta
– 5 oz. fresh spinach, chopped

Tools:
– large pan
– large pot
– knife
– wooden spoon (or big stirring spoon)
– cutting board
– measuring cups
– grater (unless you buy pre-grated cheese)

Method:
  1. Sprinkle chicken with salt and pepper.
  2. Heat olive oil over medium heat. Add cubed chicken and cook, stirring occasionally, until browned on all sides. Remove chicken from pan, and set aside.
  3. In the same pan, toast garlic and red pepper flakes for a moment. De-glaze pan by adding wine, and using your wooden spoon to scrape the bottom of the pan of the chicken juices and caramelization.
  4. Add the chicken broth, basil, oregano, and thyme, and bring to a low simmer over medium-low heat.
  5. While the seasoned broth is simmering, boil water for pasta. Cook pasta based on package directions, and drain, setting aside while you finish the sauce.
  6. Add cream to broth gradually. Add Parmesan and stir thoroughly. Mix in chicken, pasta, and sun-dried tomatoes. Stir in spinach until wilted. Serve.


Okay, so not EVERY step is chronicled here, but most of them. I always like to know, when I’m trying a new recipe, if what I see is what I should be seeing, so I like to do that for you all, too.

So here you go! Brown that chicken!

Make sure to set the chicken aside so it doesn’t over cook and get hard and dry.

Because the chicken pieces are fairly small, there is a possibility that you might over-cook them. I suggest browning them on a medium-high heat just to brown the sides, then turn the heat down to finish cooking so they don’t over dry. You can also put a lid on the pan, to help keep in the moisture.

The chicken brownings, garlic, and red pepper flakes.

Without adding any additional moisture to the pan, toast the red pepper and garlic with the brownings from the chicken. I don’t know if “brownings” is a word, but I’m making it one!

De-glazing the pan with white wine. Steamy!

Splashing the wine into the pan will help to de-glaze the pan of the brownings, and create the beginnings of the sauce base. Use your cooking utensil to scrape the bottom of the pan to get all of the brownings off. The pan I used is REALLY nice, so it came right up without me having to really do anything. But I’ve made this on older pans, where it takes a bit more effort. Getting the above picture was not easy – so much steam! How do people take photos of in-progress cooking without getting oil or steam all over their camera lens? lol. I’m still learning.

Next step: add broth and herbs, then slowly add the cream, Parmesan, and sun-dried tomatoes.

The sun-dried tomatoes will add some oil to the sauce. If you know where I can find sun-dried tomatoes packed in water, let me know!

While I was making this, I took off the lids of all of the dried herbs I was about to put in the pan, so I could measure them quickly. (I don’t usually measure things like this…I kinda just throw some in there. lol) As I went to put the lids back, I lost the inner, plastic, shaker lid to one of them, then also forgot which lid went with which herb. *facepalm* I had to smell them each several times to make sure the basil lid wasn’t going on the oregano lid. Thankfully, I’m usually cooking with both. But not always. Gotta trust my olfactory memory on this one! Maybe I ought to put the names on the sides of the bottles, too. Ha!

The above mosaic is the pan with the added fresh spinach, the spinach as it’s wilting, and the finished product with the pasta!

When adding the spinach, it will look like a lot – too much to fit – but it will cook down, I promise! I do recommend using a fairly large or deep pan – it can be hard to stir the spinach in when it’s still fresh. Baring that – add a bit at a time. Cooking the spinach down more isn’t going to hurt it, and cooking the sauce longer will only make it thicker, which is a good thing!

Once the spinach is cooked down, add the cooked and drained pasta, and let it cool slightly before serving! Letting it sit for a few moments will help the sauce thicken. :)

If you try this recipe, please let me know what you think!