

Some of you have been waiting for this post for a few weeks. Hope you haven’t forgotten about it! I sure haven’t.
I apologize for getting this out a little late…Wednesday was a bad mental health day, and I scarfed down several shortbread cookies, and slept a lot. Thursday, I was productive, but put finishing this off until the last minute, and then it wouldn’t save and I lost all my work at 3am…hence, why it’s only going up now.
ANYHOW, THIS is the cake I made for my roommate’s 35th birthday! I promised you all on Facebook and Instagram that I’d show you the final result, and….TA-DA!!!
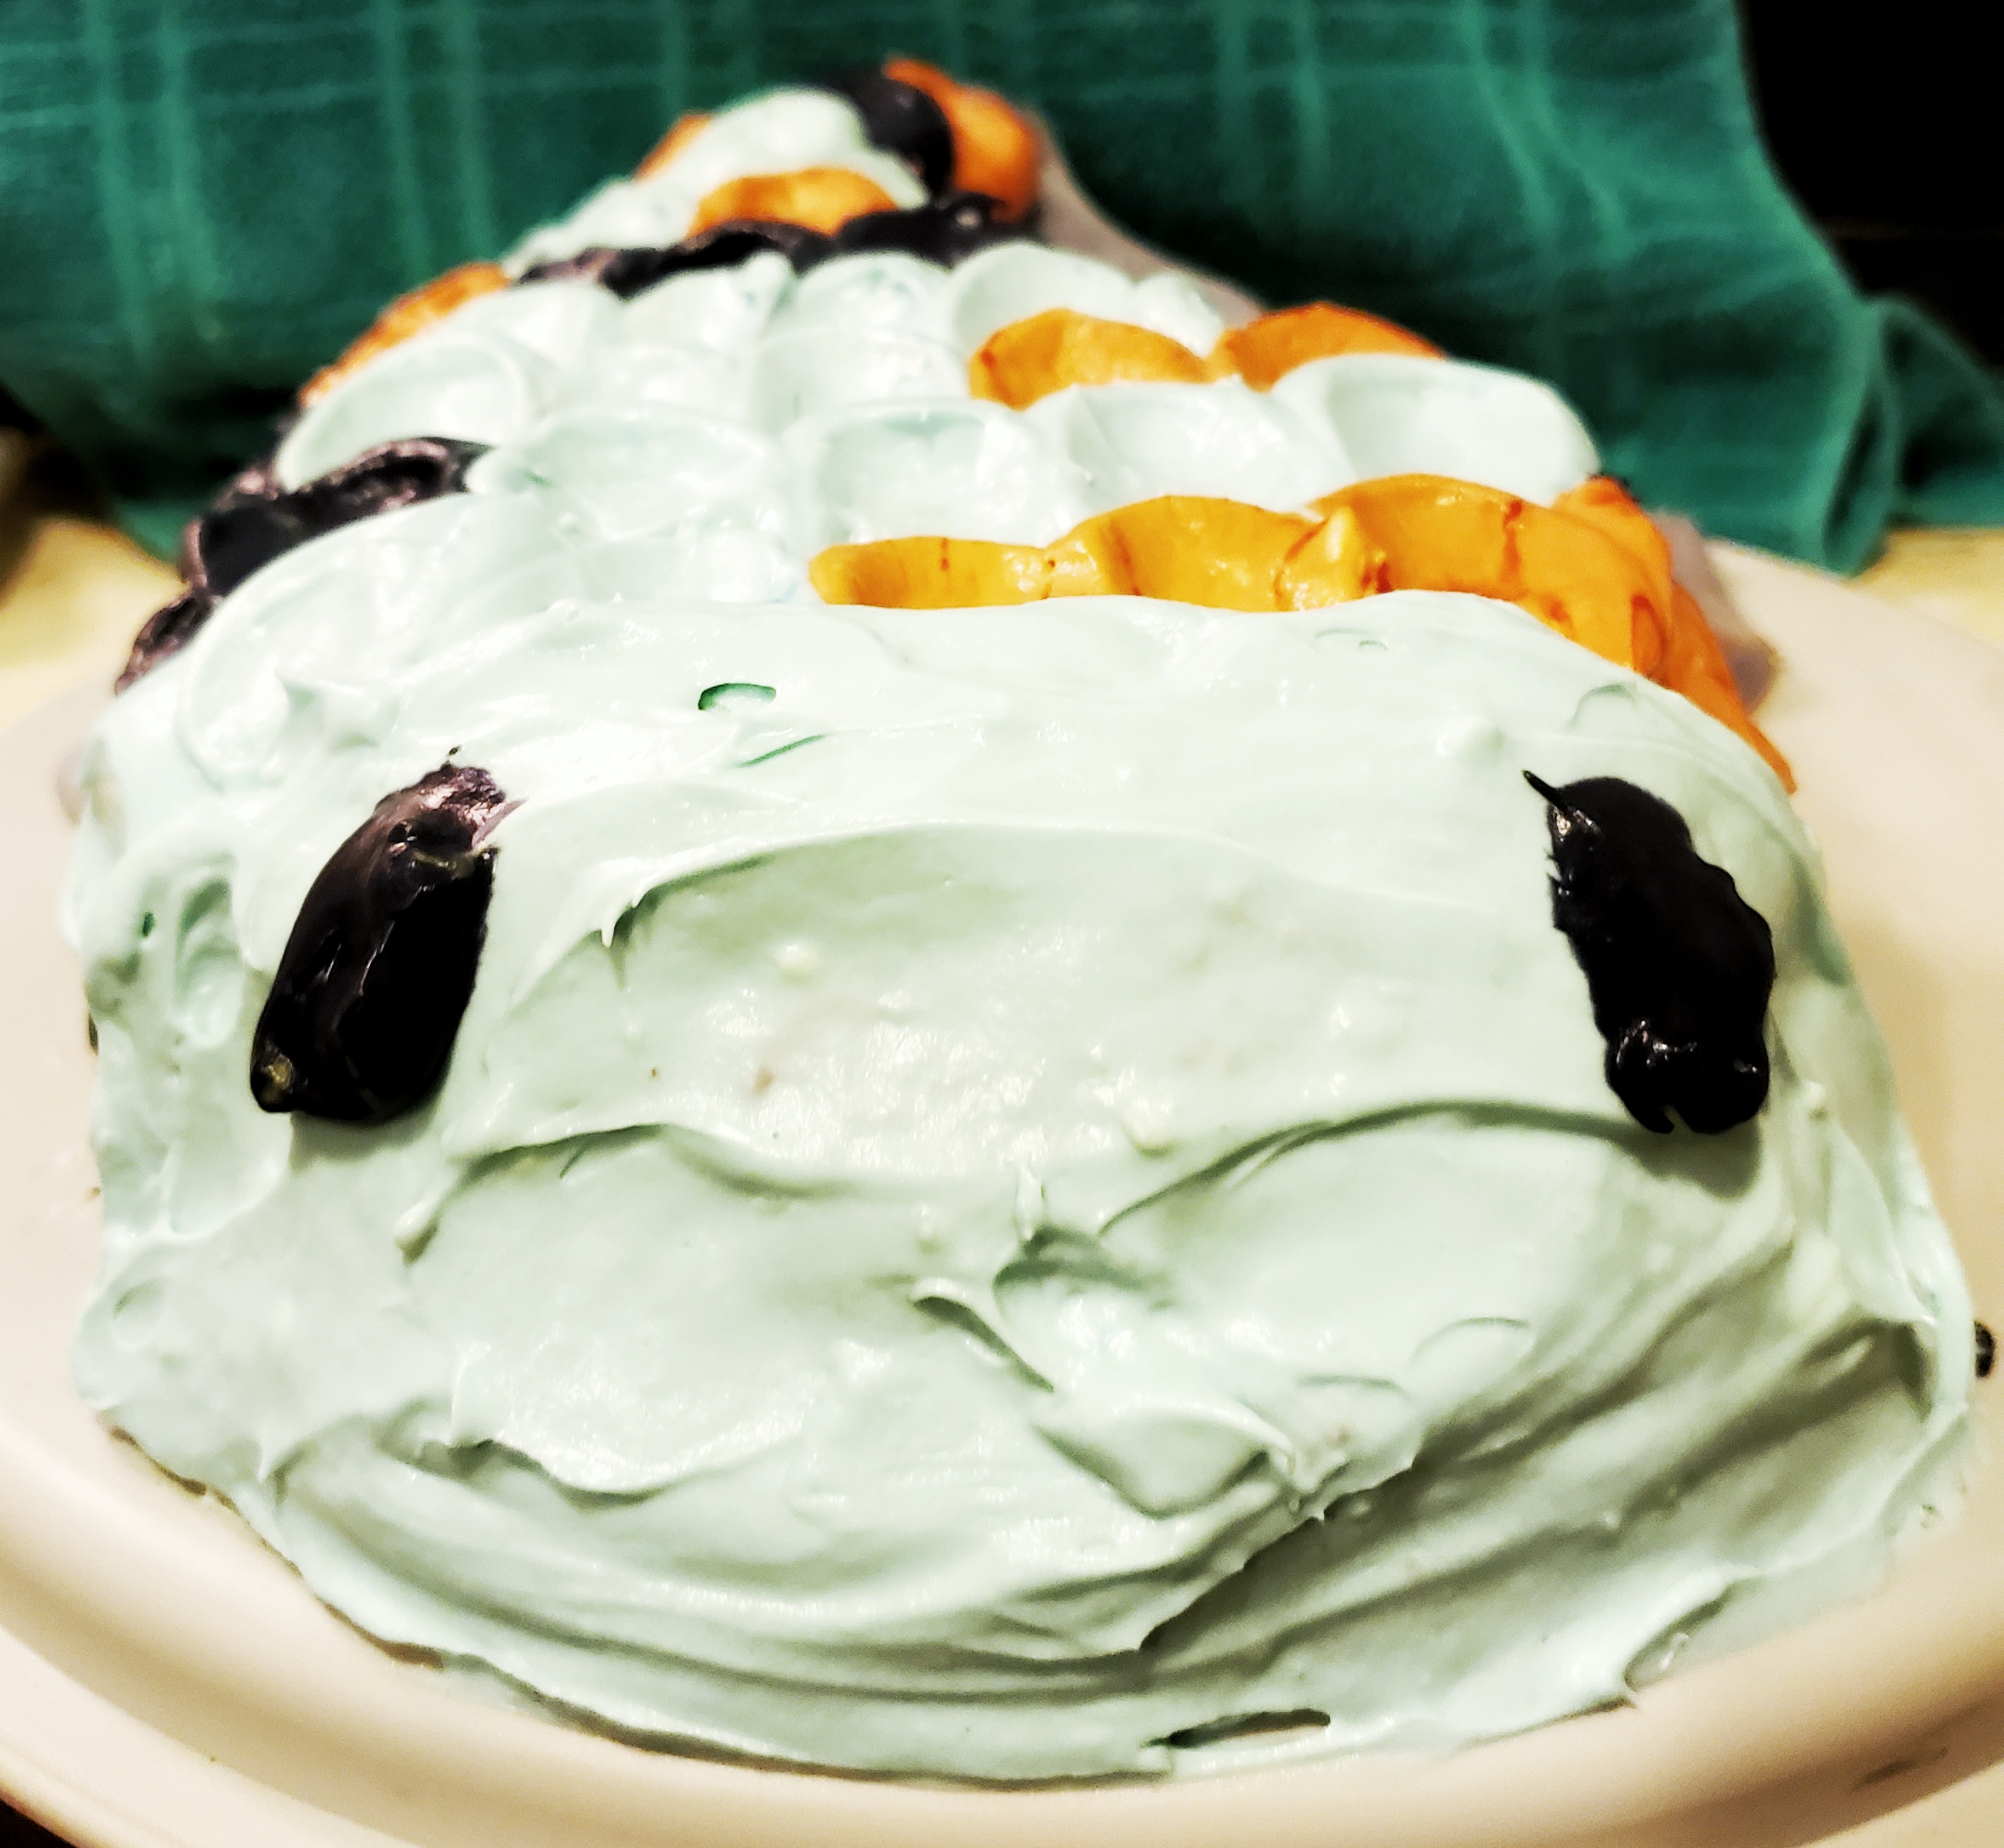
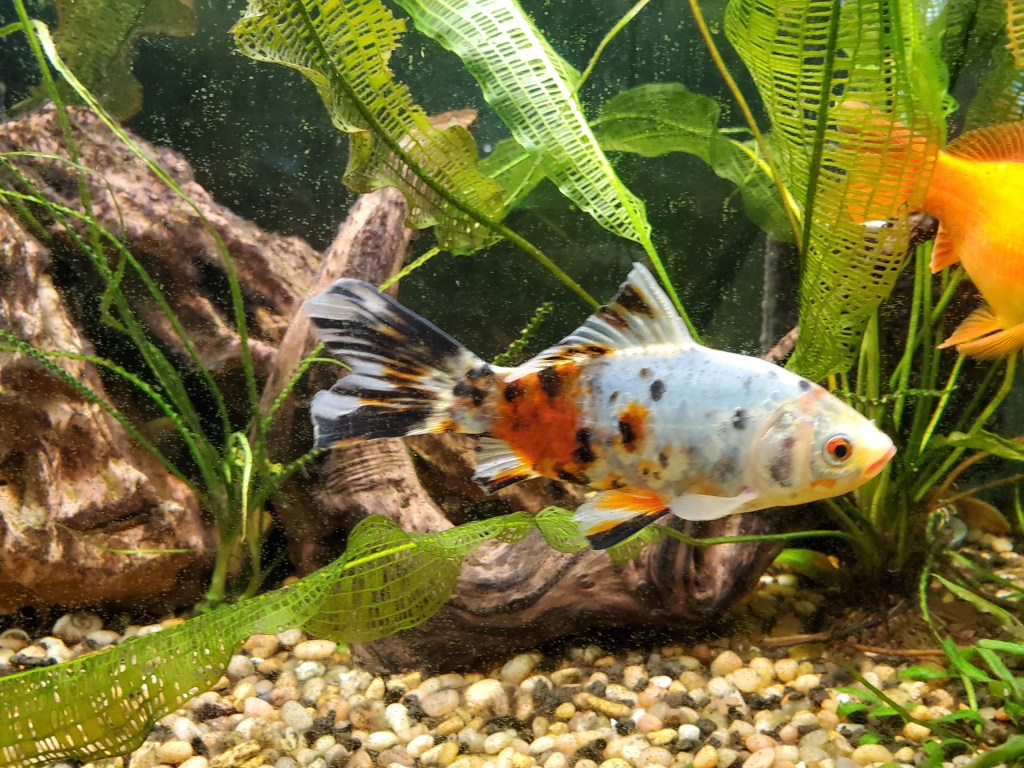
It’s a FISH! And not just any fish…I actually modeled it after a goldfish we have:

The idea for this cake came to me as I was trying to fall asleep one night. I know my roommate loves white cake (which is basically an almond cake by another name), and I saw these funfetti chips at the store, and knew I needed to incorporate them into the cake:

I wanted to use this (in my opinion, too-sweet) blackberry curd I made several weeks ago after a very successful blackberry picking adventure, and then realized the cake would be really sweet, so I decided on a cream cheese frosting, adding some lemon curd I had to make it even more tangy. Lemon and blackberries go well together, after all. I love my sweets, don’t get me wrong, but I started leaning towards not-sickly-sweet back in high school, and I know my roommate doesn’t mind very sweet things, so I wanted to balance out the sweetness of the cake with my need to make things tart and tangy. lol.
My roommate works at a local (but incredibly successful) fish and aquatic plant store, so I figured I would try my hand at a showstopper-worthy creation, and make it look like a fish!
Please forgive my crappy photos…I wish I had a proper set up to take good food photos – something I’m working on – but my kitchen was also a DISASTER after assembling this, and I just wanted to get some photos before I lost the will, and it had to go into the fridge. I’m getting better at taking good base photos with my phone camera’s manual settings, and editing them hasn’t been too much of an issue, given my design background, but I don’t quite have the capital to invest too much in some backdrops, a tripod, and proper lighting at the moment. I’m going to try to use natural light when I can, but my kitchen doesn’t have a window, so I’m limited when I’m doing in-progress shots.
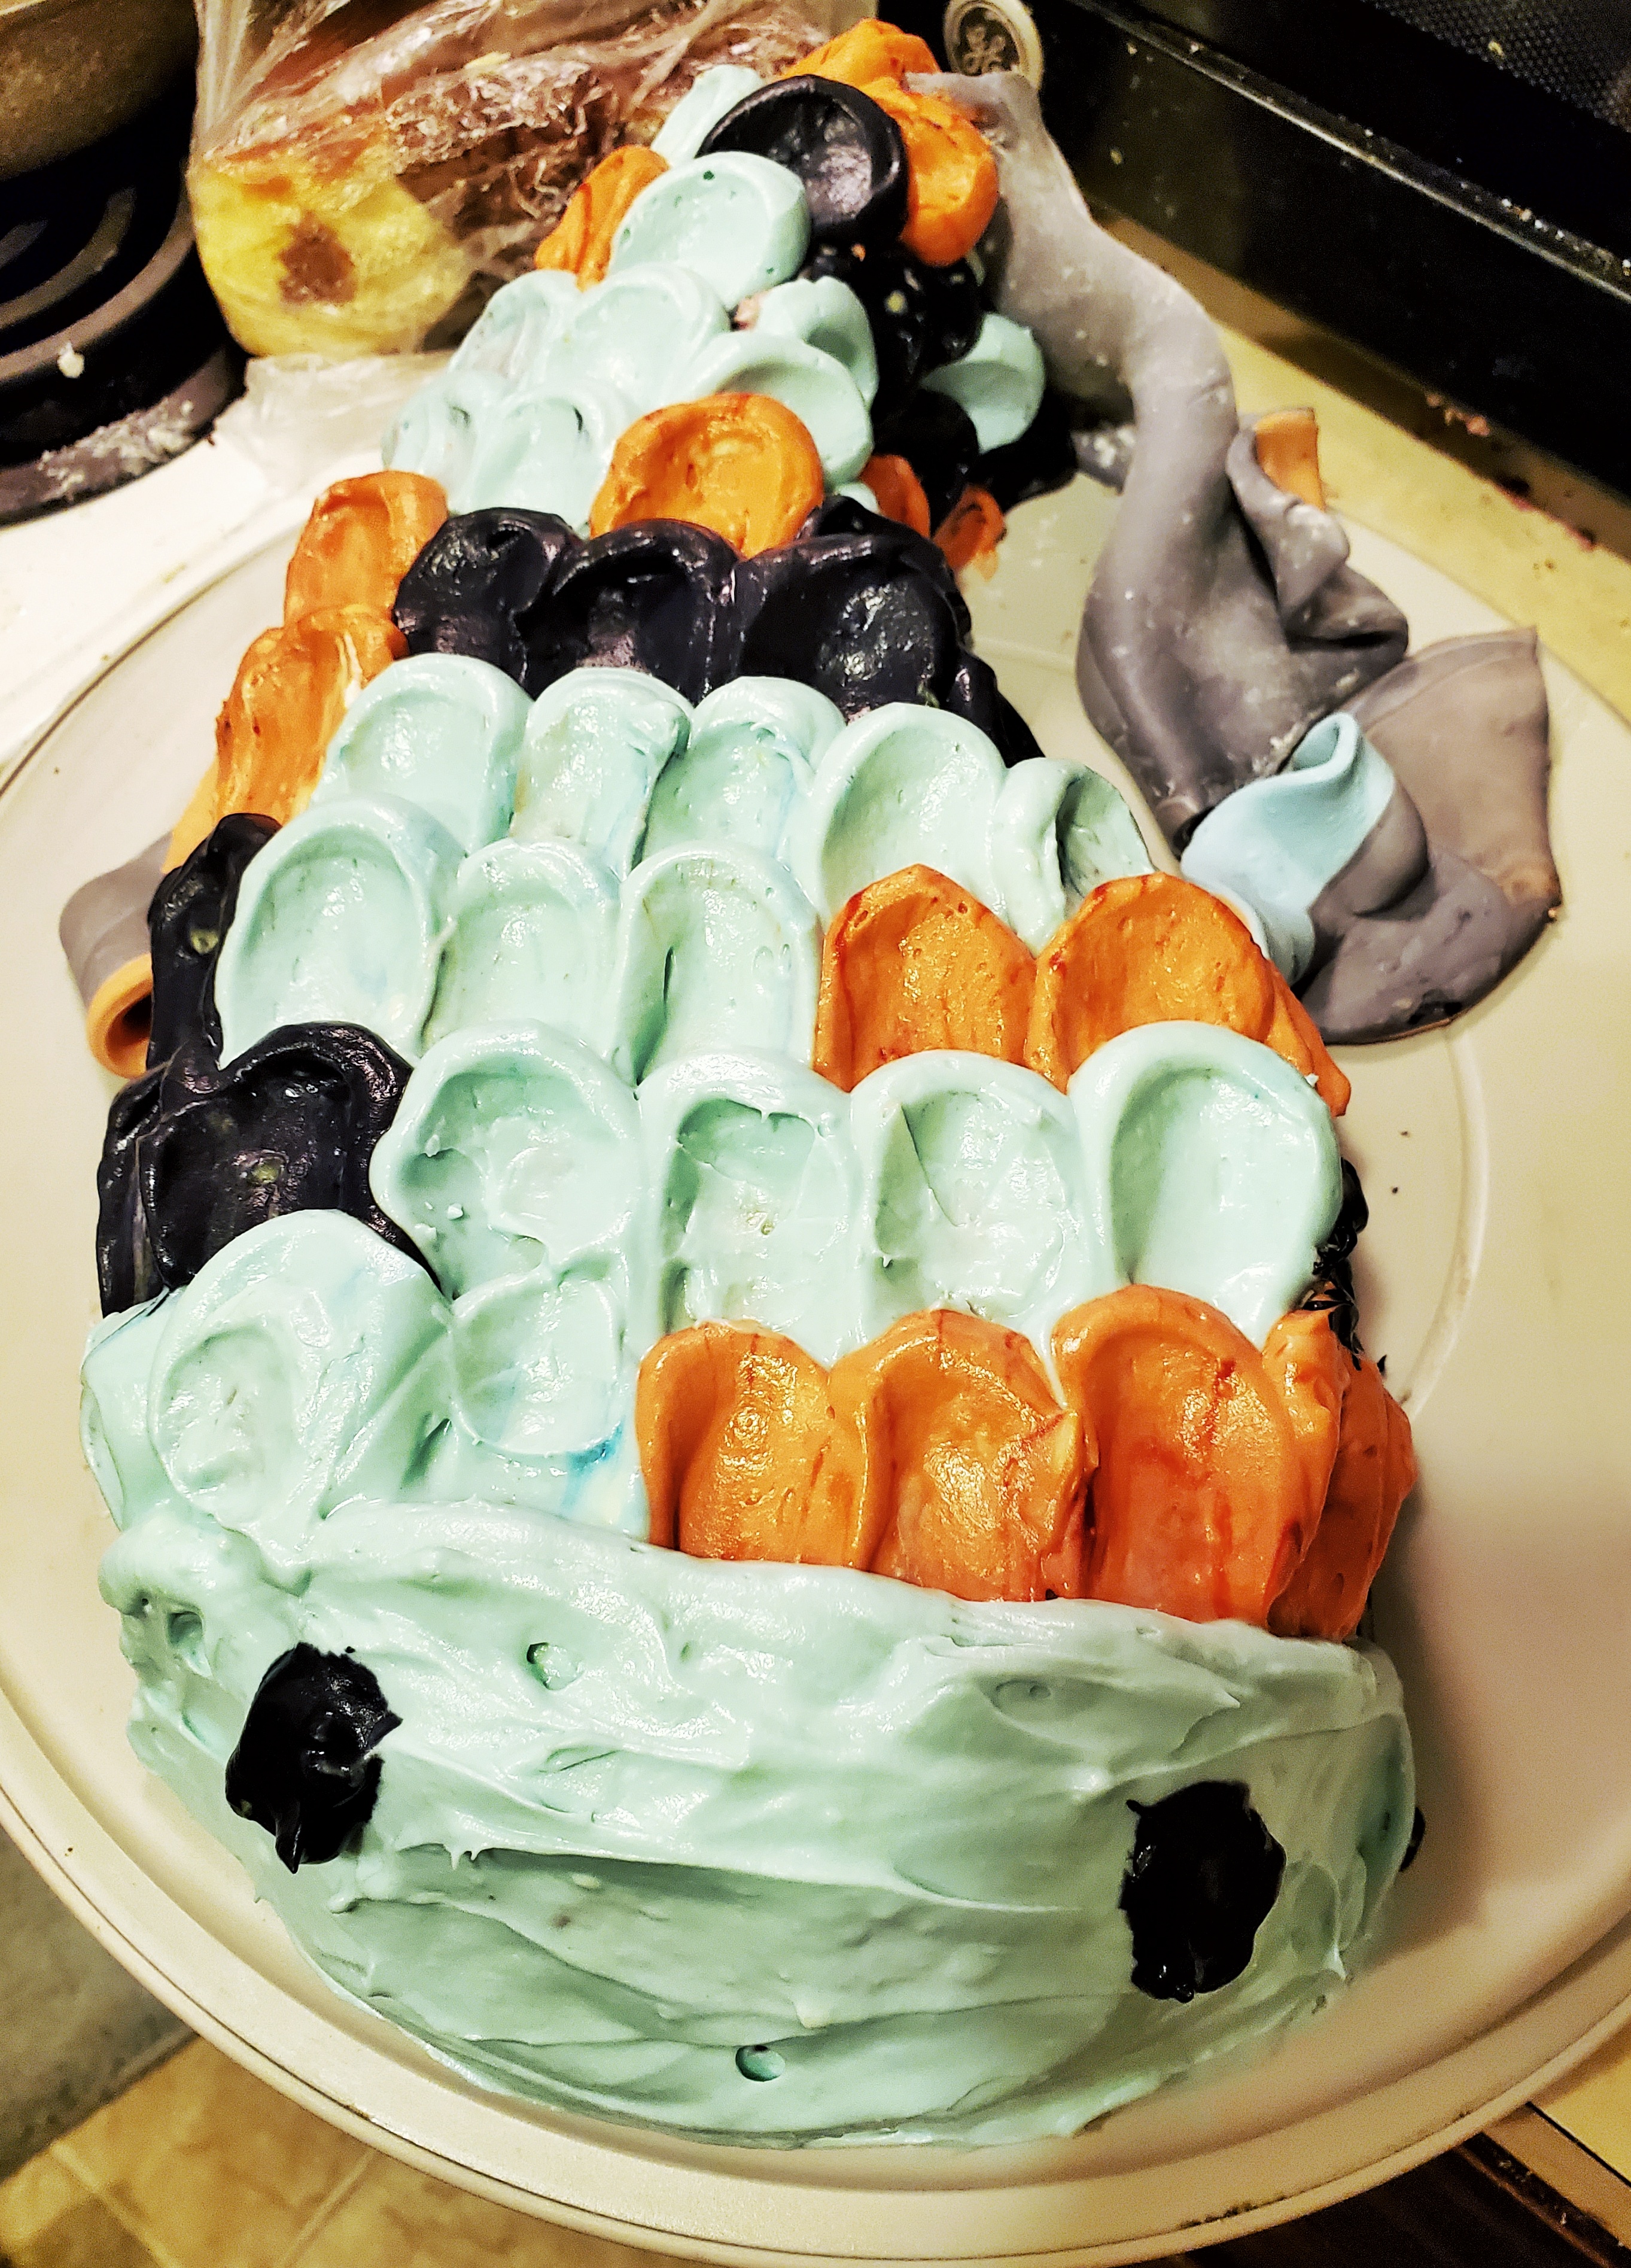
Something I thought turned out really well, were the fins. They’re kind of flowy, more like a betta fish than a goldfish, but I’m glad they turned out so well – I was worried they wouldn’t work how I’d intended. I didn’t intend to add a dorsal fin, and I’m okay with that!

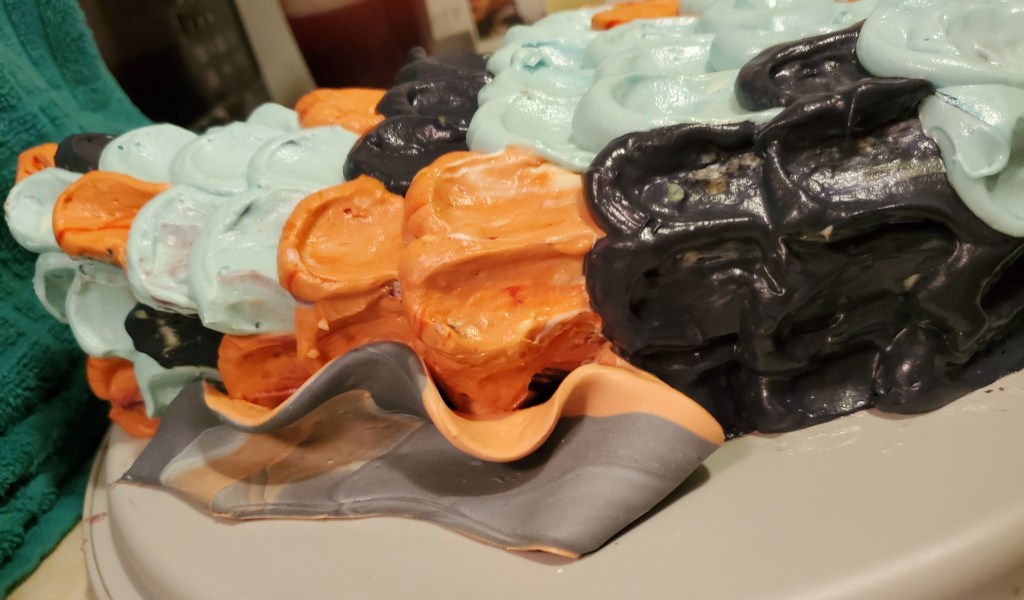
I did have to manipulate the tail a bit – if I had to do it over, I probably would have rolled out the fondant a little thicker so it would stand up a bit more.
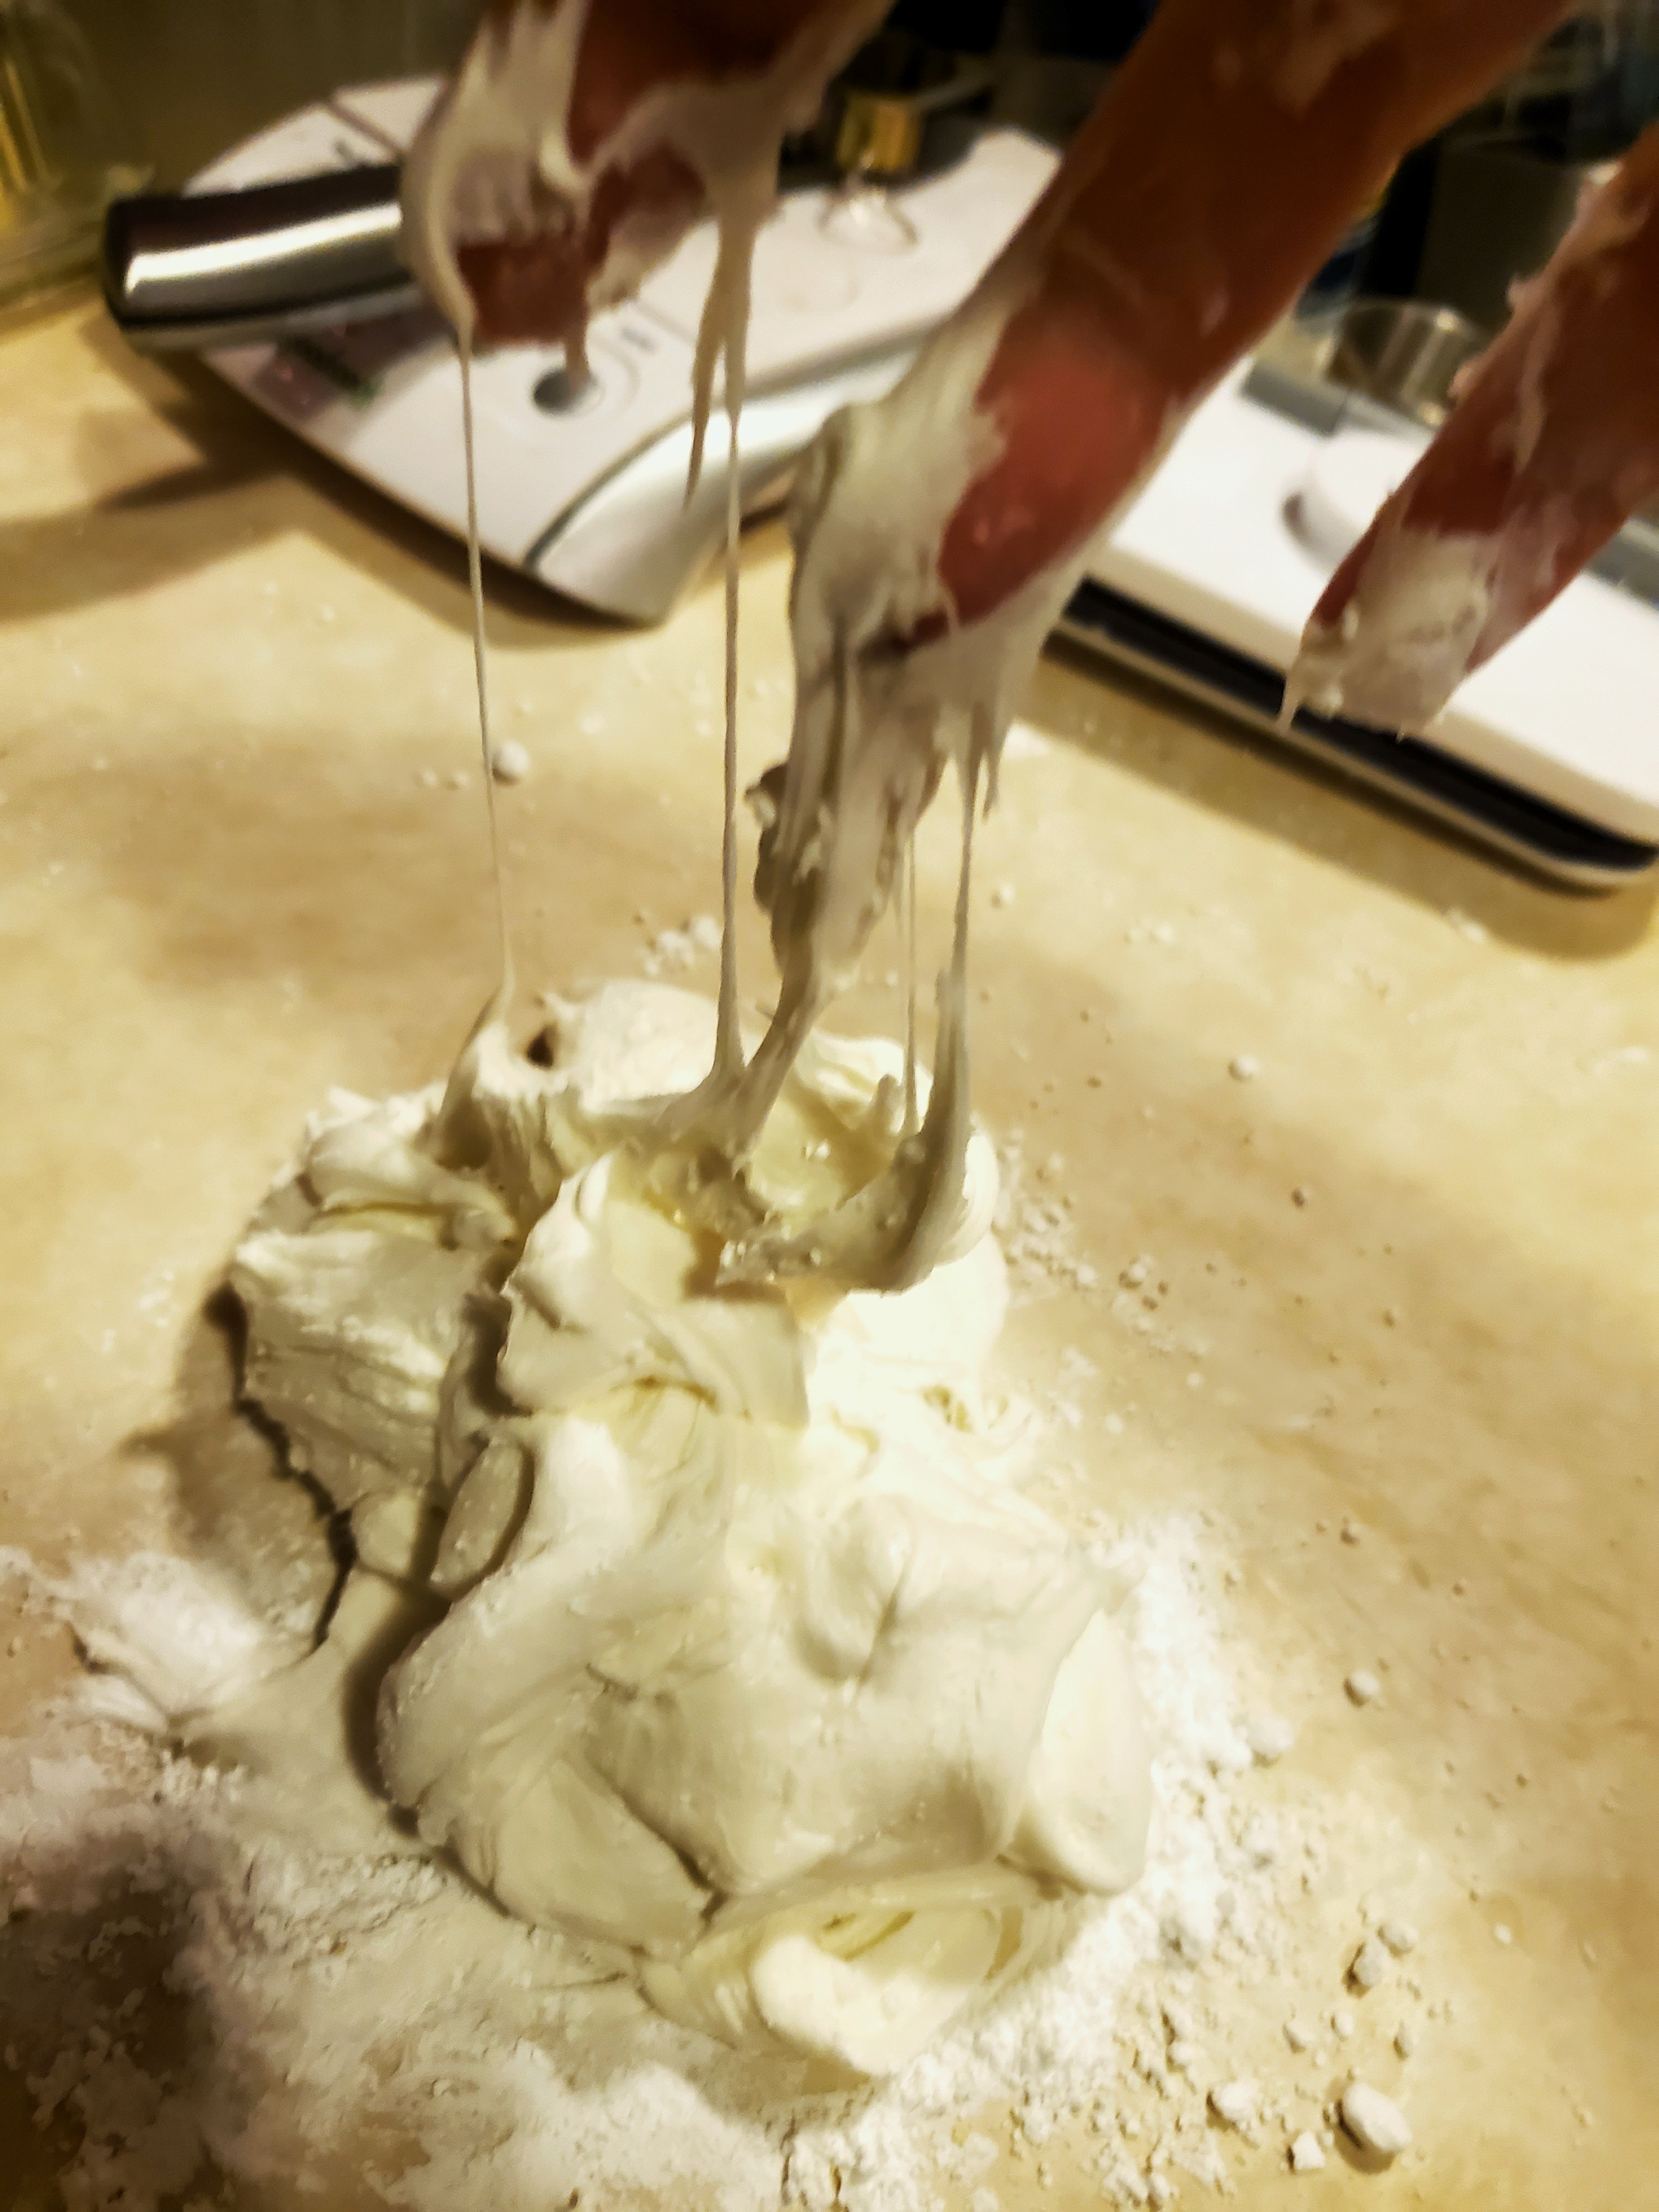
Some other tricky things, is that while the cake was baking, I made the marshmallow fondant, which turned out to not be the best idea. ~_~ It had stiffened up while it cooled, and I still needed to knead in the color in. I warmed it up in the microwave, but it got too warm, and therefore, sticky, and I had to add more powdered sugar. When it’s sticky, it’s pretty hard to work with, like a really wet dough. In the recipe below, I instruct to make the fondant, then divide it and add the color, but you could divide the marshmallows before heating, and add the color then. I didn’t opt to do that, because I was worried about once I added the powdered sugar, it would dilute the color, and I’d have to add more anyway.
One tool I think has really helped my game in the kitchen, is this scrapper:
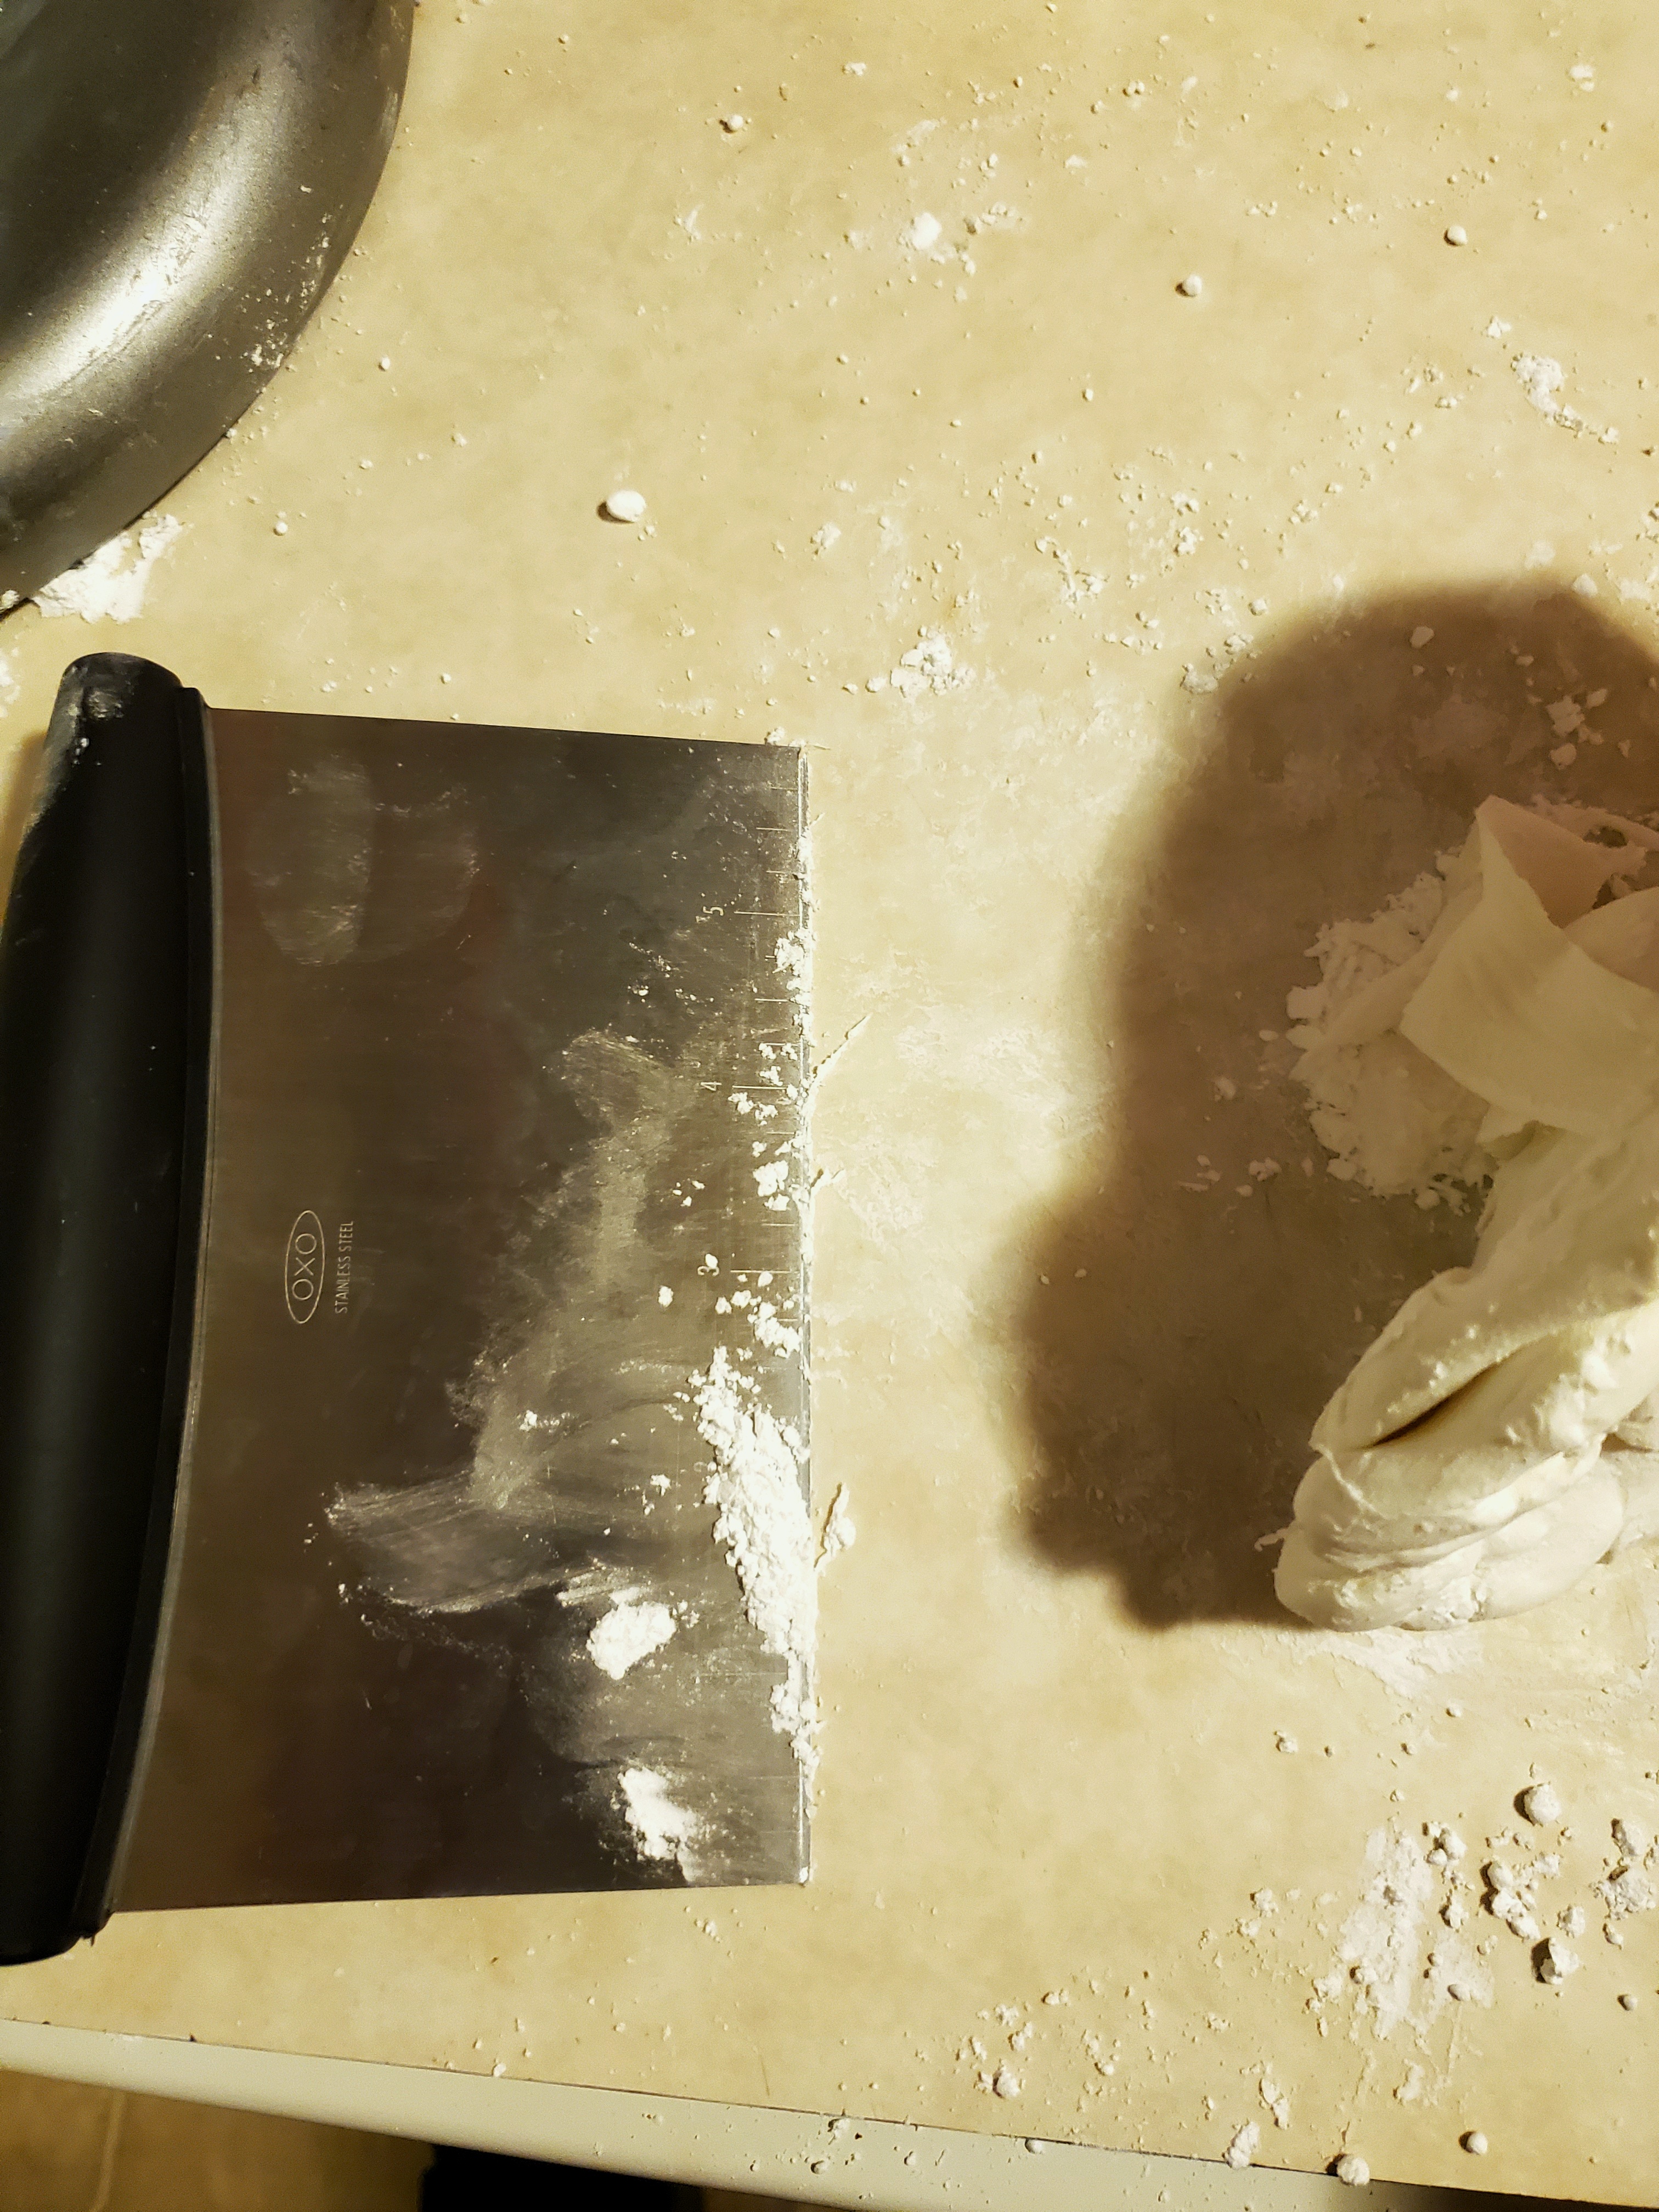
Seriously, the best tool. My counter isn’t perfectly smooth, so this really helps me clean up messes that are stuck to the counter (usually after kneading something). It helps you cut and flip dough. Many thanks to my friend Steven for the gift!
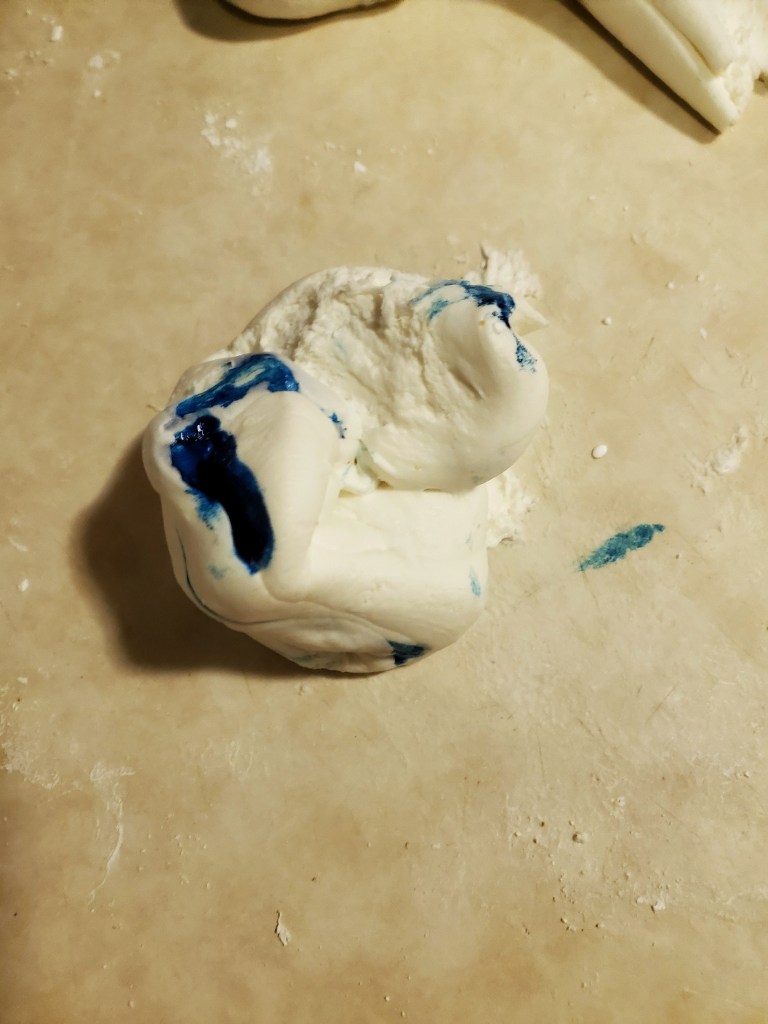
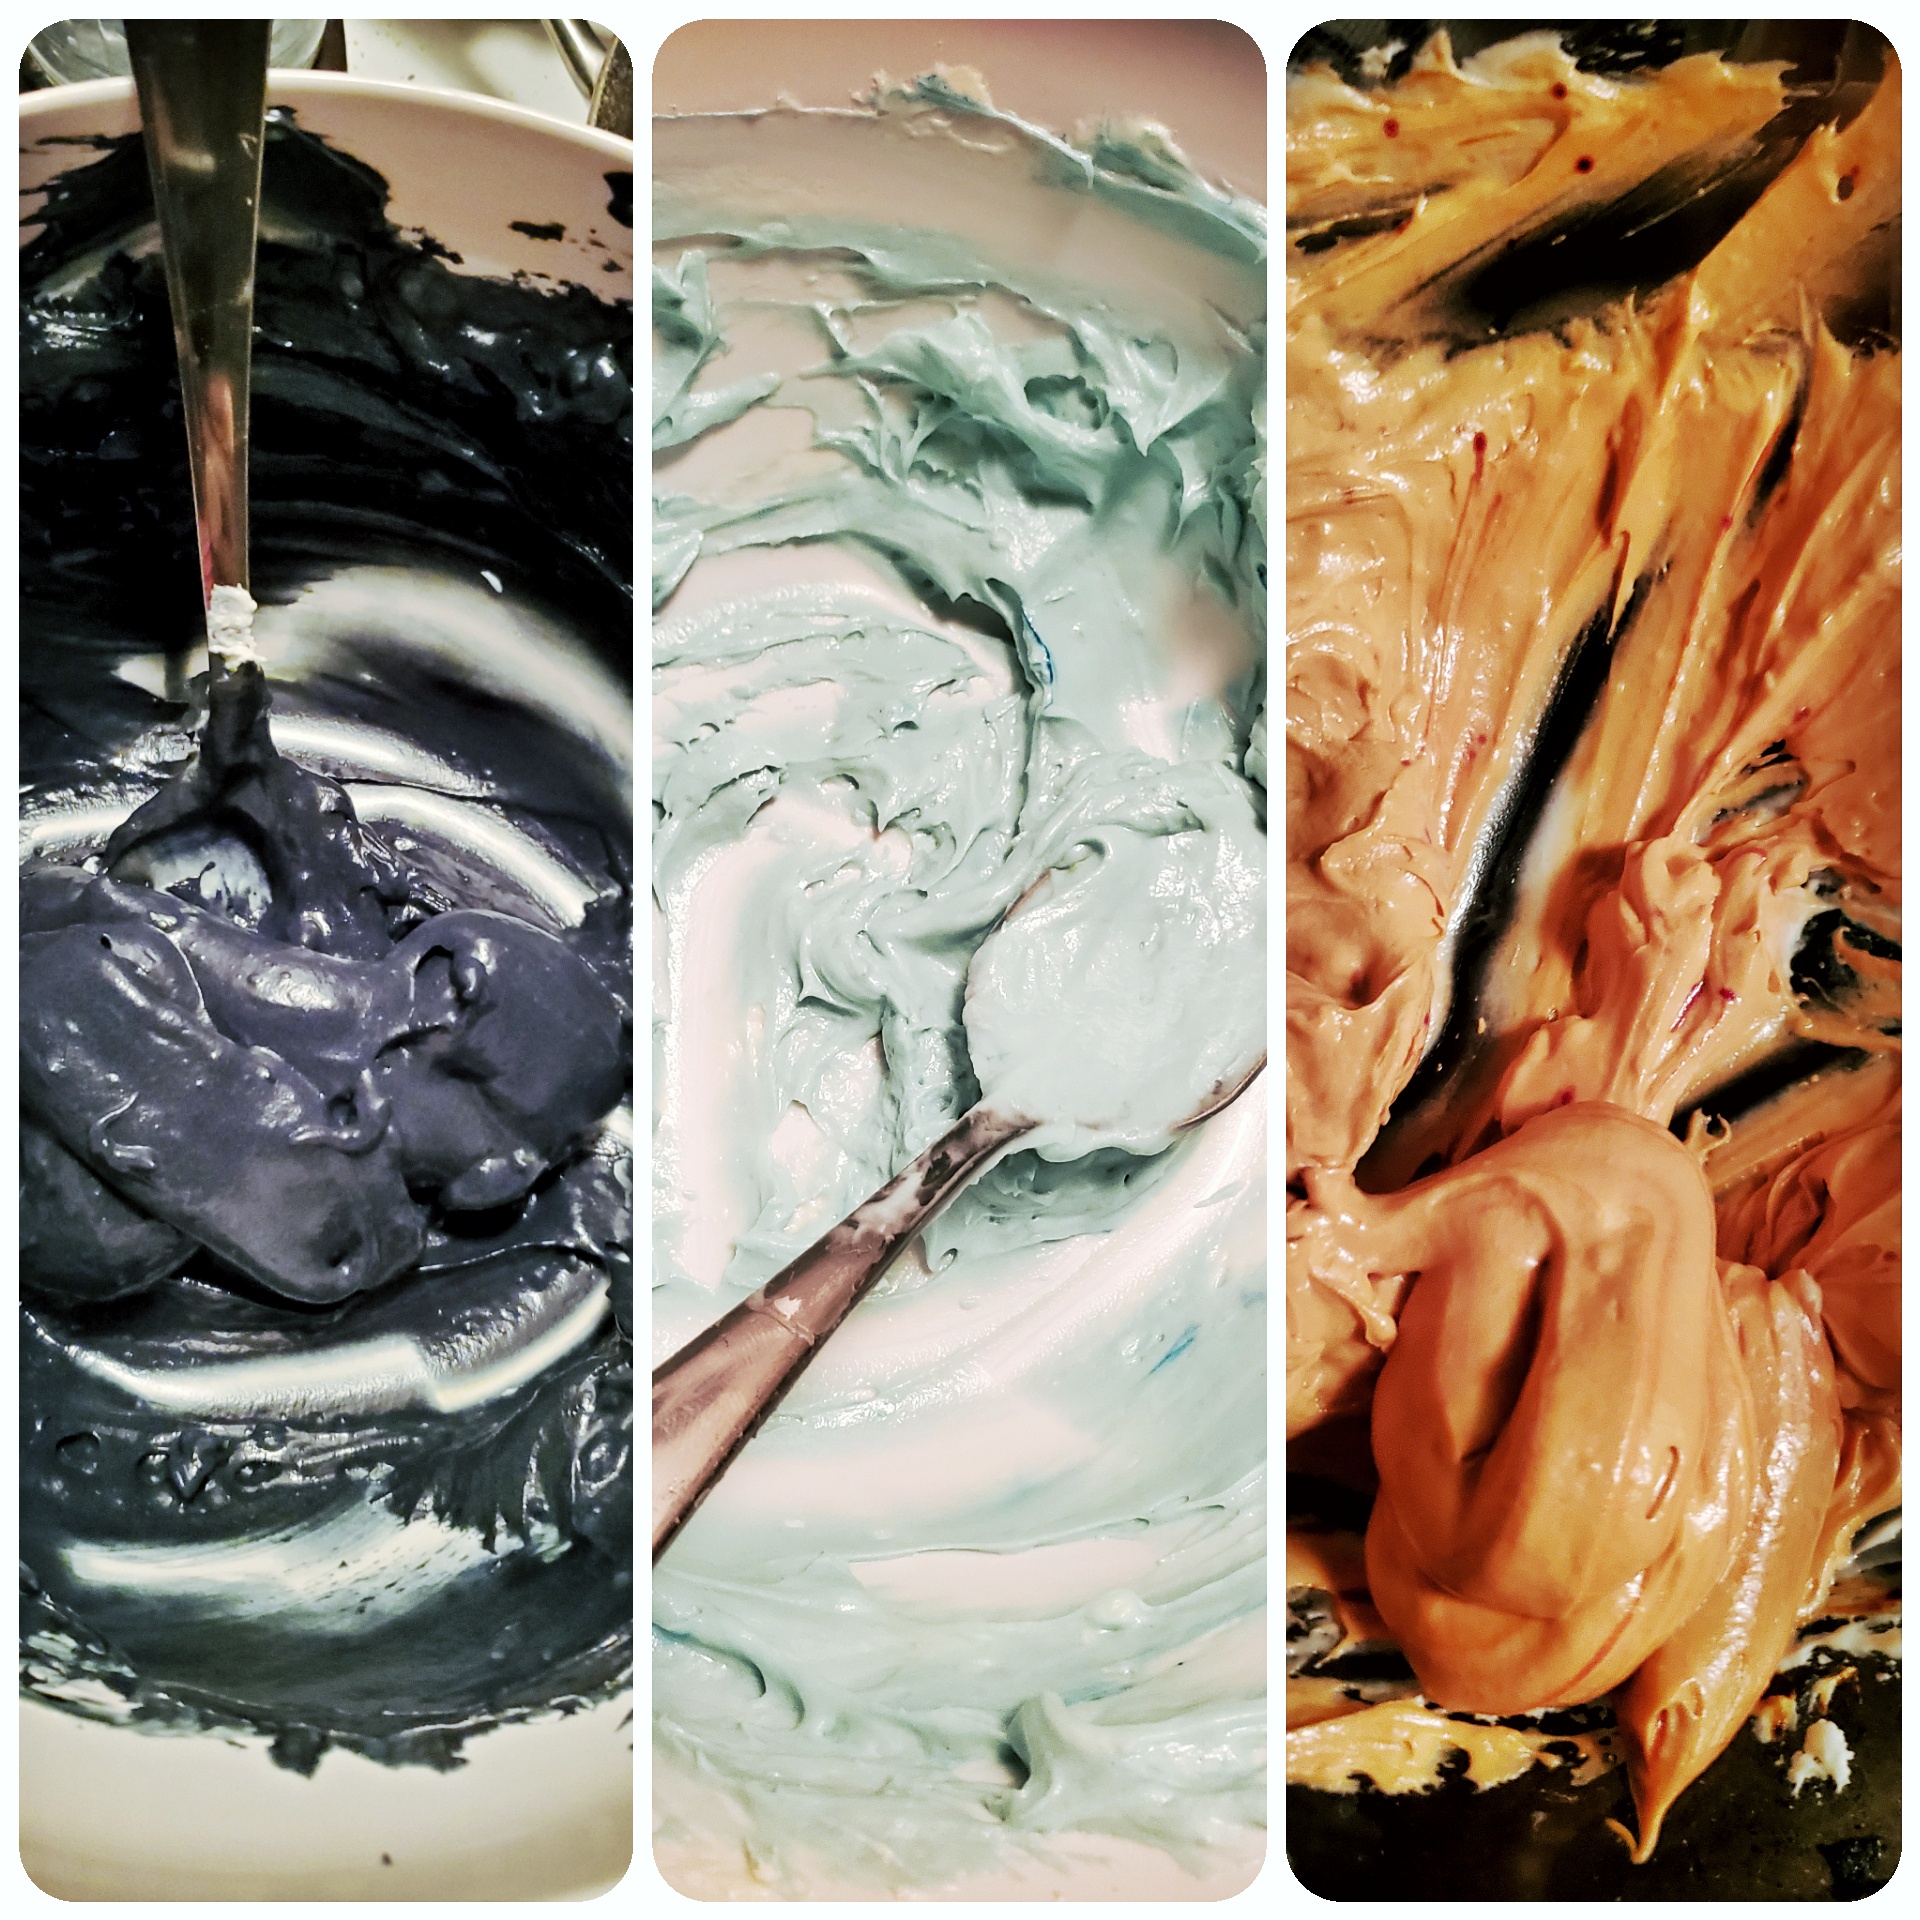
When you add the color to the fondant, you really want to just add a little bit at a time. You will also get some color on your surface and probably your hands. Just wash them thoroughly between colors, and you should be fine.
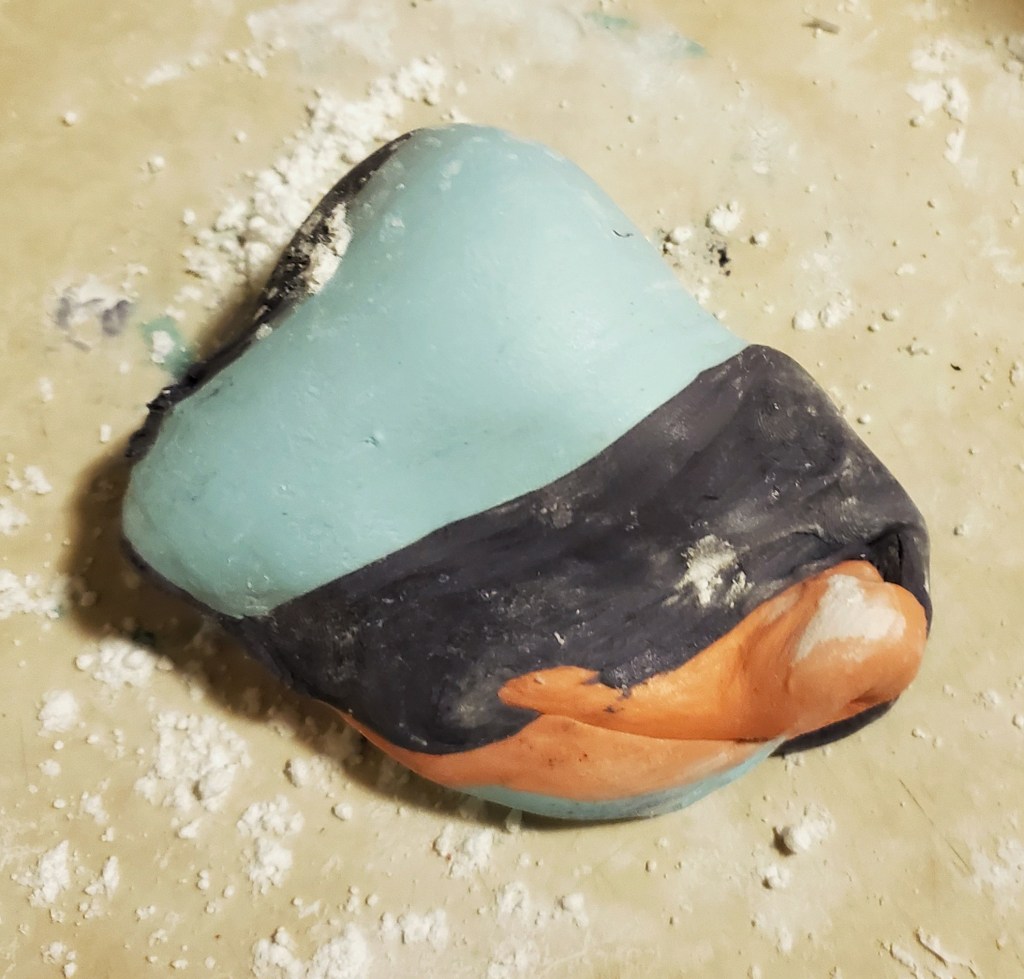

I also love how well the fondant matched the frosting!
Now, the assembly. Honestly, I added too much of the blackberry curd, and it was a bit of a mess. The curd was looser than I’m used to. Not exactly sure why – perhaps too much liquid in the recipe. Either way, it made putting the cake together and doing the crumb coat a bit hard. I also think I’m just not good at doing crumb coats. They never really seem to help, though that might be because I don’t make a separate, stiffer frosting. I’m still learning.
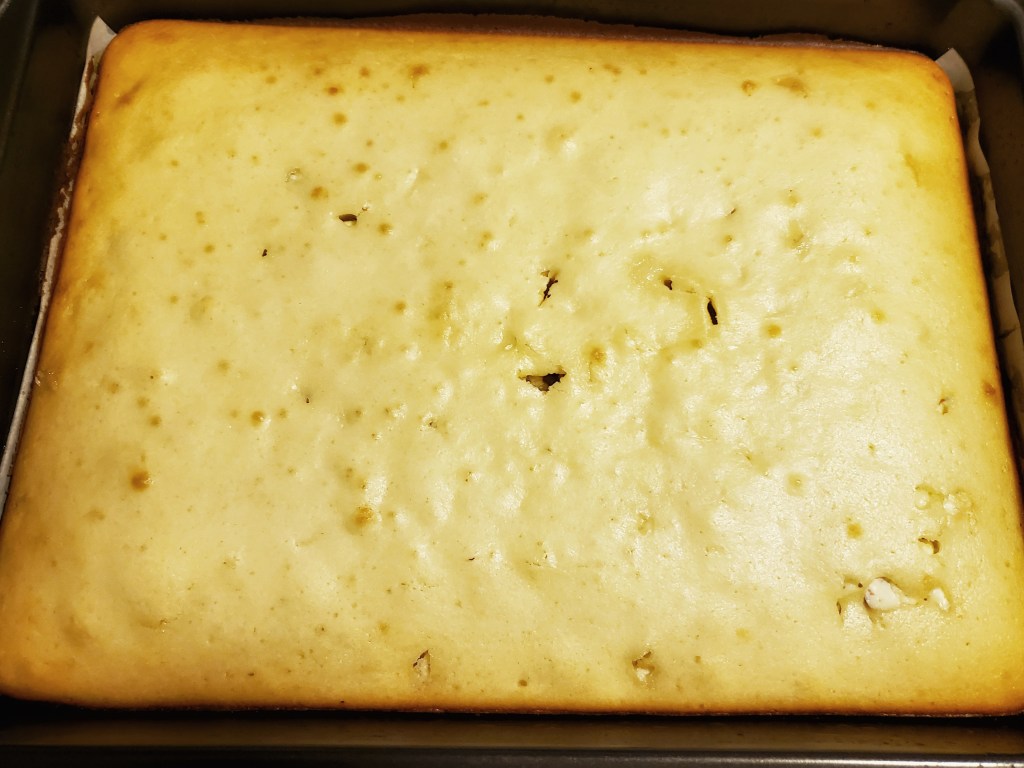
The finished sponge – nice and golden! 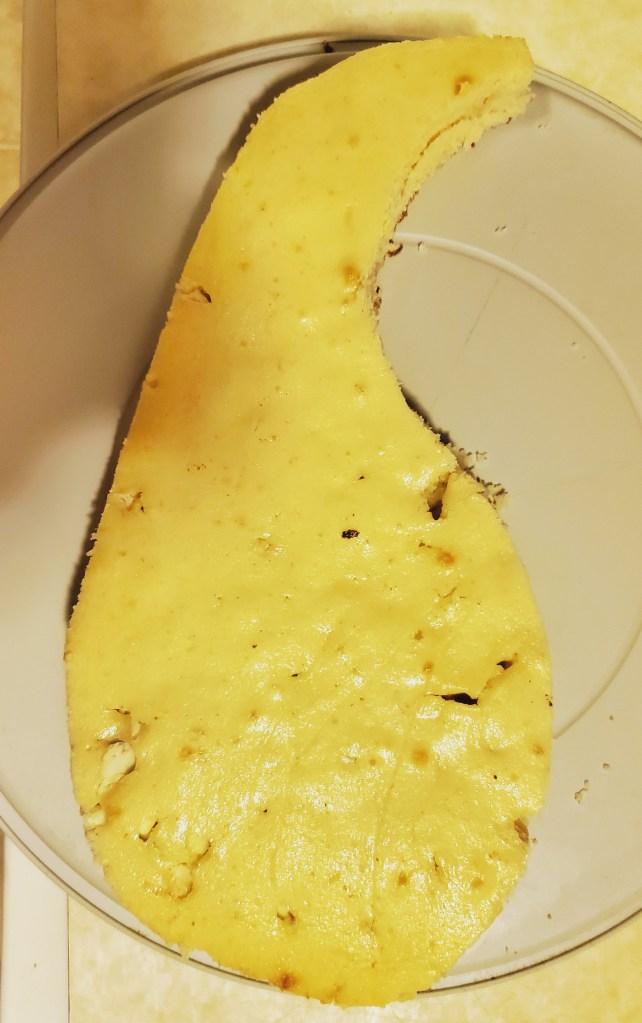
Yeah…I know it looks like a tadpole…just wait! 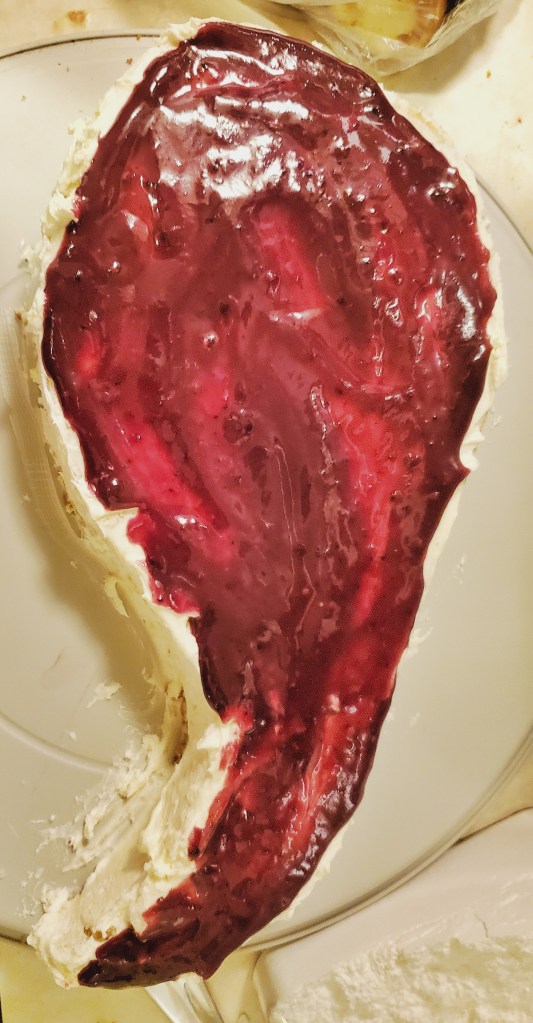
Mmmm…yummy blackberry curd! I’m all for fruit in between cake layers. 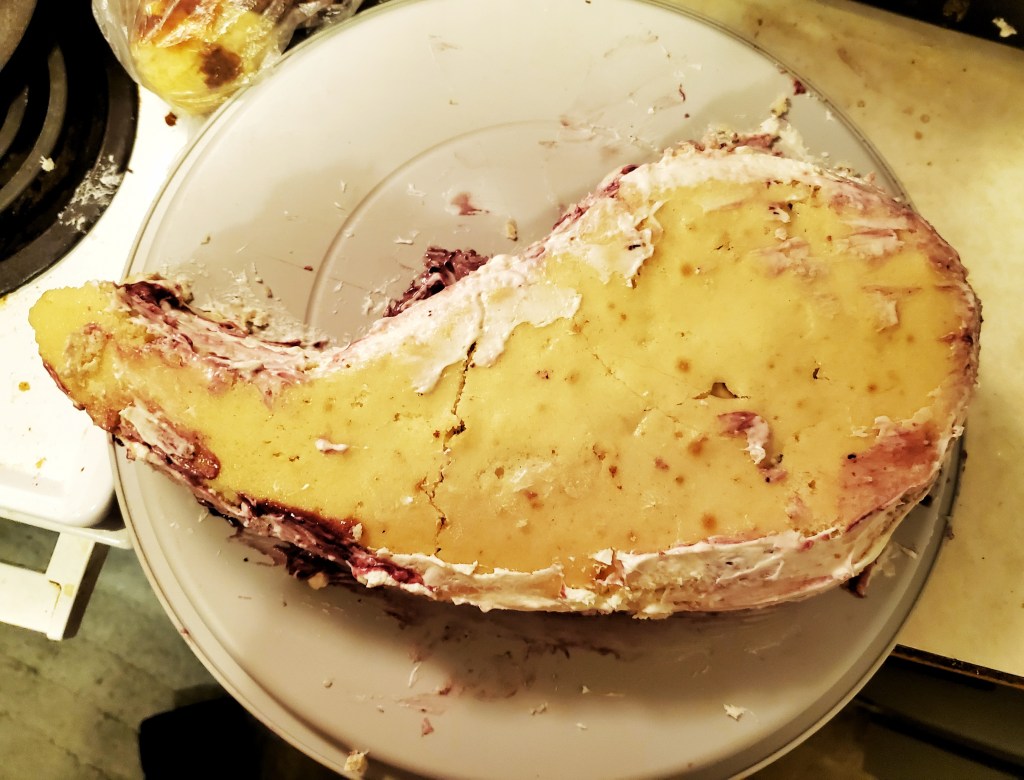
Messy as HELL. And too big for my cake container. I did trim it down a bit. You can see that the top layer split while I was trying to put it on.
Let me tell ya – if I was ever in the Bake Off tent, I would probably sweat all over my bakes. I felt like I was actually doing a showstopper challenge assembling this cake! Mostly while decorating – I had to switch between frosting colors, which was a trip, and got me sweatin’. But I’m SO happy with how it turned out! And my roommate loved it, too!
Level: Easy to bake, Moderate/Hard to decorate
Serves: 10-12
Cooking Time: 30 minutes (not including the curds, which add about 30 minutes each)
Decorating Prep: 30-45 minutes
Decoration: 45-60 minutes (depending on how speedy you are)
Total Time: 2.25 hours (3.25 hours)
Ingredients:
White Cake
– 1 cup butter softened
– 1 1/2 cups sugar
– 2 teaspoons almond extract
– 3 1/2 cups cake flour
– 4 teaspoons of baking powder
– 1/2 teaspoon salt
– 6 large egg whites room temperature
– 1 1/2 cups milk room temperature
– 6 oz. funfetti chips
Lemon Cream Cheese Frosting
– 1 cup unsalted butter, softened
– 24 oz. full-fat cream cheese, softened
– 1 cup powdered sugar
– 1 cup of lemon curd
– 1 tsp lemon extract (see notes)
– gel food coloring
Filling
This Blackberry Curd recipe
Marshmallow Fondant
– mini-marshmallows
– powdered sugar
– gel food coloring
Tools:
– various sized mixing bowls
– electric mixer (hand, and/or standing)
– measuring cups
– measuring spoons
– small spoon
– piping bags, or ziplock bags
– knife
– food scale (see notes)
– medium pot or double boiler
– glass bowl (see notes) – wire cooling rack
– spatula
– toothpicks
Method:
Please read all instructions and notes before starting, including the assembly.
For Cake
- Grease an 11″x14″ pan, and line the bottom with parchment paper. Preheat oven to 350℉.
- Using either a stand mixer or a hand mixer, whip butter and sugar together until pale and fluffy. Beat in almond extract.
- Stir flour, salt, and baking powder together in a separate bowl. Set aside.
- In a liquid measuring cup, use a fork to whisk eggs and milk together. Set aside.
- Alternating the dry mix and the egg-milk mix, gradually add to the butter-sugar mixture, making sure it’s fully incorporated before adding more. Use a spatula to scrape down the sides of the bowl.
- Pour batter into prepared pan. Bake for 25-30 minutes, or until toothpick or knife comes out clean when inserted in the middle.
- Let cake rest in the pan for 5 minutes before carefully transferring to cool completely on a wire rack.
- In a large mixing bowl, beat cream cheese until light and fluffy.
- Add butter and continue to beat until well incorporated, using a spatula to scrape down the sides of the bowl.
- A little at a time, add powdered sugar, until fully incorporated.
- Add lemon curd and beat until fully mixed in.
- Either continue to add lemon curd until the desired flavor is reached, or use lemon extract, 1/2 a teaspoon at a time.
- Place finished frosting in a covered bowl in the fridge until ready to use.
I highly recommend waiting until you’re ready to put this on the cake before starting this step.
- Put half a bag of mini-marshmallows in a microwave safe bowl, and microwave on high in 30-second bursts, until partially melted.
- Add about 1/2 cup powdered sugar, using a large spoon to mix it in. Continue to add more powdered sugar until mixture is somewhat stiff.
- Lightly sprinkle powdered sugar on counter, and tip the marshmallow mixture onto the surface, using your hands to knead any extra powdered sugar into the fondant. Fondant should be smooth. It will stiffen as it cools, so work fast. If it gets too stiff for the next step, you can microwave it in short, 15-second bursts, but be careful about doing it too much, as it will become sticky an hard to manage again, and you’ll need to add more powdered sugar.
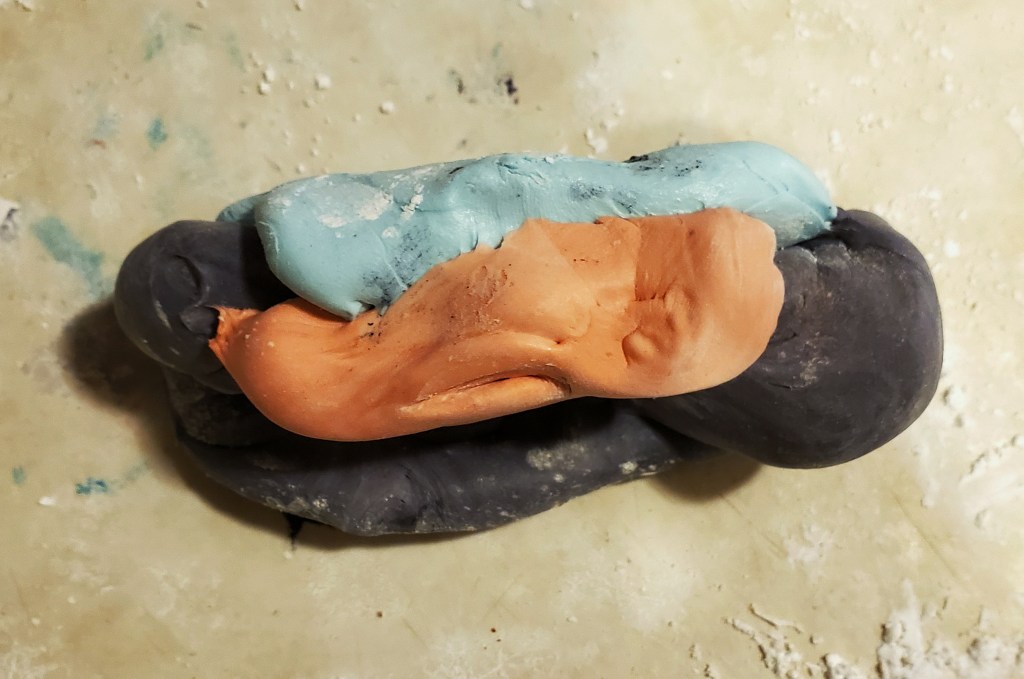
- Using a knife or scraper, cut fondant into the same amount of colors you have. Using a toothpick, add a small amount of coloring to the fondant and knead it in, adding more color until desired color is reached.
- Smush your colored fondants together, and knead and turn until you have a multi-colored fondant.
- Roll fondant to about a 1/4 inch thickness, and cut out your fin shapes. It will be a bit floppy, but will look flowy when it’s on the finished fish cake. If you don’t want it as flowy, roll it out much thicker.
- Using a paper template, cut out two fish-shaped layers from your cooled sponge.
- Place the first layer of your sponge on your decorating surface/cake stand.
- Using the frosting, put a thin crumb coat layer on the first layer. Spoon a small amount of the blackberry curd on top of the first sponge layer. Don’t add too much, or it’ll splooge out of the sides when you add the next layer.
- Add your next layer and put a crumb coat on that layer as well.
- Divide the remaining frosting into as many bowls as colors you have. Add color with a toothpick until the desired color is reached. Put frosting into piping (or ziplock) bags and snip the ends open, or fit with large, round frosting tips.
- Arm yourself with a small spoon and some paper towels.
- Starting from the ‘tail’ end, make a row of dots of icing in your desired color pattern. Use the back of your spoon to drag the frosting toward the ‘head’ of the fish, wiping off the spoon between colors.
- Continue, one row at a time, adding frosting and using the spoon to create ‘scales’ as you move up to the ‘head’. Decorate the head as you desire, either with more scales, or with a solid color and eyes.
- If you find the frosting to be a little droopy as you work on it, put the cake and the frosting in the fridge until the fat in it firms up a little.
- To add the fins, gently push the fondant ‘in between’ the scales. It should be a bit floppy/flowy, but if it doesn’t want to stand up and stay in the cake, you can cut a notch in the cake to insert the fins.
Notes:
- I…actually don’t know how long this will take for you to make – sorry! lol. I have the cooking times, but the decoration prep and assembly might take you shorter or longer, depending on a lot of factors. I recommend doing as much in advance as possible, like the frosting and the curds!
- I put lemon extract in here, because I only had 1 cup of lemon curd available, but still wanted more lemon flavor. Overall, I don’t recommend using extracts too much, as they can leave a strange aftertaste. If you don’t have lemon curd, try lemon juice, though it might mess with the texture if you use too much.
- I found this particular blackberry curd recipe to be a little sweet for my tastes, but that’s why I used it for this cake! I wanted to balance the tartness coming from the lemon cream cheese frosting. If I were to make it again, I would reduce the sugar dramatically.
- I try to use a food scale while baking as much as possible. It’s more accurate than measuring, and I use it for all kinds of things, including making sure I’m not over-feeding my dogs. lol. The blackberry curd recipe also happens to use grams, so it was useful there as well. If you don’t have one, this one looks pretty great, and the company has a good mission as well!
- Glass bowl (and medium pot): I added this in case you don’t have a double-boiler to make the curds. If you’ve never used this method, you place a pot about half-full of water on high, and place a bowl that is bigger than the opening of the pot on top. Once the water starts boiling, turn it down slightly, so it doesn’t bubble up and touch the bottom of the bowl. This is a great option if you don’t have a double-boiler, and don’t have much need for one.
- I made a paper template with half of a general yin-yang design. This was to take advantage of the size of the pan I had. I had to adjust it slightly to make sure each side was identical, so I basically wound up trimming the edges of sponge off, and kind of eyeballing the shape. I did have to trim it a bit once it was layered, though.
If you make a cake based off of this, please let me know! I’d love to see how it turns out!
