

It’s that time of year! Cookie time! I’ve been baking up a storm this past week – mostly cookies, but also a gooey brownie peanut butter bar that is as delicious as it is messy.
I’ve also finally gotten all of my Yule decorations up! Which is always a bit of challenge for me when I’m working, but that was less of an issue this year – the only thing hampering me was my motivation, and anything else I was trying to get done. Maybe I’ve been giving myself too much to do. LOL.


I’ve been working on cards for the Craft Fair, and handling greeting card orders (yay!), and I just sent out all of my holiday packages to friends and family. I always try to send something homemade, like cookies, jam, bath salts, lotion, etc. The shipping is honestly about all I can afford most years. This year, I sent cookies and some blackberry jalapeno jam I made with the blackberries I picked this fall. I only sent the packages out yesterday, and one already made it to it’s destination!
The person who received this package is my oldest friend – we’ve known each other since we were 5! She loved the gift – and mentioned that the small gifts I sent for her kids are a grateful gesture – both her and her husband have been laid off due to COVID, and the tree might be a little light underneath this year. She’s also dealing with all the feelings I think we’re all dealing with this year. I wish I could go visit her, but of course, I can’t. But thankfully, we can talk on the phone, or chat online, and help each other get through everything together. It’s been a horrible, terrible, no good year, and I’m glad to spread a little extra love when and where I can. The world could use more of it!
I might have mentioned this already, but I tend to spread my love through food. And I’m here to share some of that with you! I made several different types of cookies this year: sugar, snowball, ginger molasses, chocolate brownie peppermint, snickerdoodle, and the one I’m going to share with you today: my Raspberry Holiday Cookies!
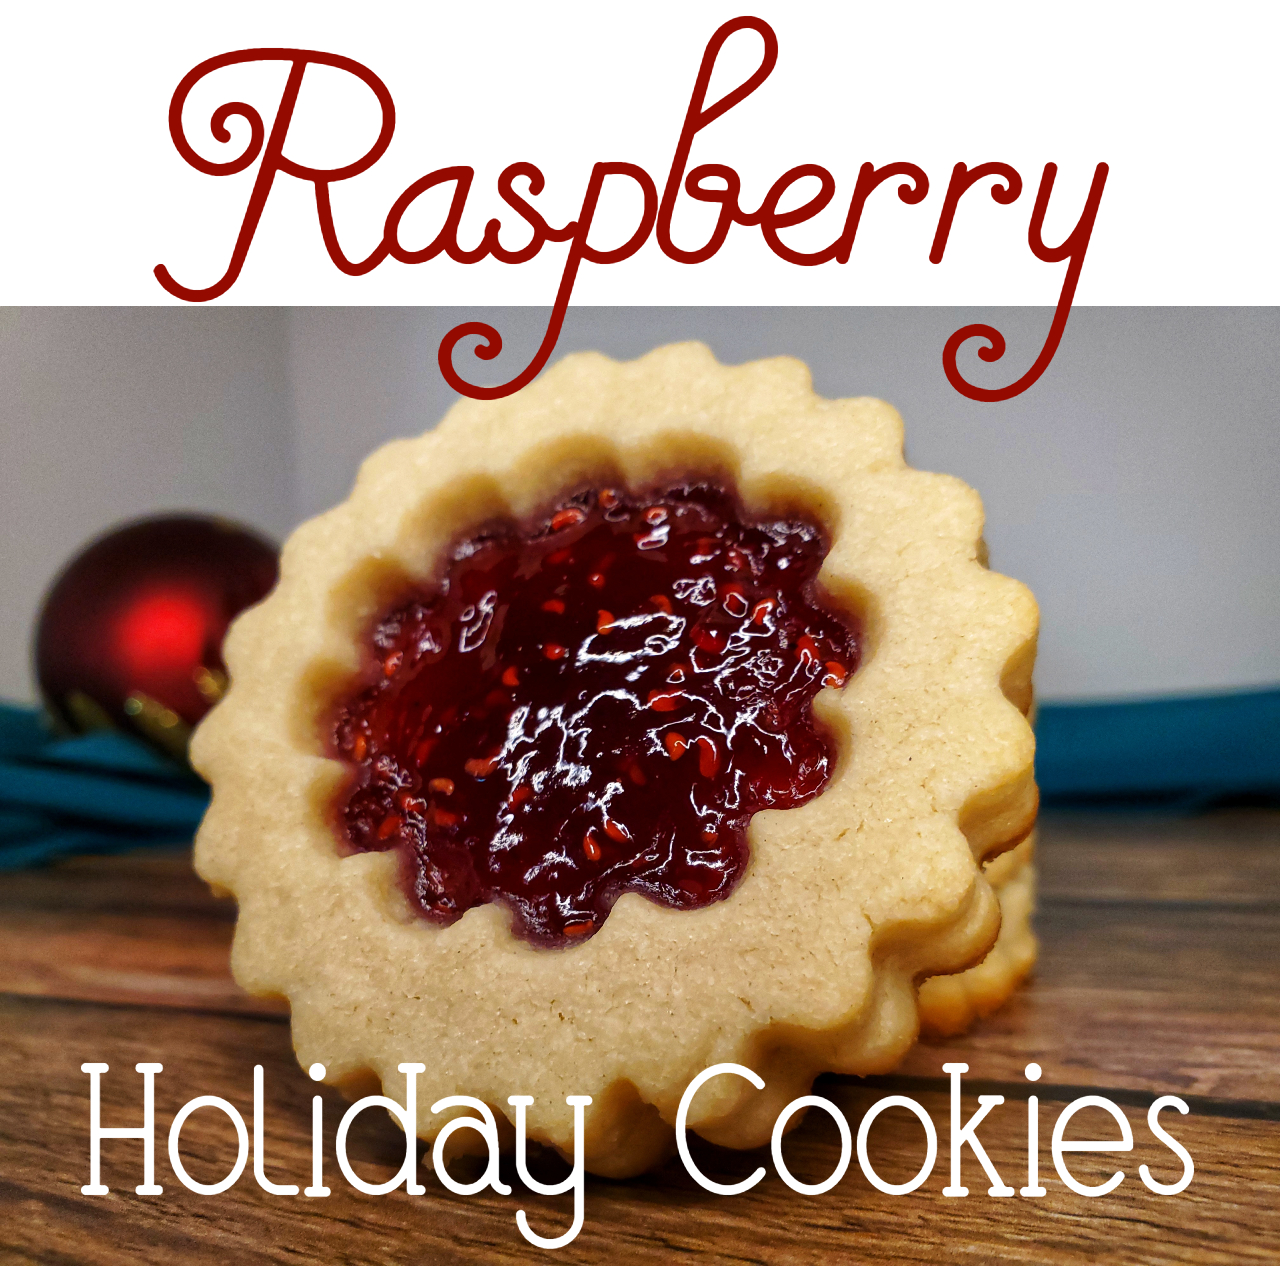
These are my roommate’s and her mom’s favorite – akin to thumbprint cookies, but a little more fiddly. :) With a buttery short-bread like base, and a generous dollop of yummy jam, these are a great addition to any cookie tin, and will go quickly, so I suggest making a double batch!
Level: Easy/Medium
Serves: ~32
Prep Time: 75 minutes (60 minutes of that is chilling time)
Cooking Time: 7-10 minutes per batch
Total Time: ~2 hours (plus more for cooling)
Ingredients:
– 1 cup (226g) unsalted butter, softened
– 1 cup (226g) white sugar
– 1 egg
– 3 cups (325g) all-purpose flour
– 1/2 tsp salt
– 8oz raspberry jam (or your choice of preserves)
Tools:
– various sized mixing bowls
– wooden spoon
– measuring cups
– measuring spoons
– cookie cutters, one slightly smaller than the other (2″ diameter max)
– wire cooling rack
– small spoon (about 1 tsp holding size)
– baking sheets
– parchment paper
– plastic cling wrap and/or silicone baking mat
– rolling pin
Method:
- In a large bowl, cream together butter and sugar until light and fluffy. Add egg and beat thoroughly.
- In another bowl, sift flour and salt together. Add, one cup at a time, to butter sugar mixture, mixing all the way in before adding more. The mixture will be stiff as it comes together, but pliable.
- Roll dough out to 1/4″ thickness onto a silicone baking mat or between two sheets of plastic wrap. Place on empty baking sheet, and place in fridge to chill for up to one hour. You may have to divide dough into two, and can stack the rolled out dough out between plastic wrap to keep them from sticking to each other while chilling.
- Once sufficiently chilled, preheat oven to 375℉, and line baking sheets with parchment paper.
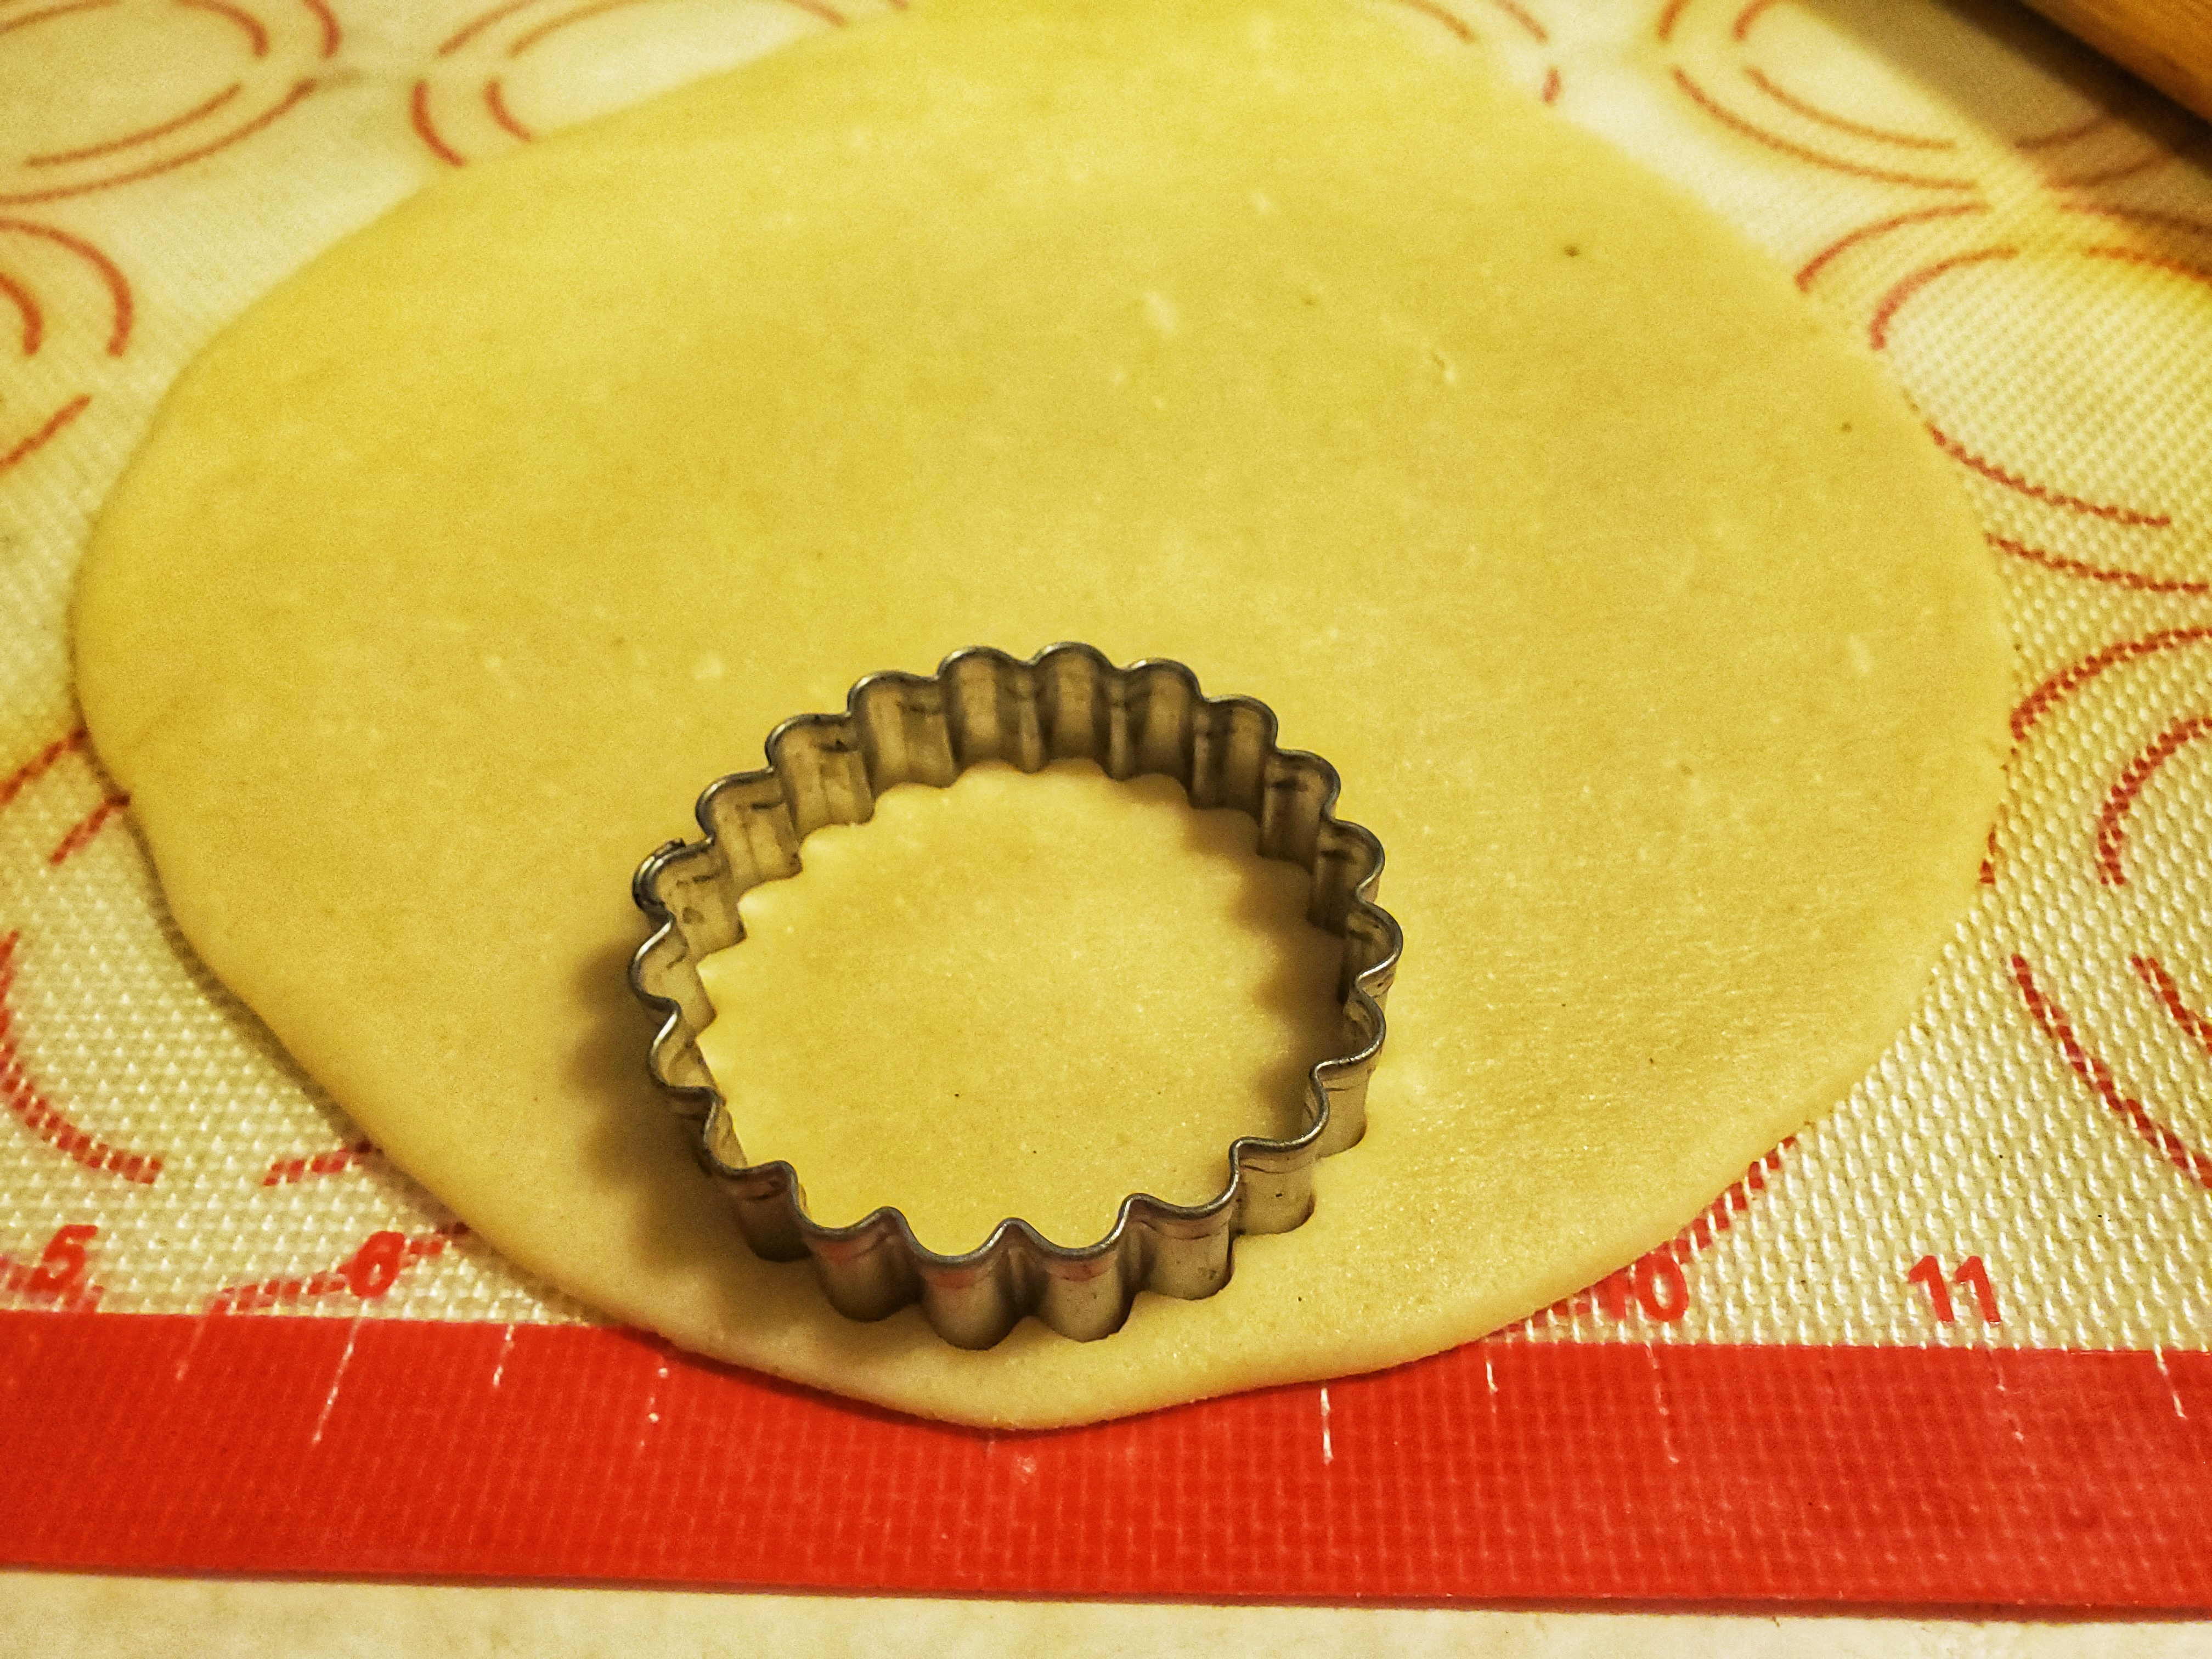
- Using cookie cutters, use the larger of the two to cut bases for the cookies, and place on the prepared cookie sheets.
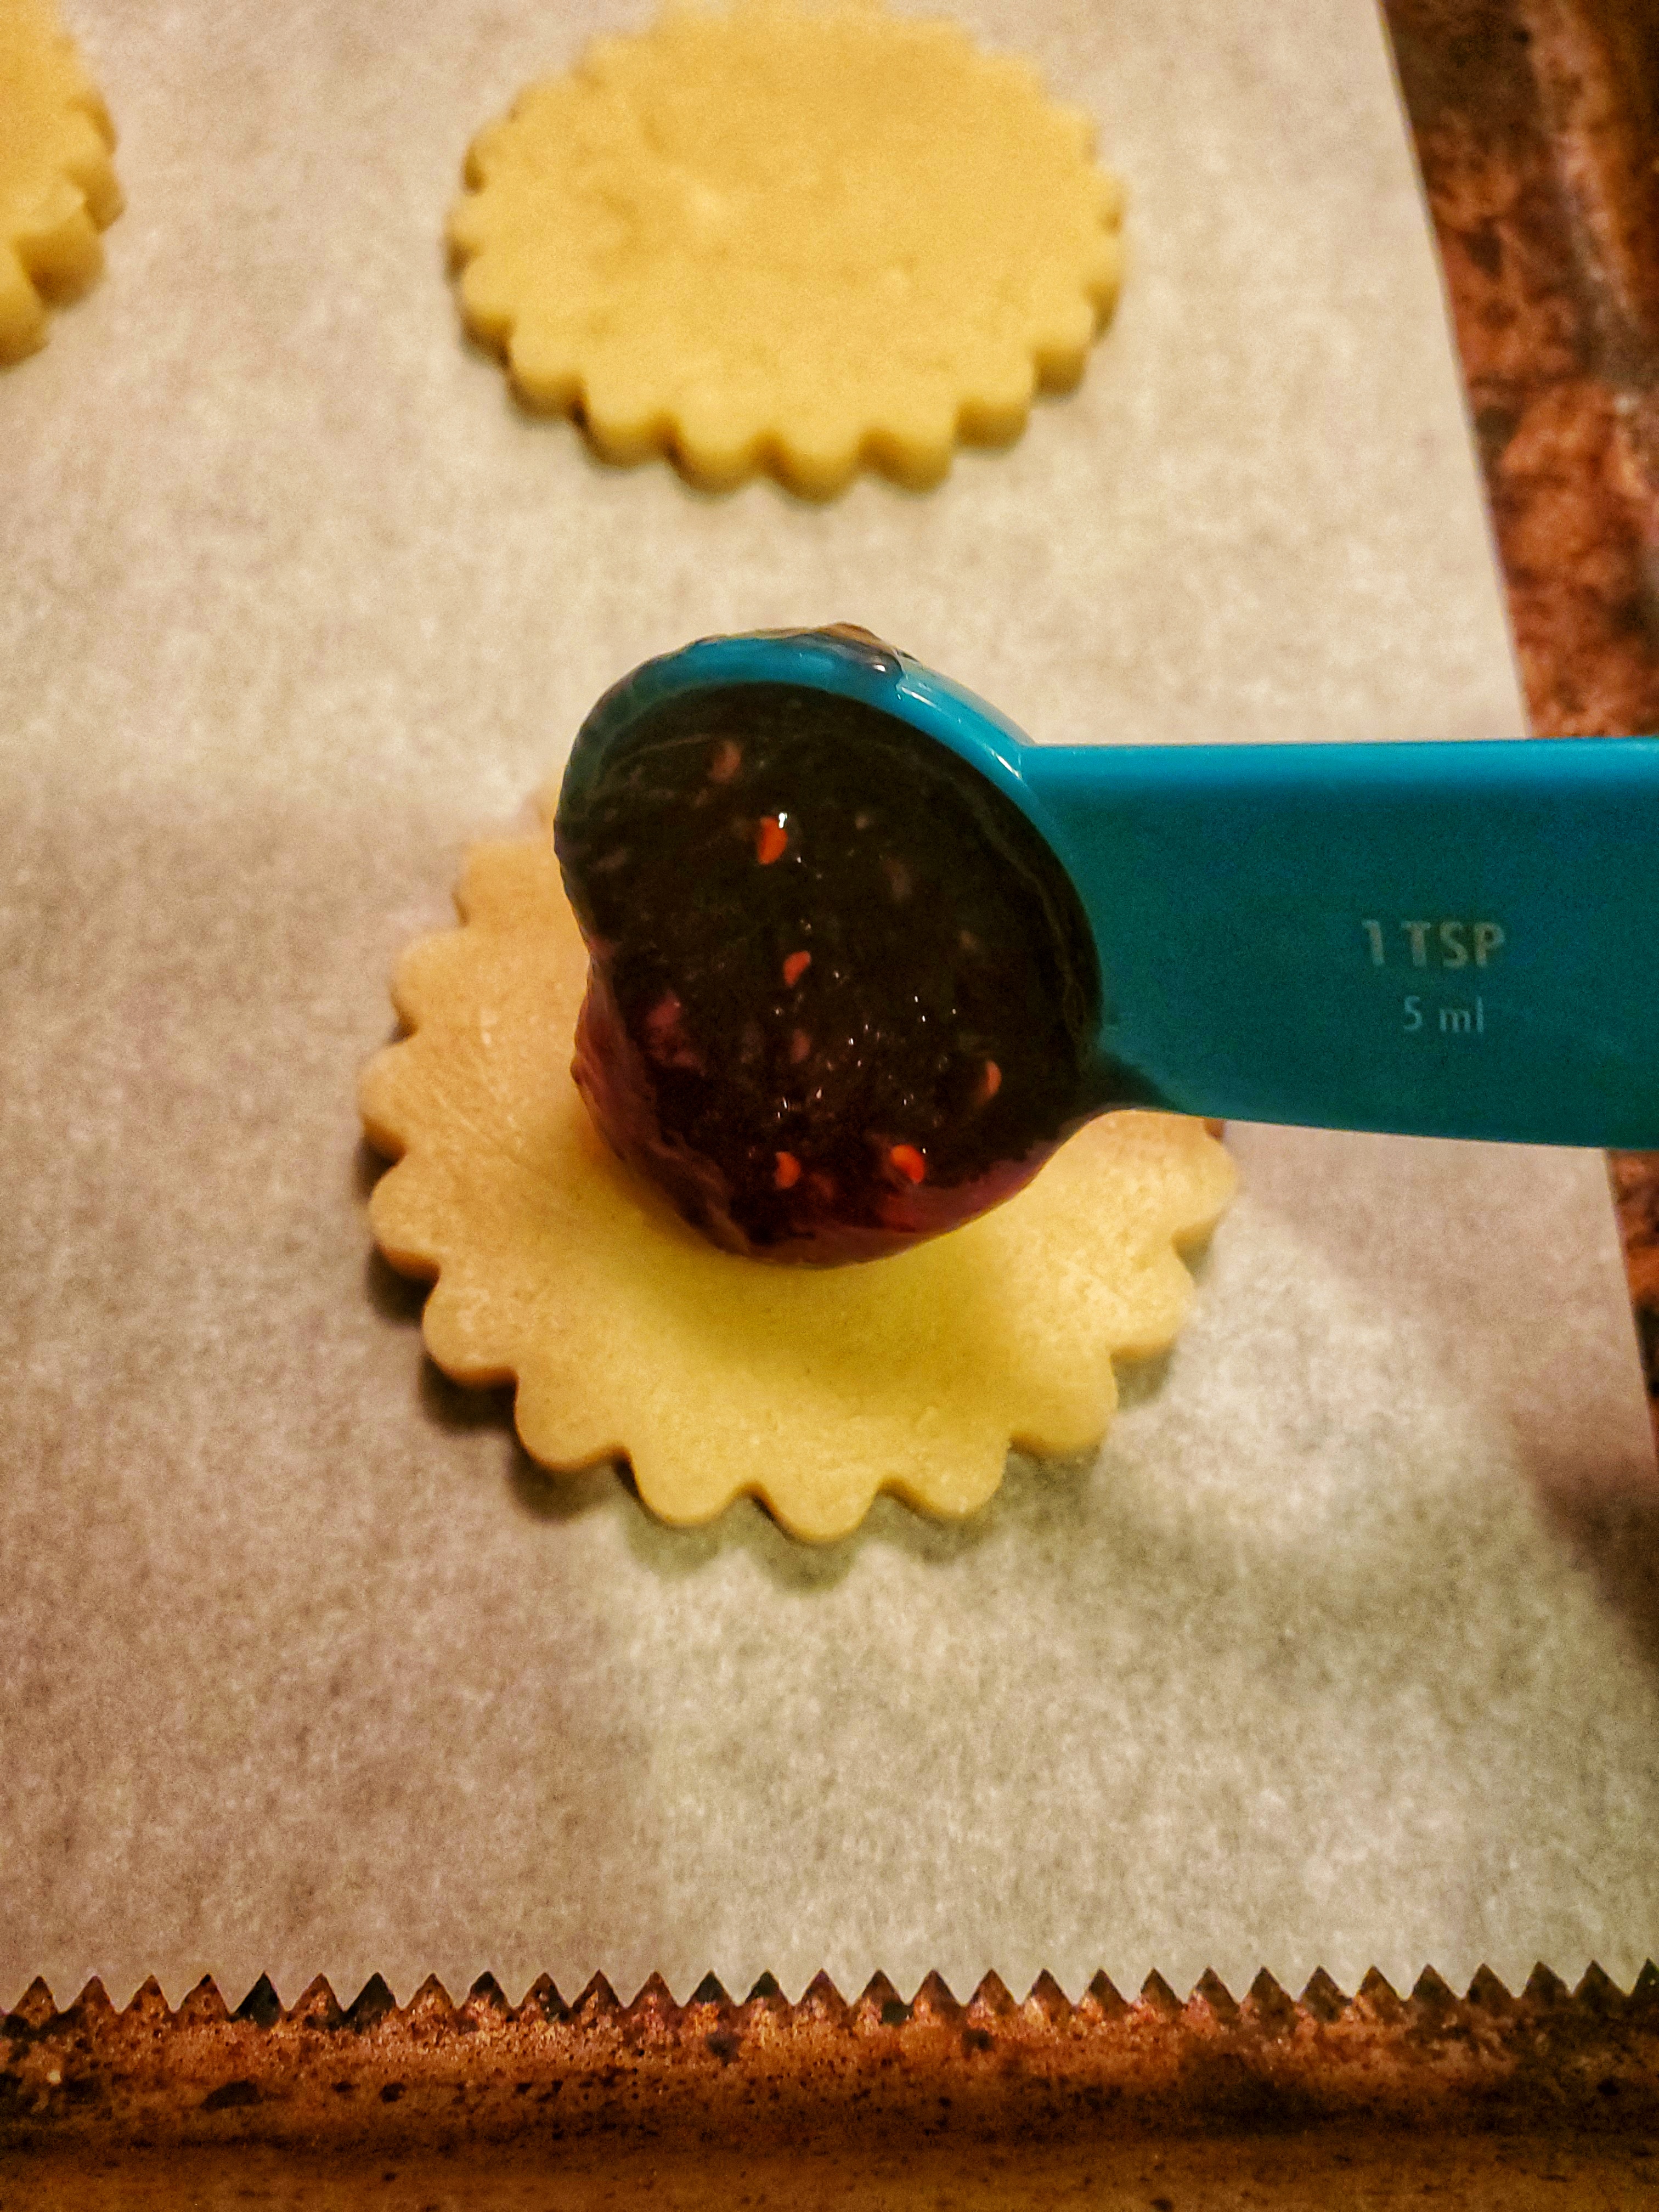
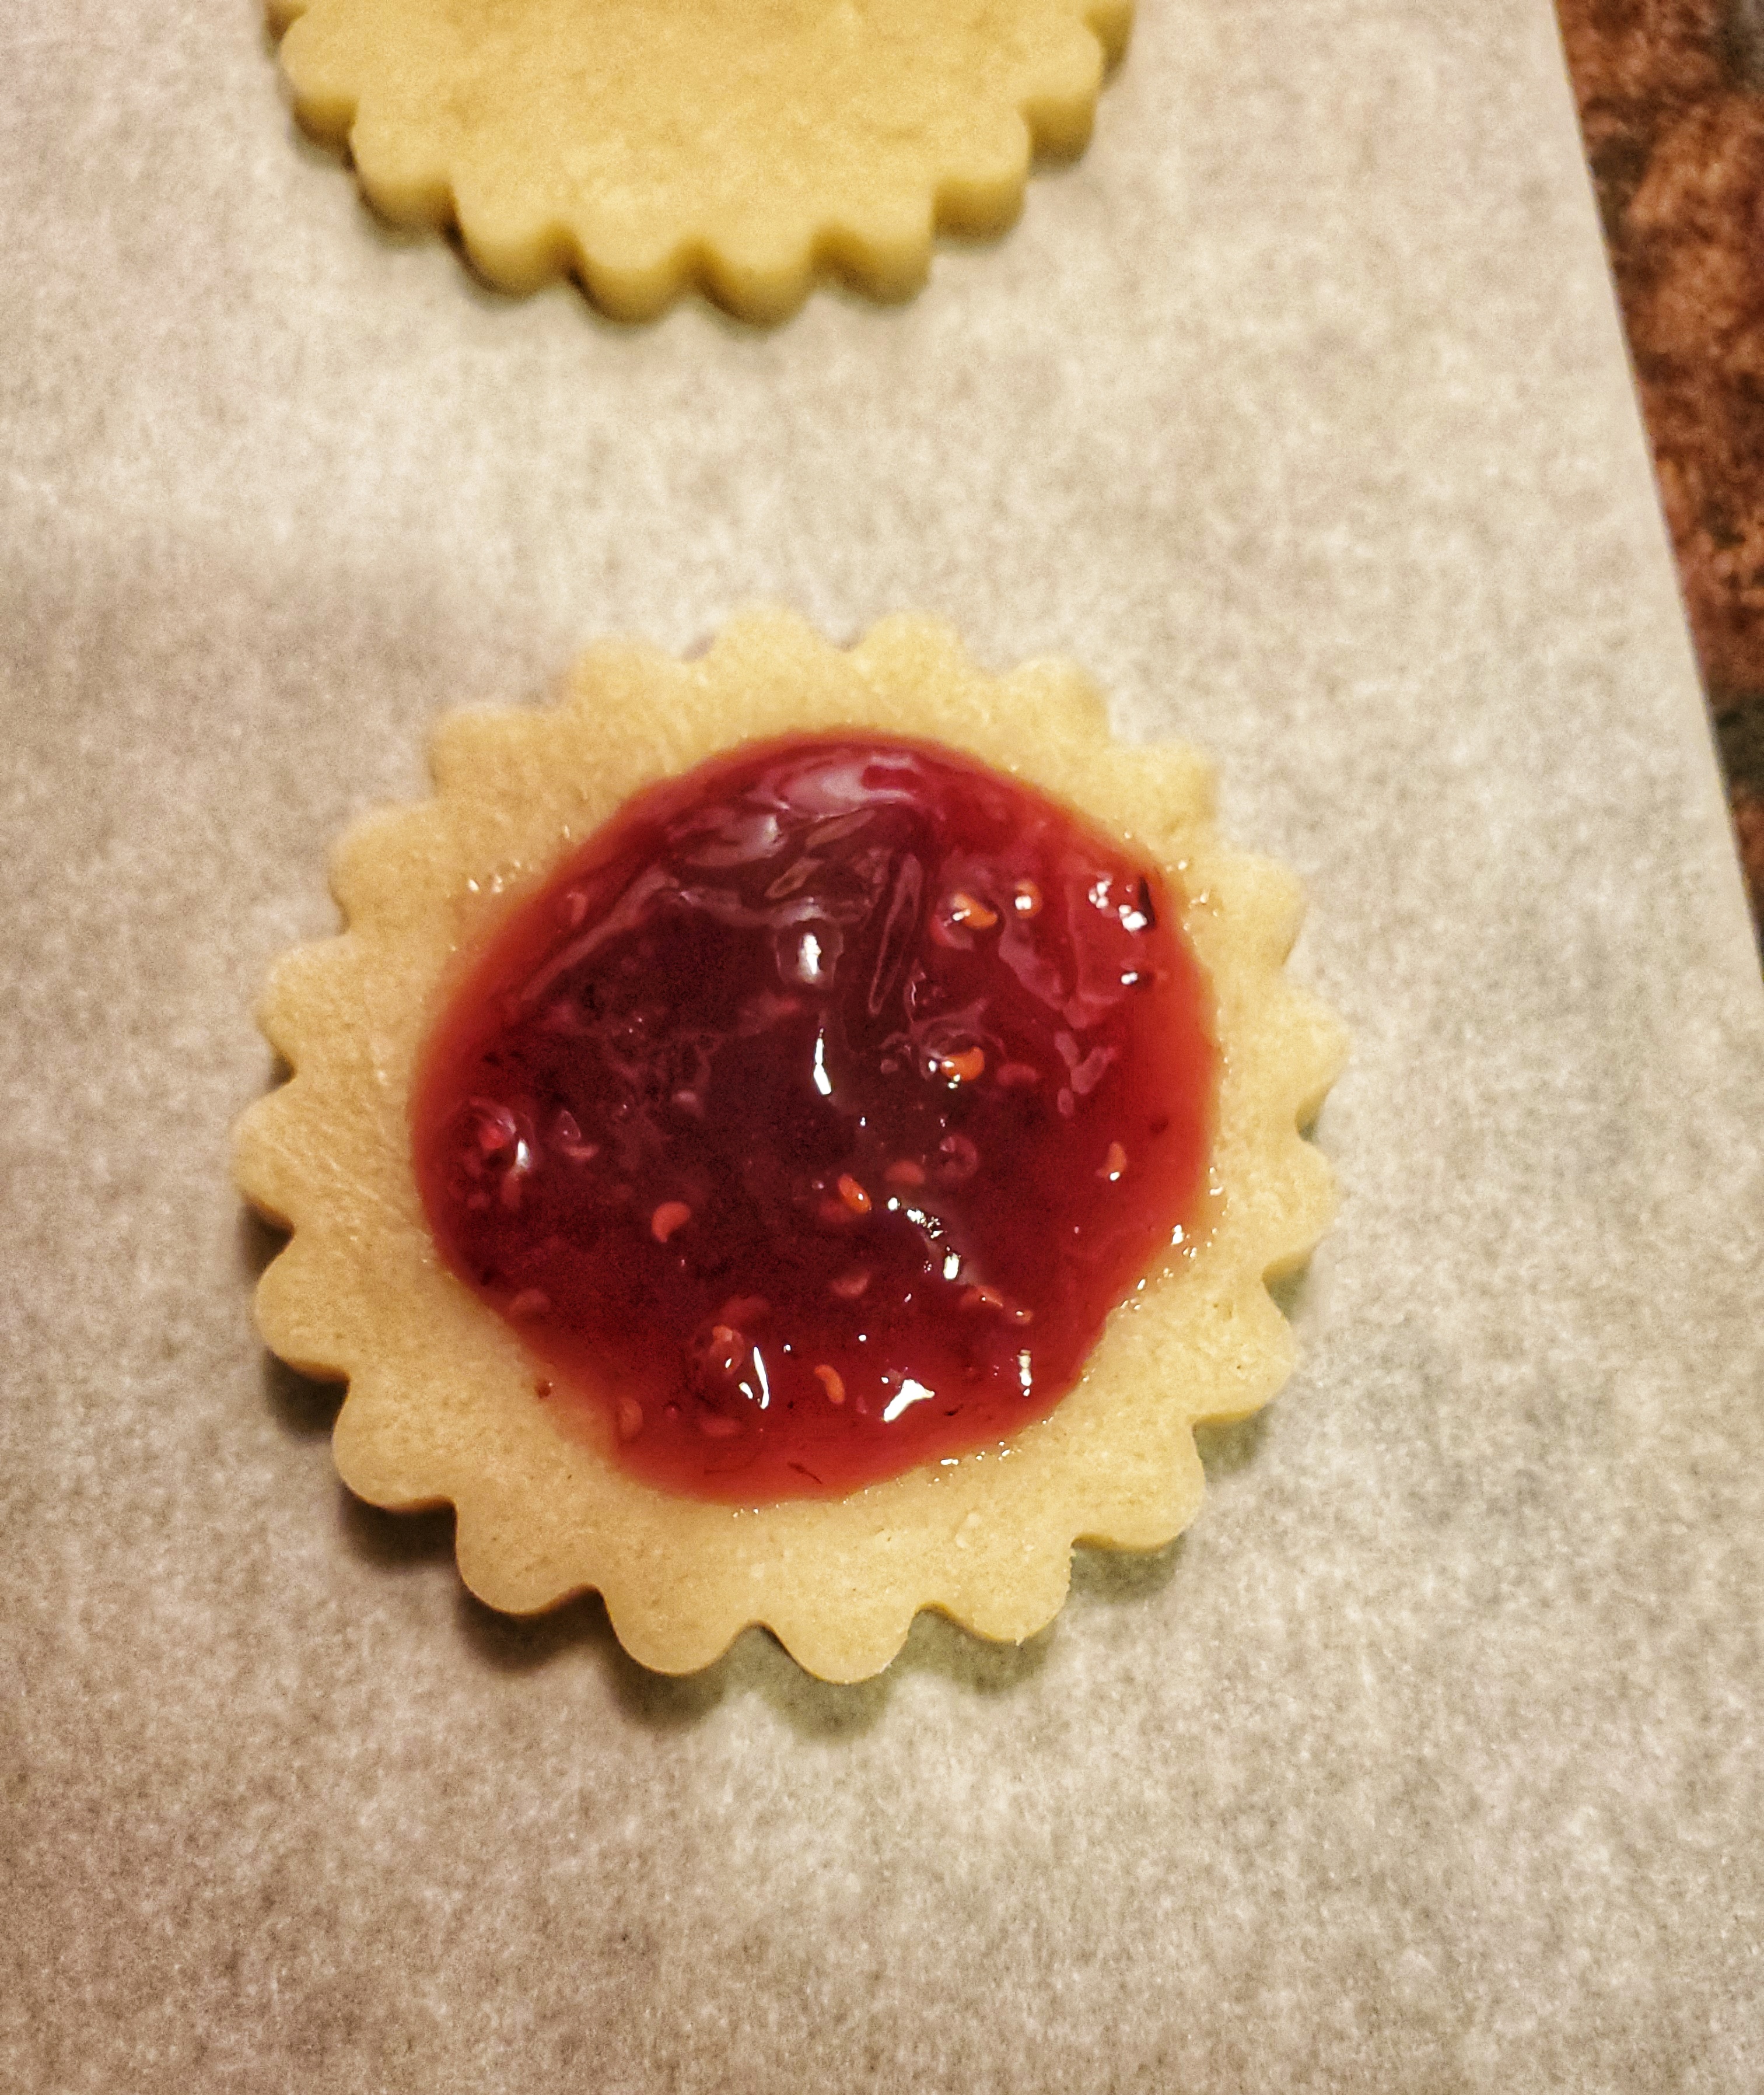
- Using a teaspoon or a small spoon, place dollops of jam in the center of the bases. Use the back of the spoon to gently push the jam out, leaving a 1/4″ border.
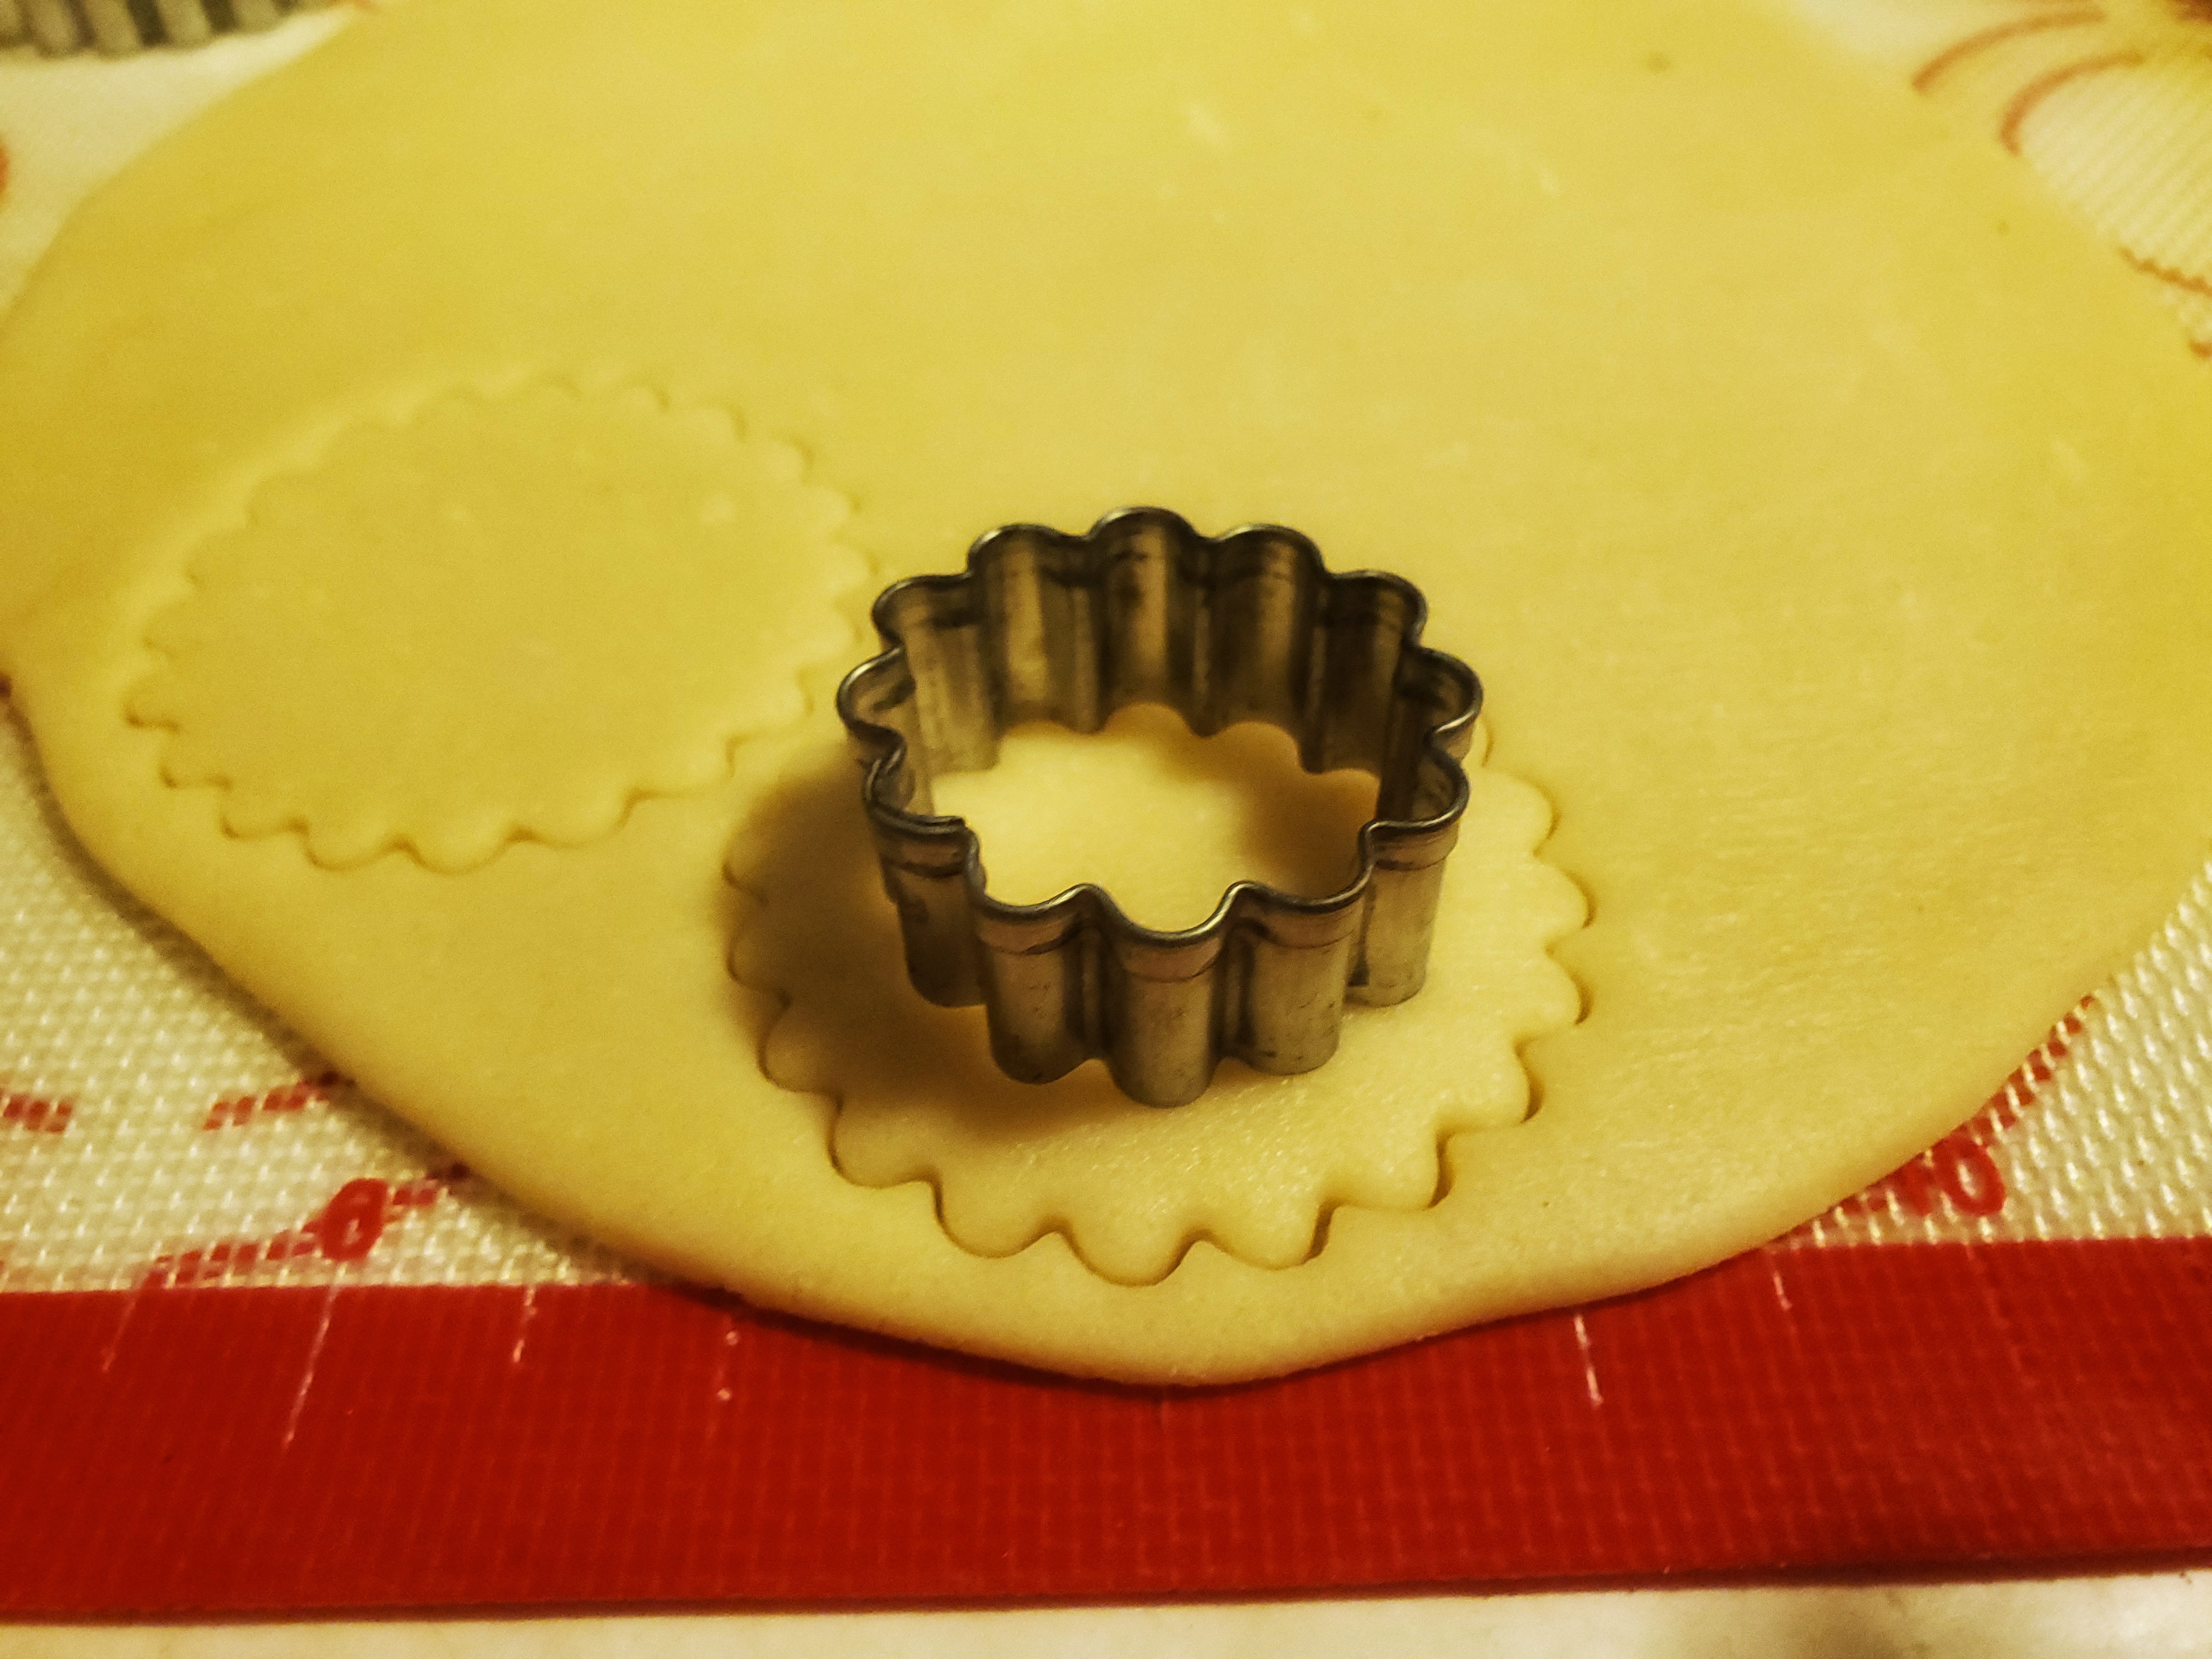
- To make the tops of the cookies, use cookie cutters to cut the same size as the base, and then cut the center out of them to create a “wreath” like top. Using a spatula, transfer tops to the prepared cookie bases, nudging them into place gently with your fingertips.
- Bake cookies for 7-10 minutes, until the edge of the bottoms of just starting to brown, and jam starts to bubble. Let cool on sheet for a few minutes, before transferring to wire rack to cool completely.
- Continue to roll, chill, and cut out cookies until all the dough is used up.
- Store finished cookies in an airtight container for up to a week (but they probably won’t last that long).
Notes:
- I highly recommend rolling the dough out before chilling it. I learned this trick when reading a blog about sugar cookies – and it makes total sense! Roll out the dough when it’s more pliable, then it’s ready to cut, and easier to move the cutouts without distorting the shape! Depending on how warm your kitchen is, you’ll likely have to roll out and chill the dough between each batch.
- You don’t want to skimp on the jam! It’s going to bubble up and help fill in the window made in the cookie top. Plus, you want a good cookie-to-jam ratio.
- I found a metal spatula was easier to slide under the cutouts to lift them up as the dough started to warm.
- Depending on the shape of your cookie cutters, the tops might be a little fiddly to place properly on the bases – chilling the dough will help a LOT with this, so don’t skip this step! When the dough is soft, it doesn’t like to keep it’s shape, and will be much harder to pick up and move into place.
- I haven’t tried them this way, but I bet you could make thumbprint cookies with this recipe, which will give you the same yumminess with less work. :)
- Set the jam out to warm slightly before using. If it’s warmer, it’ll be easier to scoop and spread.
- if the size of your cookie cutters is different, you’ll get a different amount of cookies. For me, using two inch cookie cutters for the base, this recipe yields about 32-40 cookies. I sometimes don’t roll out the dough as thin as I should for the first batch, so I sometimes get a little less than 40.

Rolling out the dough on a silicone mat and chilling it makes for easier cutting! 
Use the smaller cutter to make a “window” or “wreath” top piece! 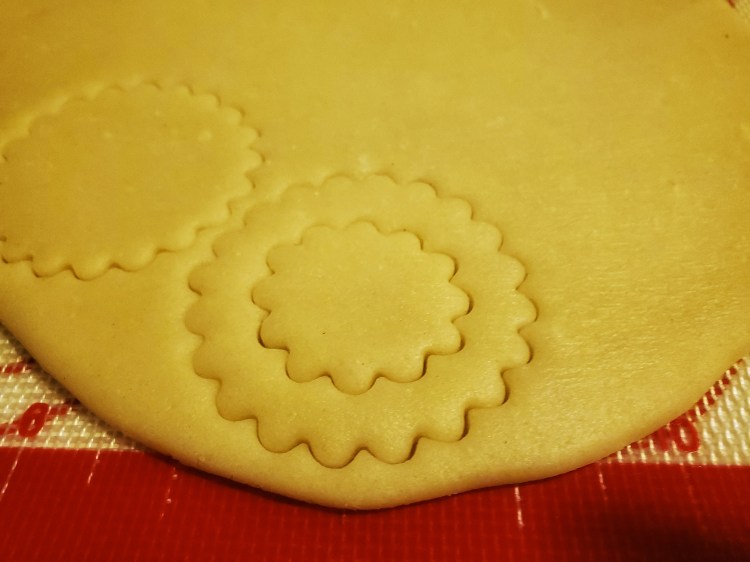

Using a teaspoon measuring spoon like this one makes for easy jam placement. 
Only a 1/4″ from the edge. 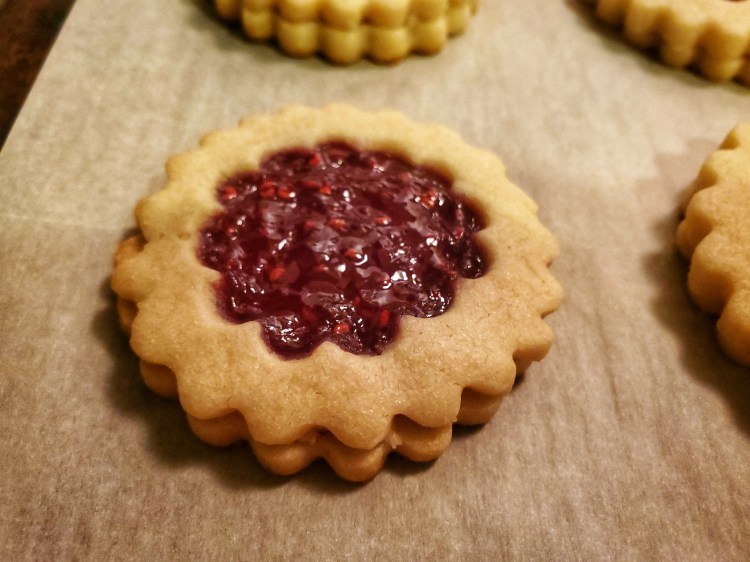
Wait for the edges to just brown, and the jam to bubble! 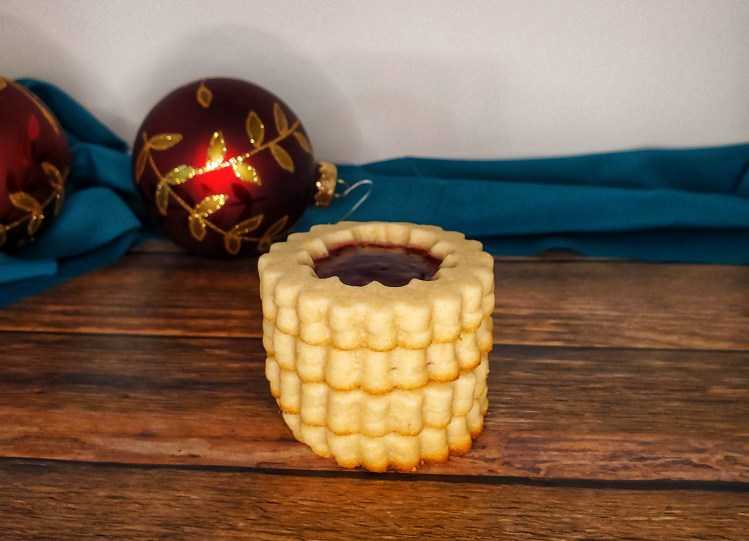
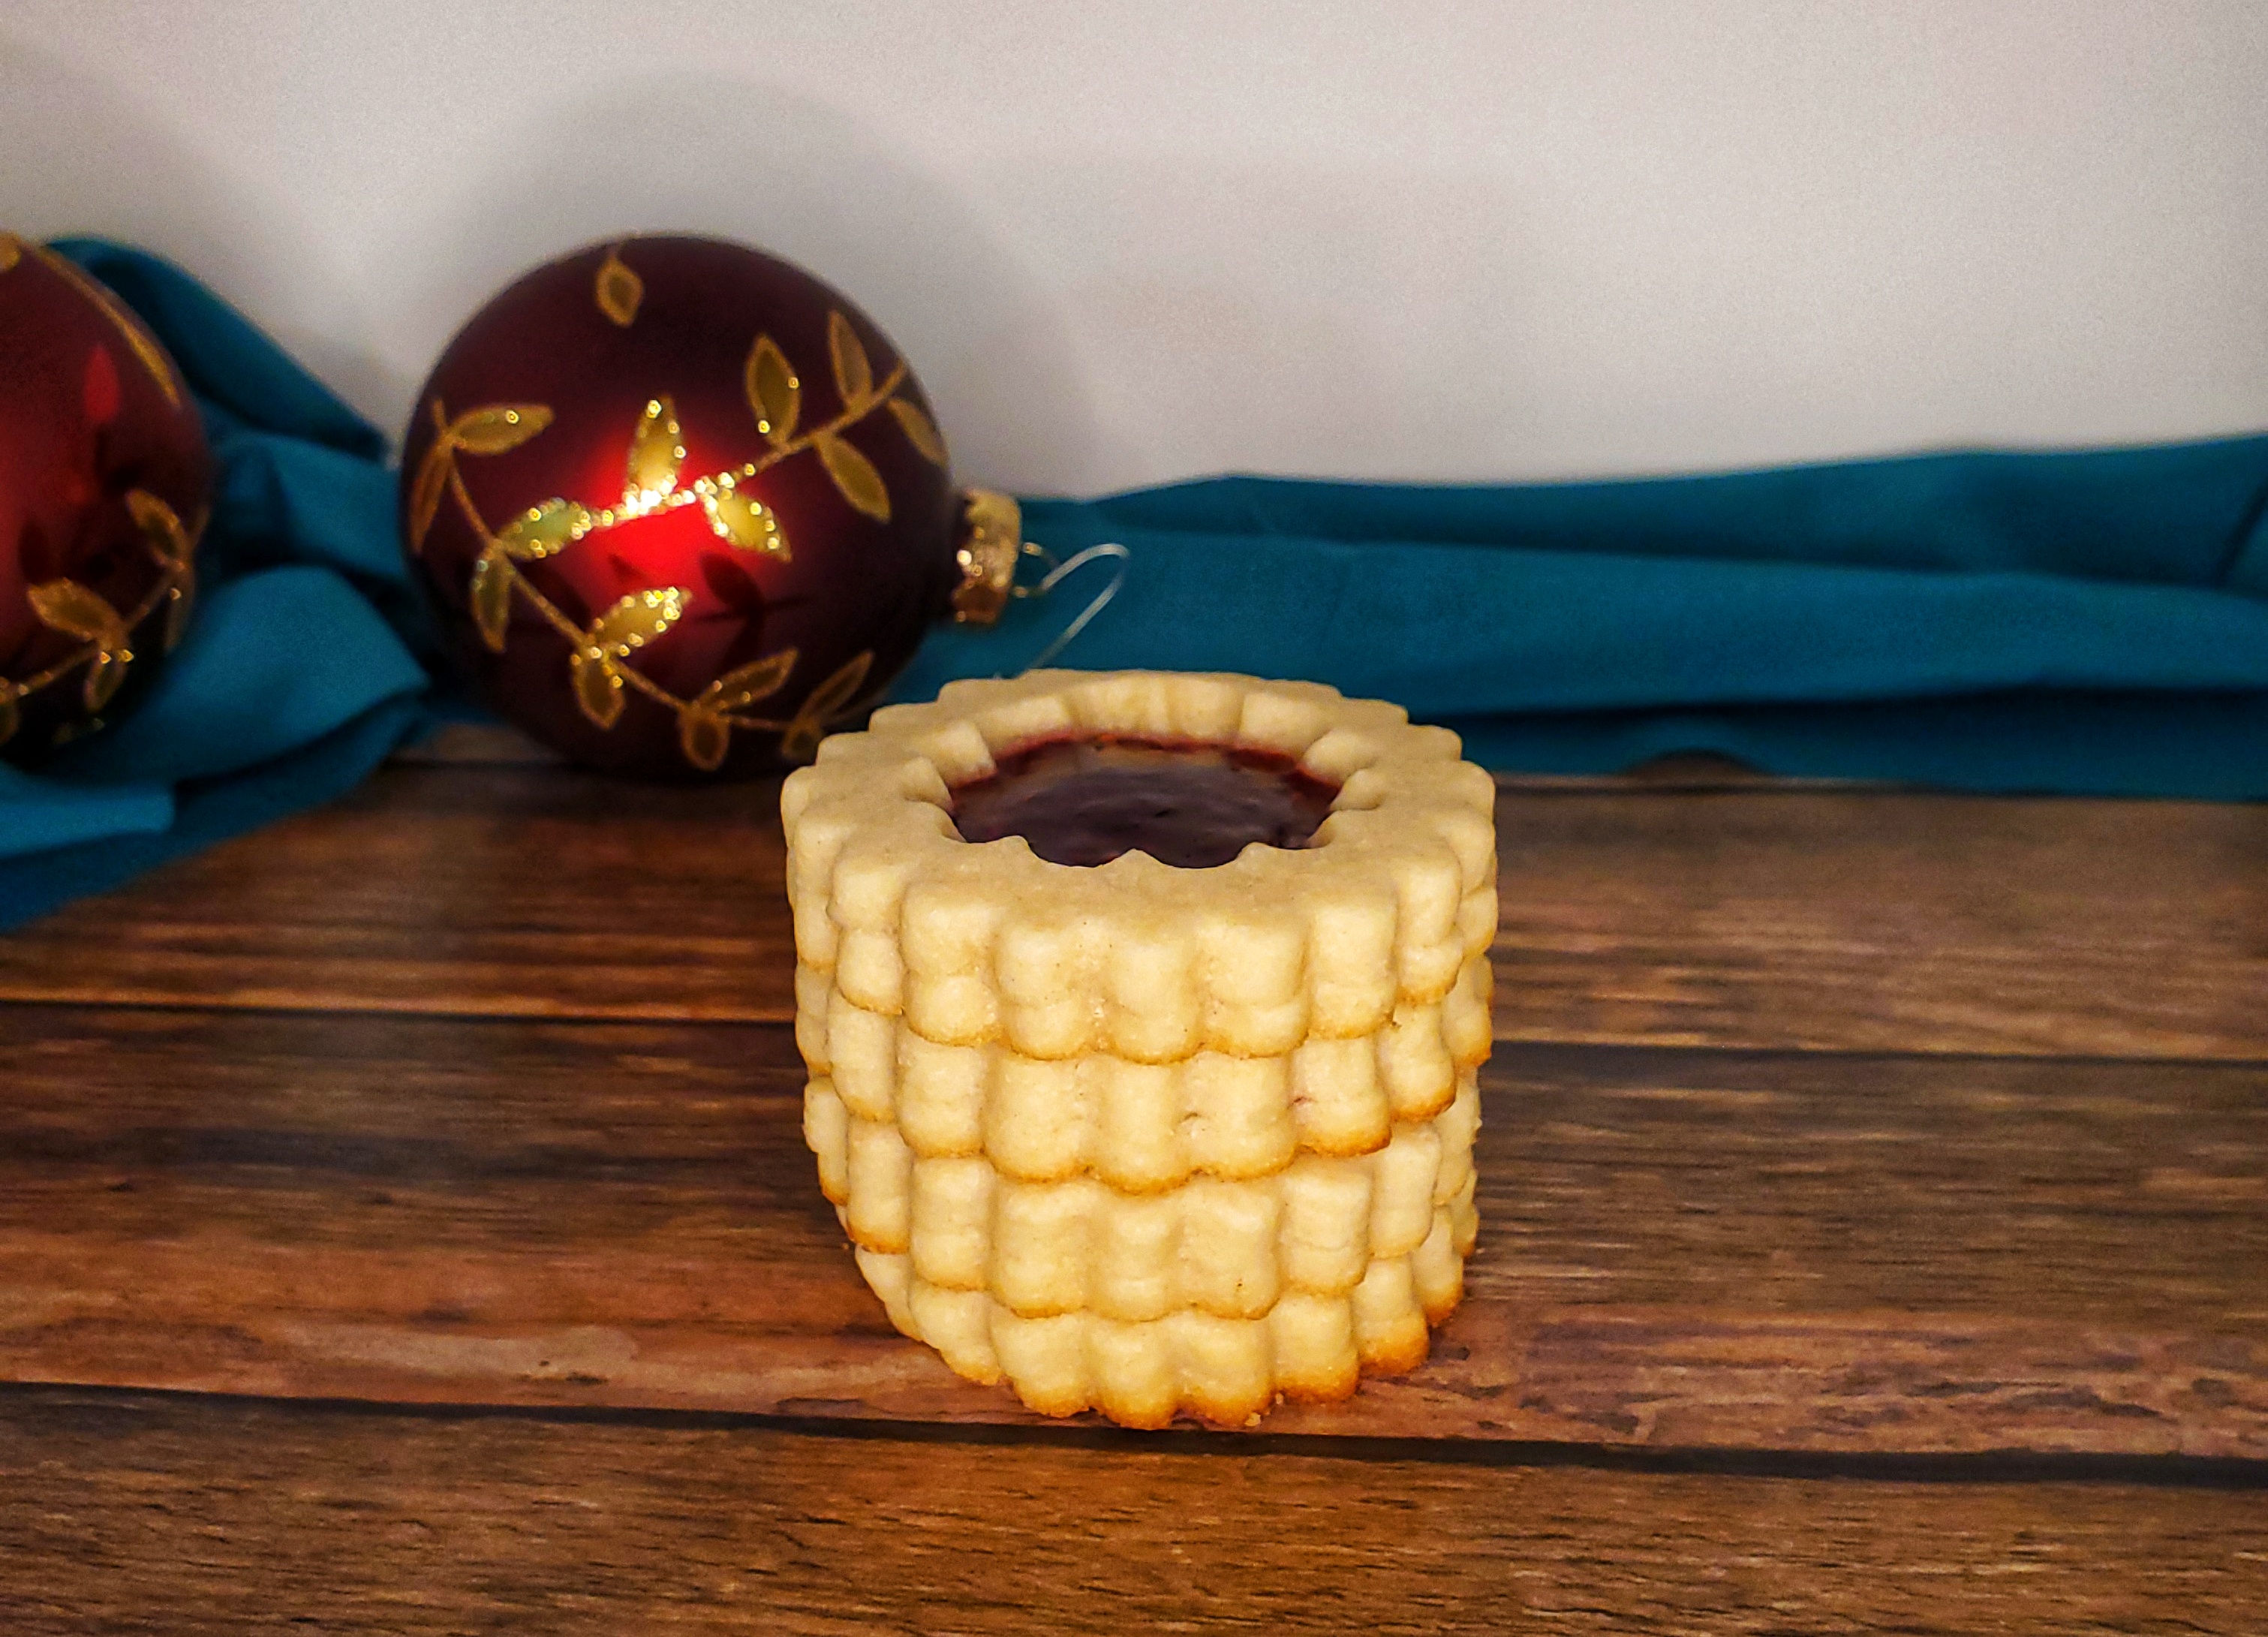
These were the four most perfect ones I made. 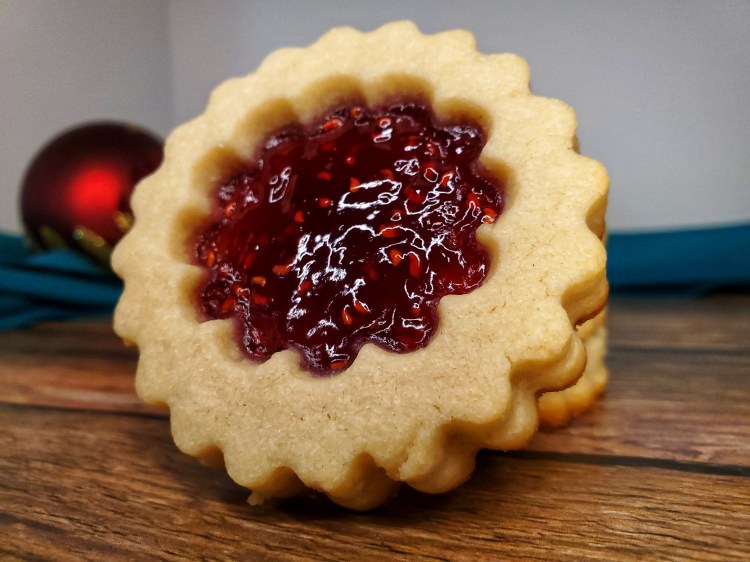
YUM. 
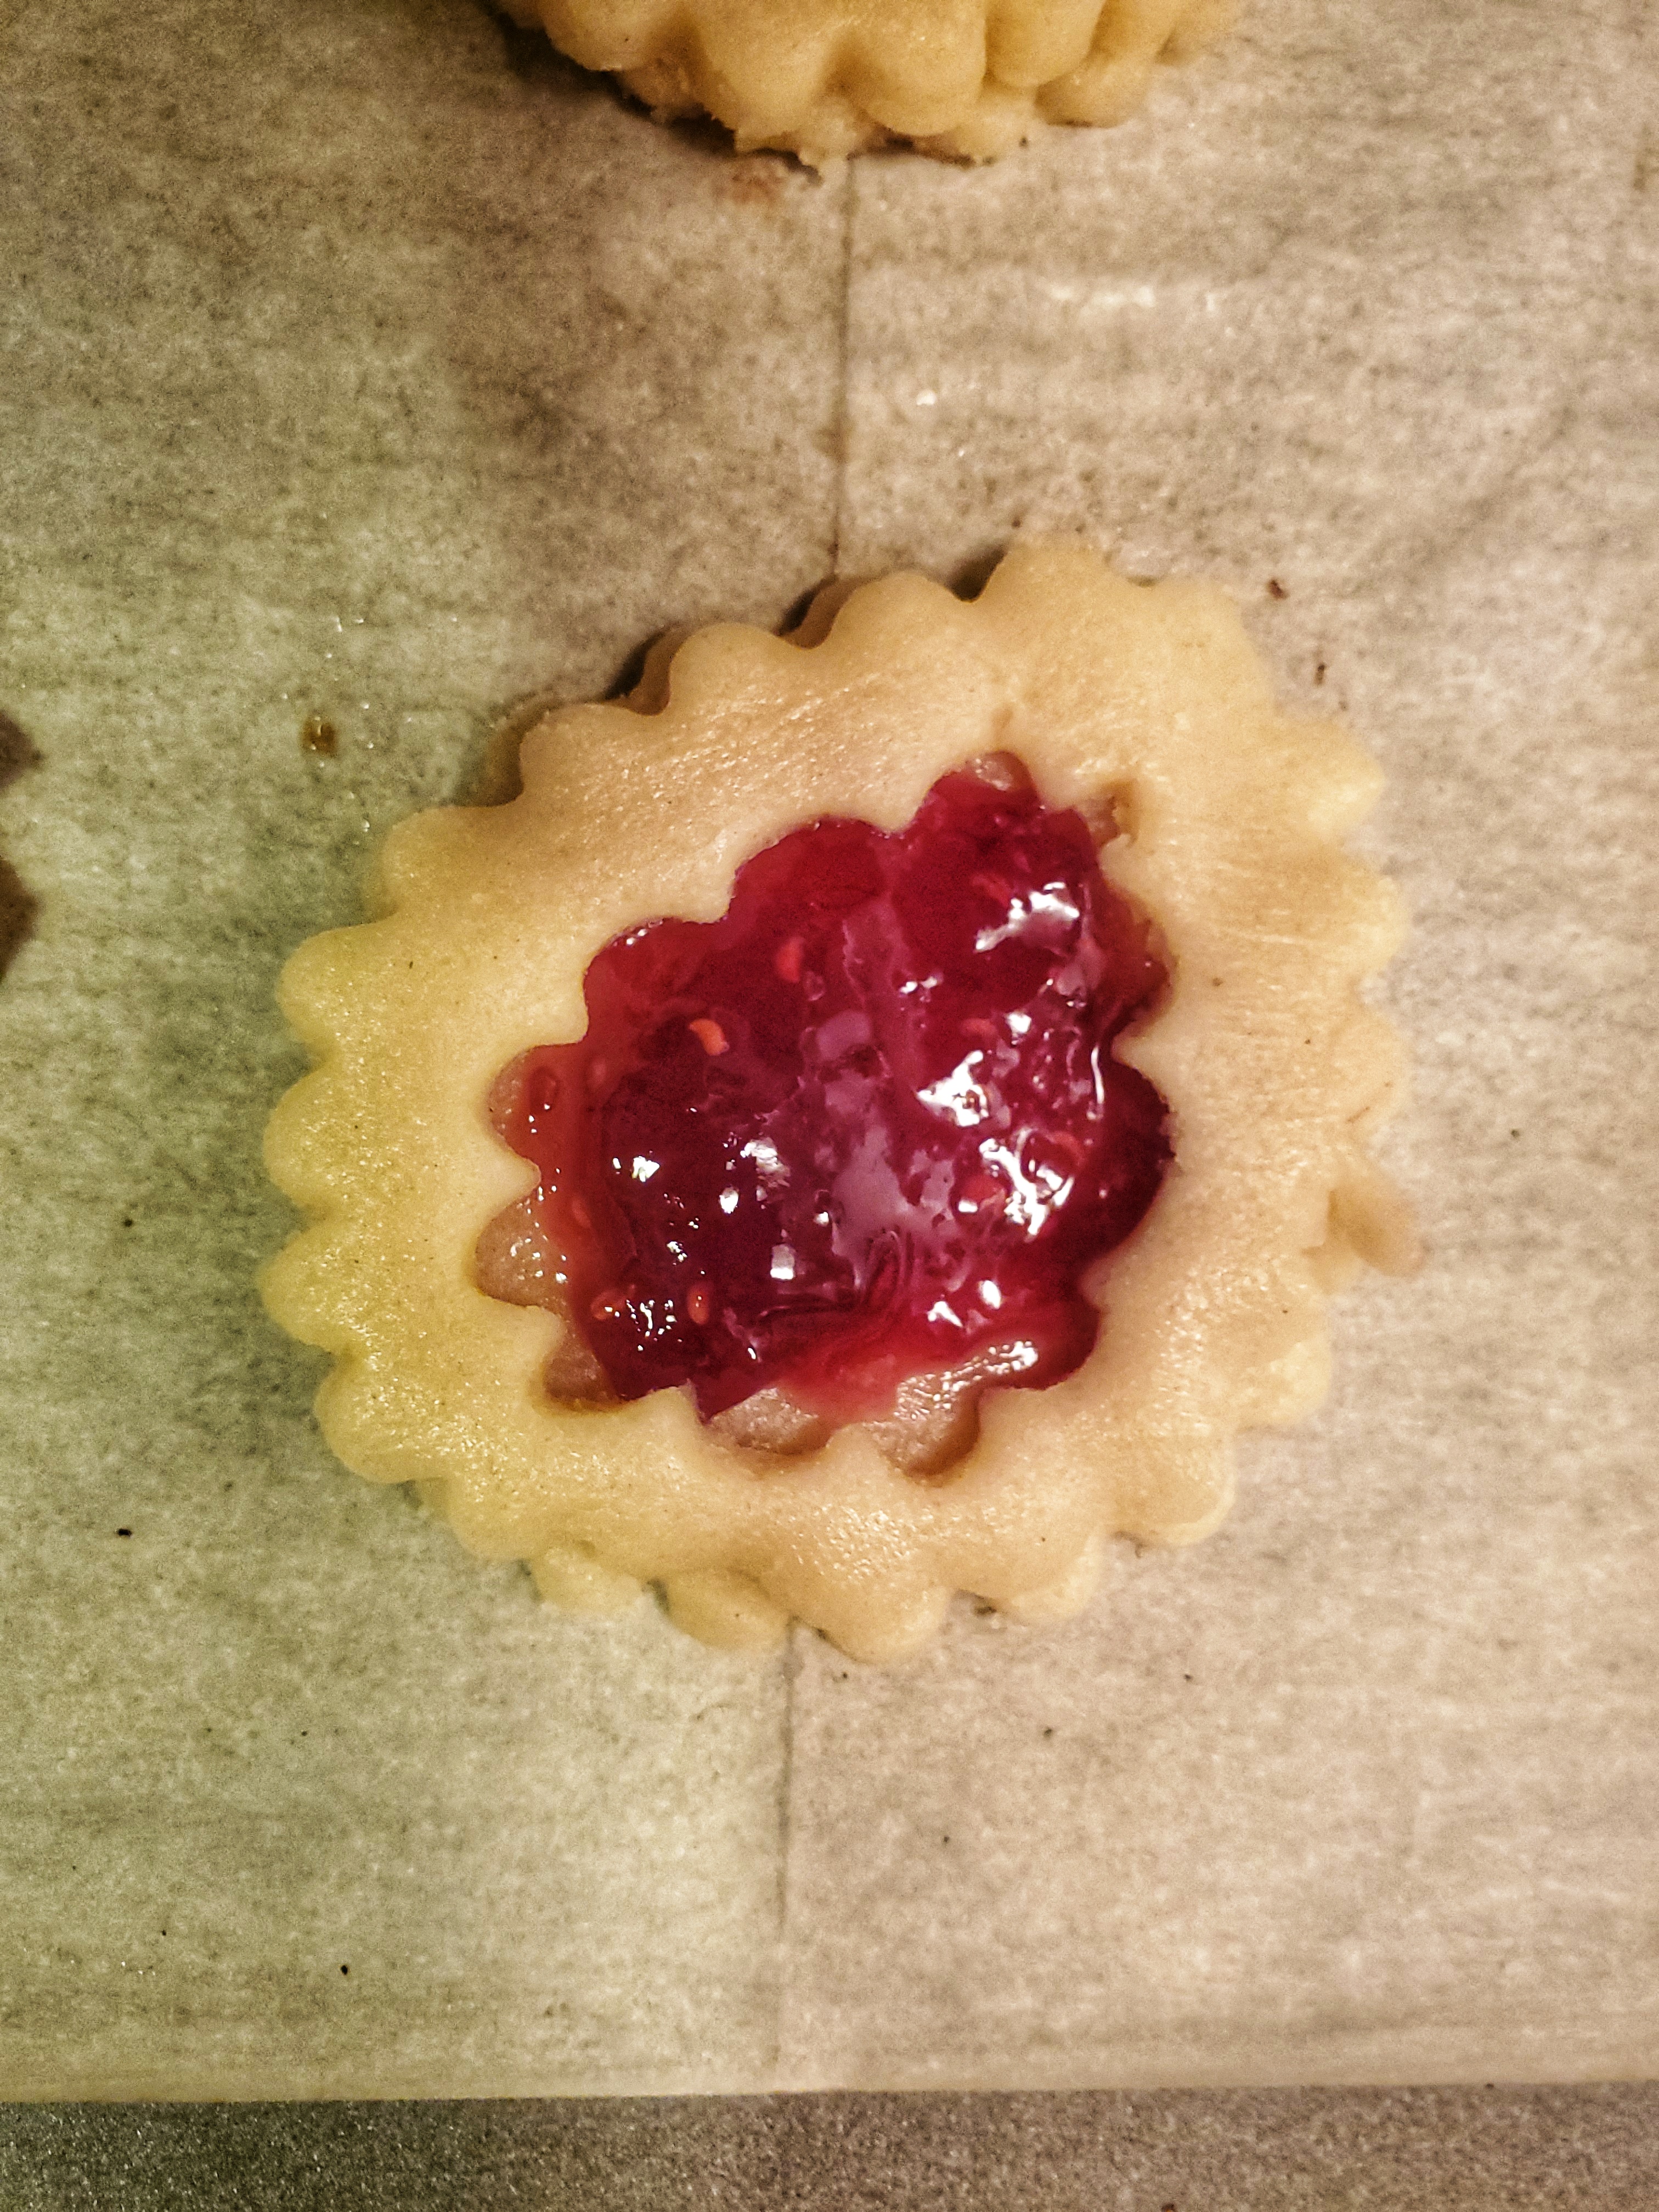
And this is what one that’s made when the dough is warm looks like. yummy, but wonky. Chill your dough, kids!


Hope you’re able to try these treats! I made an extra batch the other day, because we’d already went through quite a few, partially because I sent some out. I think I’m going to go eat another one right now, though, now that I’ve been talking about them. LOL.
Keep it crafty!
– Raven
