
CHOCOLATE.
You’re hearing me, right? That delicious, luscious, delectable, made-from-a-fruit-pod treat that’s been the source of inspiration for the most amazing dishes (and sculptures), both savory and sweet. I’m partial to the bittersweetness of dark chocolate, but all chocolate is good chocolate.
Oh, yeah.
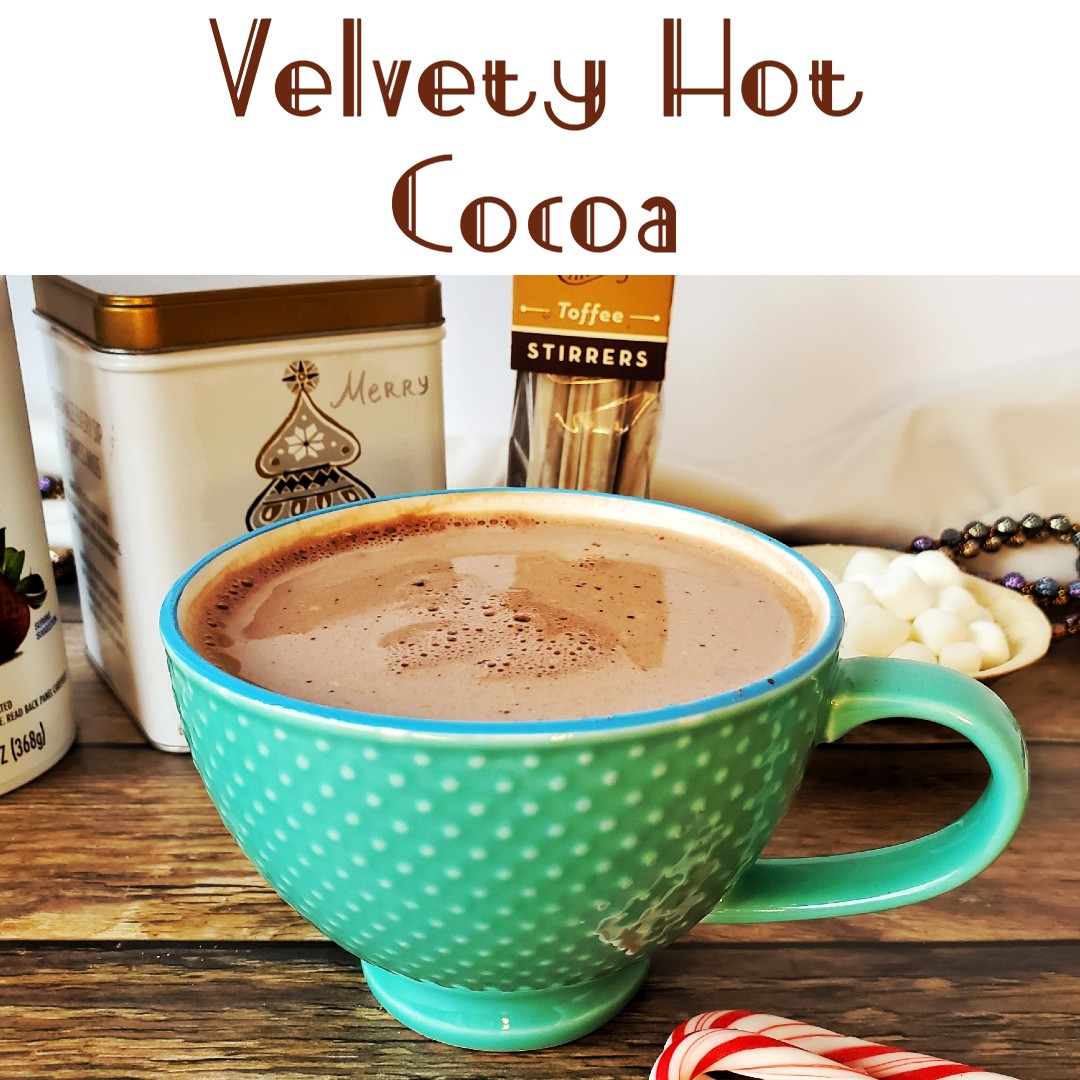
This post, is all about a specific form of that food, the velvety hot cocoa. Now, you might not know this, but the history of hot cocoa goes back several hundred, if not thousands of years. It looked a hell of a lot different then, but making a brew of cacao, peppers, vanilla and corn was considered a delicacy to the peoples living in Mesoamerica. It was quite bitter and served cold, but sometimes honey was added. The seeds from the fruit pod were traded like gold in Mexico, Central America, and South America, and it’s thought that the sweet, white pulp around the seeds is what initially had those peoples cultivating the cacao tree.
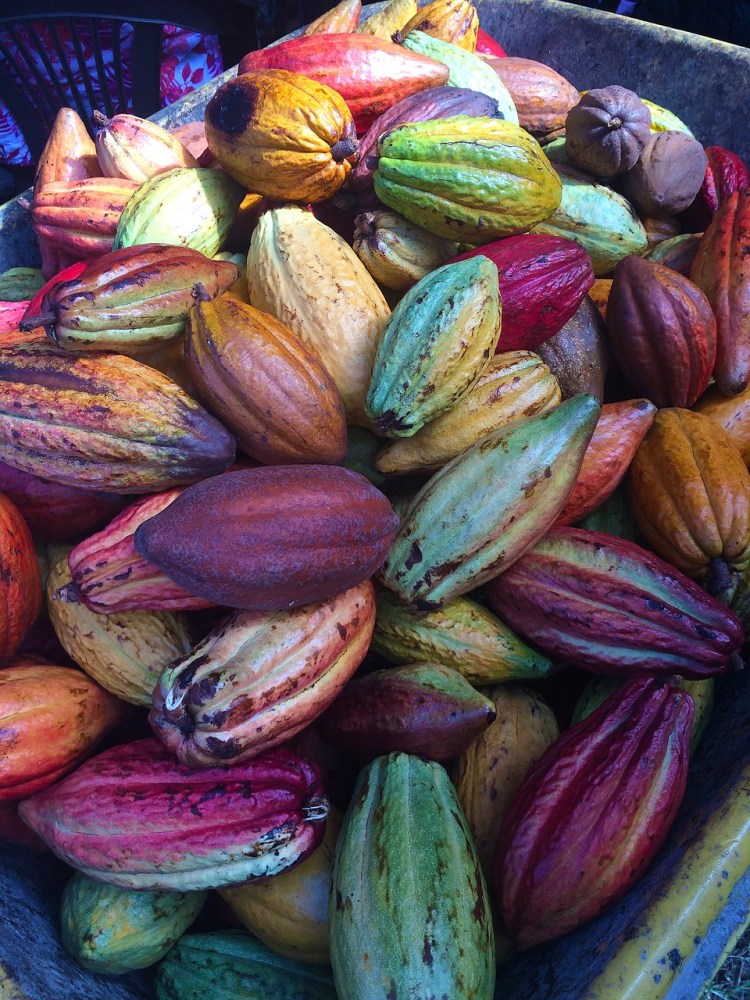
The cacao pods – which grow out of the trunks and branches of the cacao tree! 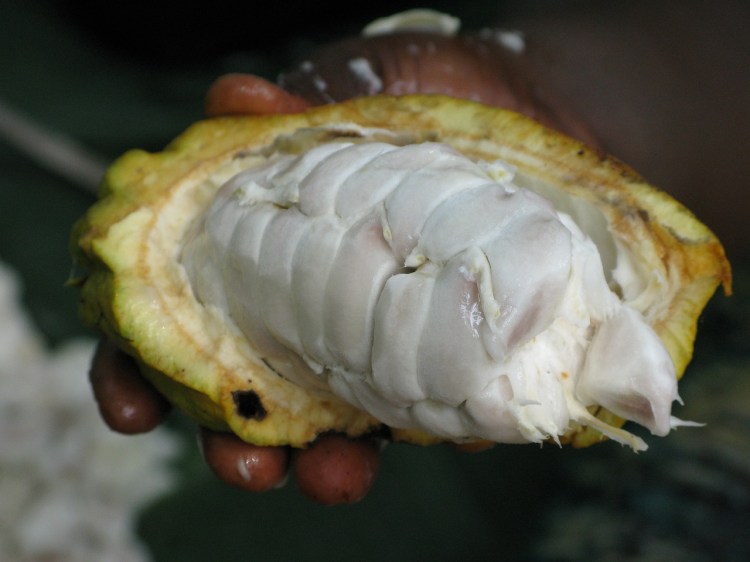
The sweet, white flesh of the cacao pod. 
Dried cacao seeds. 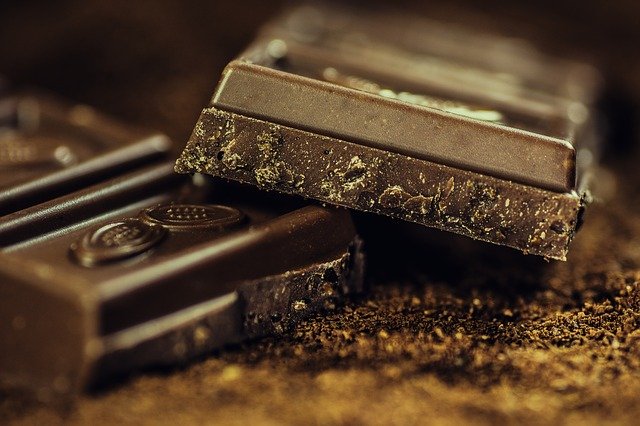
A finished chocolate bar.
There are a great many books on the subject of the world’s favorite sweet treat, and I’ve gotten most of my info from this one in particular: Chocolate: The Nature of Indulgence by Ruth Lopez. (I’m an Amazon Affiliate, btw, so I get a small percentage from any qualifying purchases originating from my site.)
But I’m just here to talk about the liquid version of chocolate, in the sweet American way. Additionally, I have TWO versions of this recipe – the kind to make many cups at once, or a mix where you can make a cup at a time, and keeps for weeks. This hot chocolate is sweet, but can be made less or more so, more or less chocolatey, AND it’s dairy free! Unlike most other versions of hot chocolate mix I’ve found online, which require powdered milk, this doesn’t have any dairy-derived powder, so it can be made with any non-dairy milk you like, though for the creaminess factor, I recommend cashew milk. If you don’t need to be dairy free, use a mixture of low-fat milk and whipping cream, or, use half & half. Really, any combination of milk you like that makes for your favorite level of creaminess. Of course, the higher the fat level, the more velvety it will be.

I’ve made this hot chocolate for many years, but only recently made a version where I could just heat up some milk in a cup, add some hot cocoa mix, and be out of the kitchen in 5 minutes. I’ve been drinking a LOT of hot cocoa this week to make sure my mix is just right, and makes the same cup every time. I think it works really well! And I hope you think so, too.
Level: Easy
Serves: 4 8oz. cups
Cooking Time: 7-10 minutes
Ingredients:
– 1/3 cup unsweetened cocoa powder (I used a Dutched cocoa blend)
– 3/4 cup granulated sugar
– pinch of salt
– 1/3 cup boiling water
– 3/4 tsp vanilla extract
– 3 1/2 cups milk (or half & half)*
– 1 cup half & half*
Tools:
– medium saucepan
– whisk
– measuring cups
– measuring spoons
– cups for serving
– small ladle or deep spoon for serving
Method:
- Boil a little bit of water in an electric kettle or in a small pan.
- In a medium saucepan, add cocoa powder, sugar, salt, and hot water. Stir with a whisk to combine.
- Turn on burner to medium-low, and gradually add milk and cream (or choice of dairy-free option) and stir in between each addition.
- Heat the cocoa gently until desired temperature, stirring continuously, being careful not to scald the milk.
- Once heated, divide evenly between cups. Top with whipped cream, marshmallows, or a sprinkle of cinnamon and serve!
Notes:
- You can use any milk or milk-substitute in this recipe. I recommend cashew milk, because it has a similar creaminess to dairy milk. I use a combination of 1% milk and half & half, but have used all half & half, or all 1% milk, and while it’s creaminess factor is changed a little, it doesn’t affect the taste.
- I don’t know about you but the mugs in my house are definitely bigger than 8 oz. LOL. So feel free to scale the recipe to make enough for the size of your mugs, and the number of people you’re feeding.
- Don’t be afraid to spice things up and add your own spin! Peppermint syrup, chopped chocolate or chocolate chips, ground cinnamon or nutmeg, coconut syrup…the customizations are endless! With syrups, I’d recommend adding them at the very end or in each cup – as heating them over a burner for long periods could affect the taste. However, chopped chocolate or ground spices can be added early on to the whole batch. Same goes for extracts, if you’re using those instead. They can replace the vanilla extract in this recipe.
- Feel free to play around with the sugar in this recipe to your liking. I sometimes find it too rich, so I’ll add more milk.
Now, the dry mix is a little different. The ratios are about the same, but there’s one ingredient which is different: the vanilla.
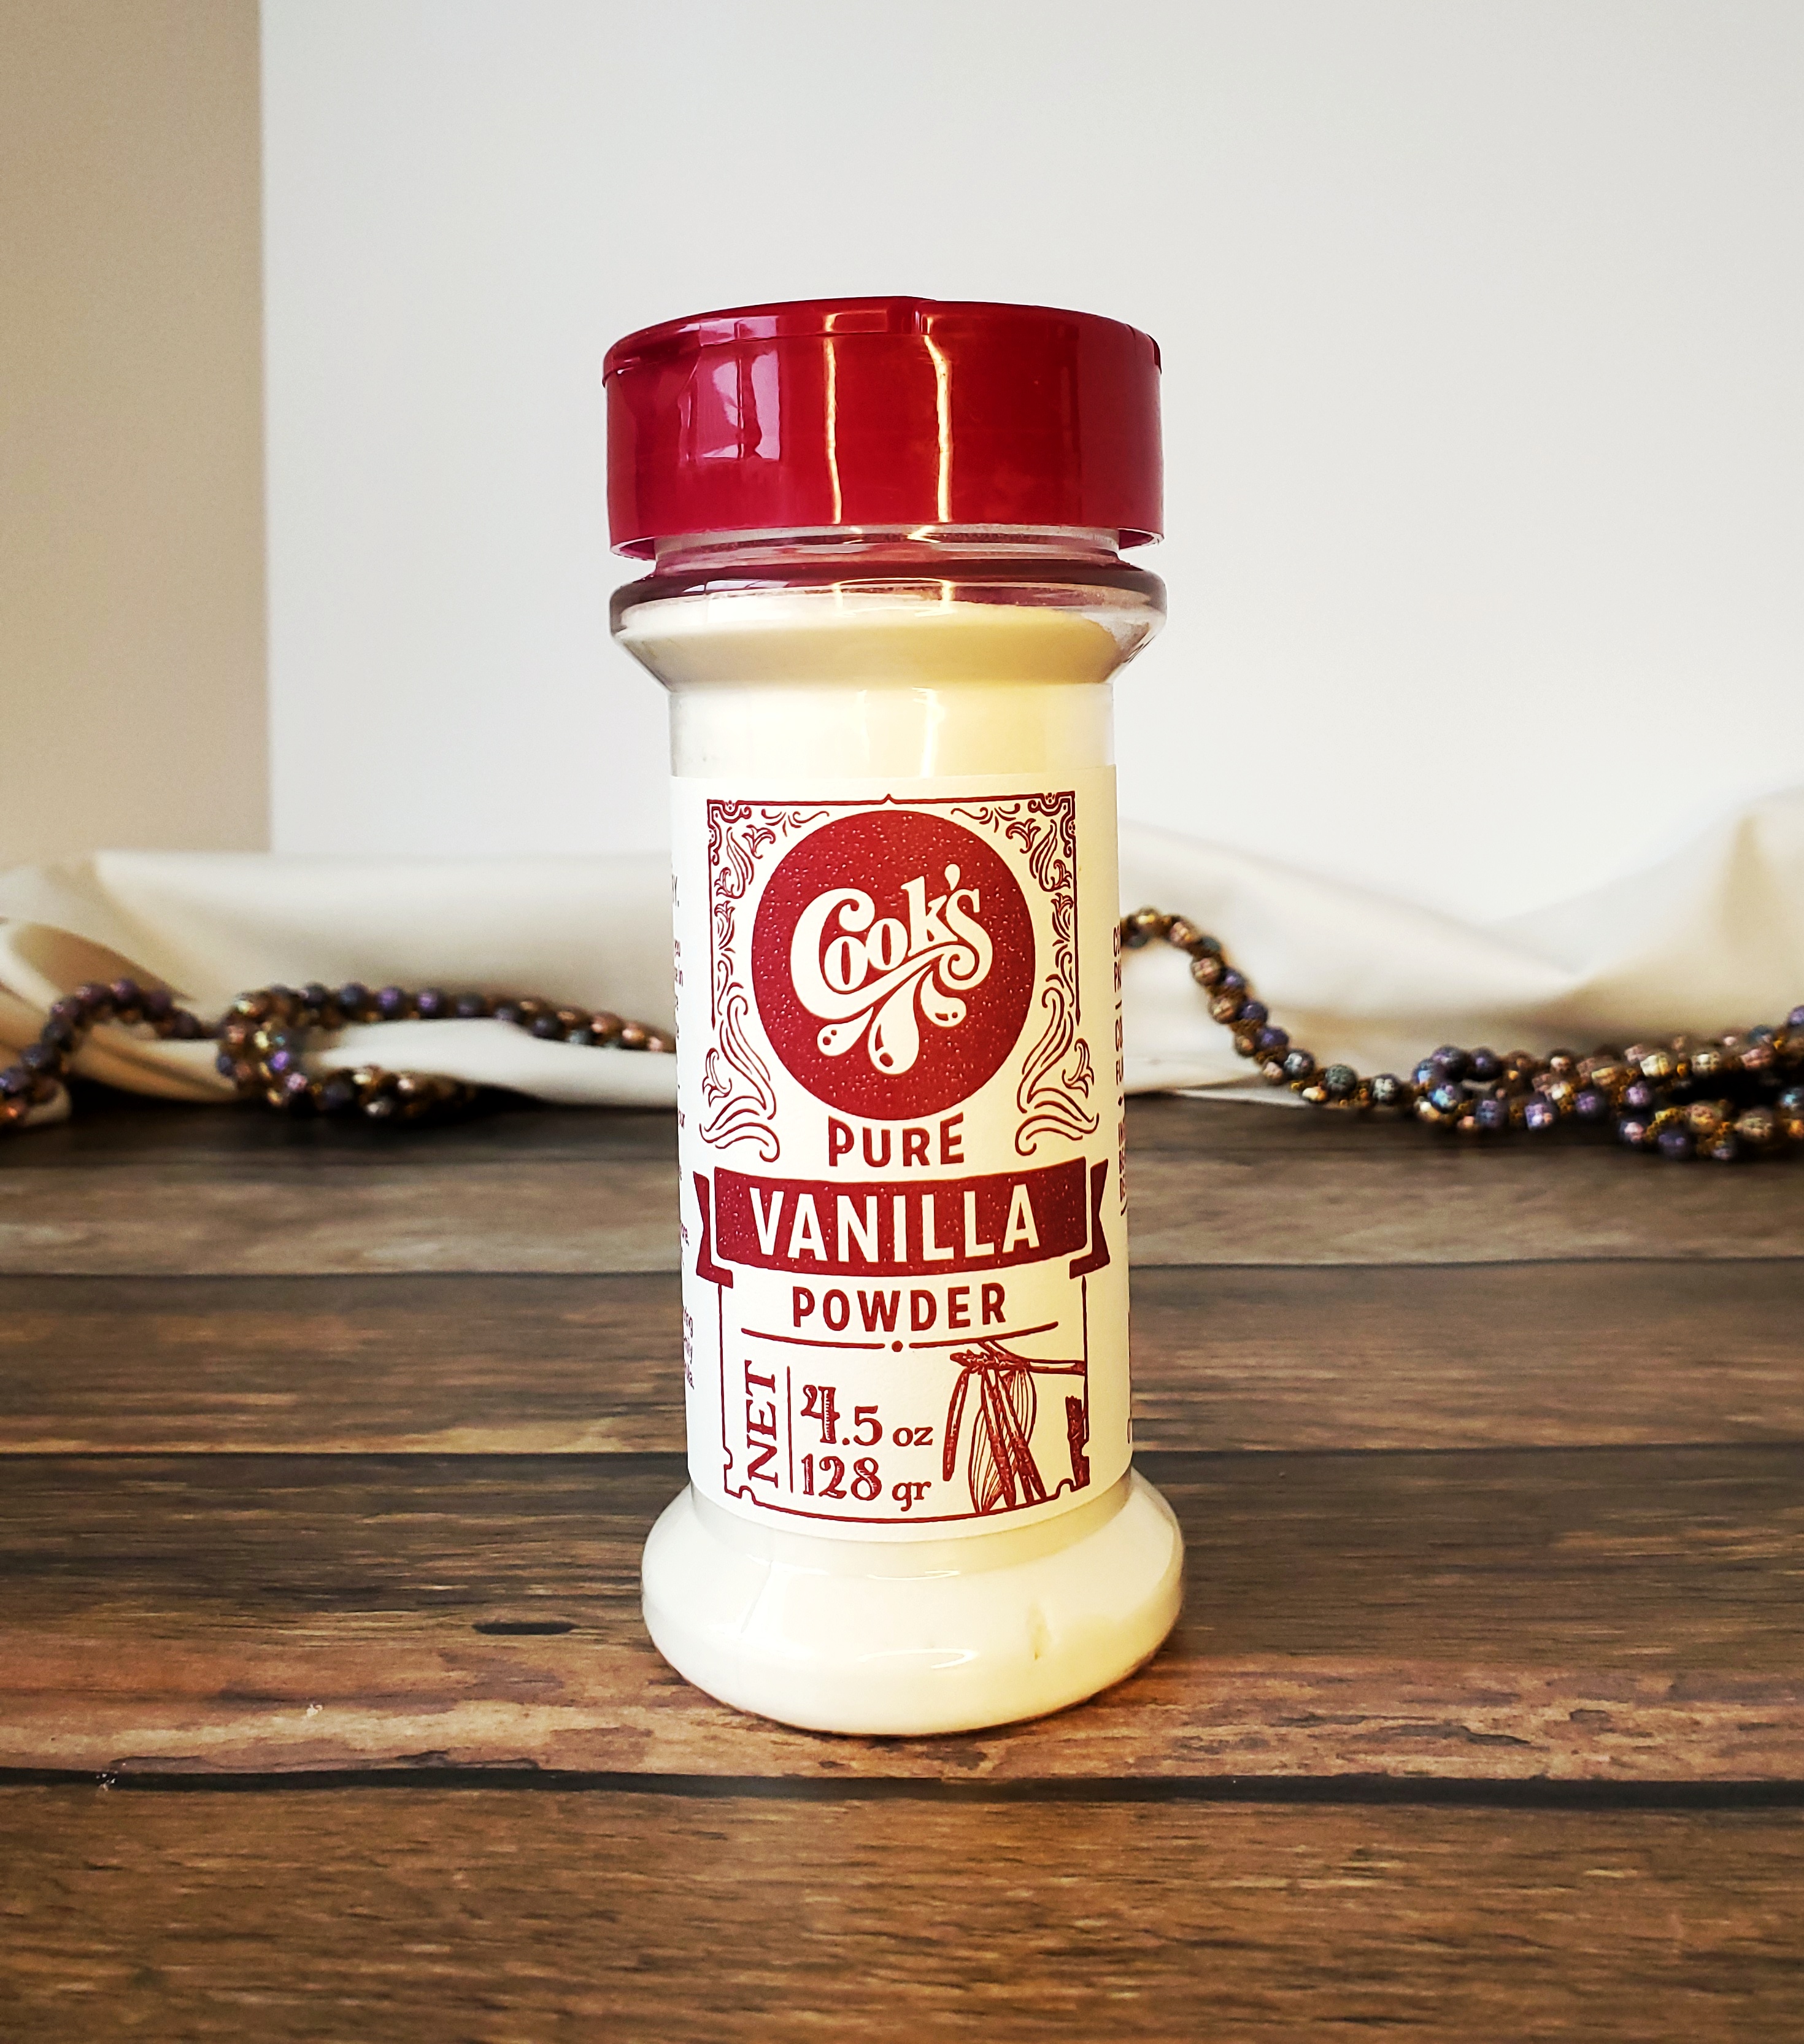
The dry mix uses vanilla powder, which I was able to find at my local Fred Meyer. If you’re unable to find it, I would leave it out, and add in 1/8 to 1/4 tsp vanilla extract per cup.
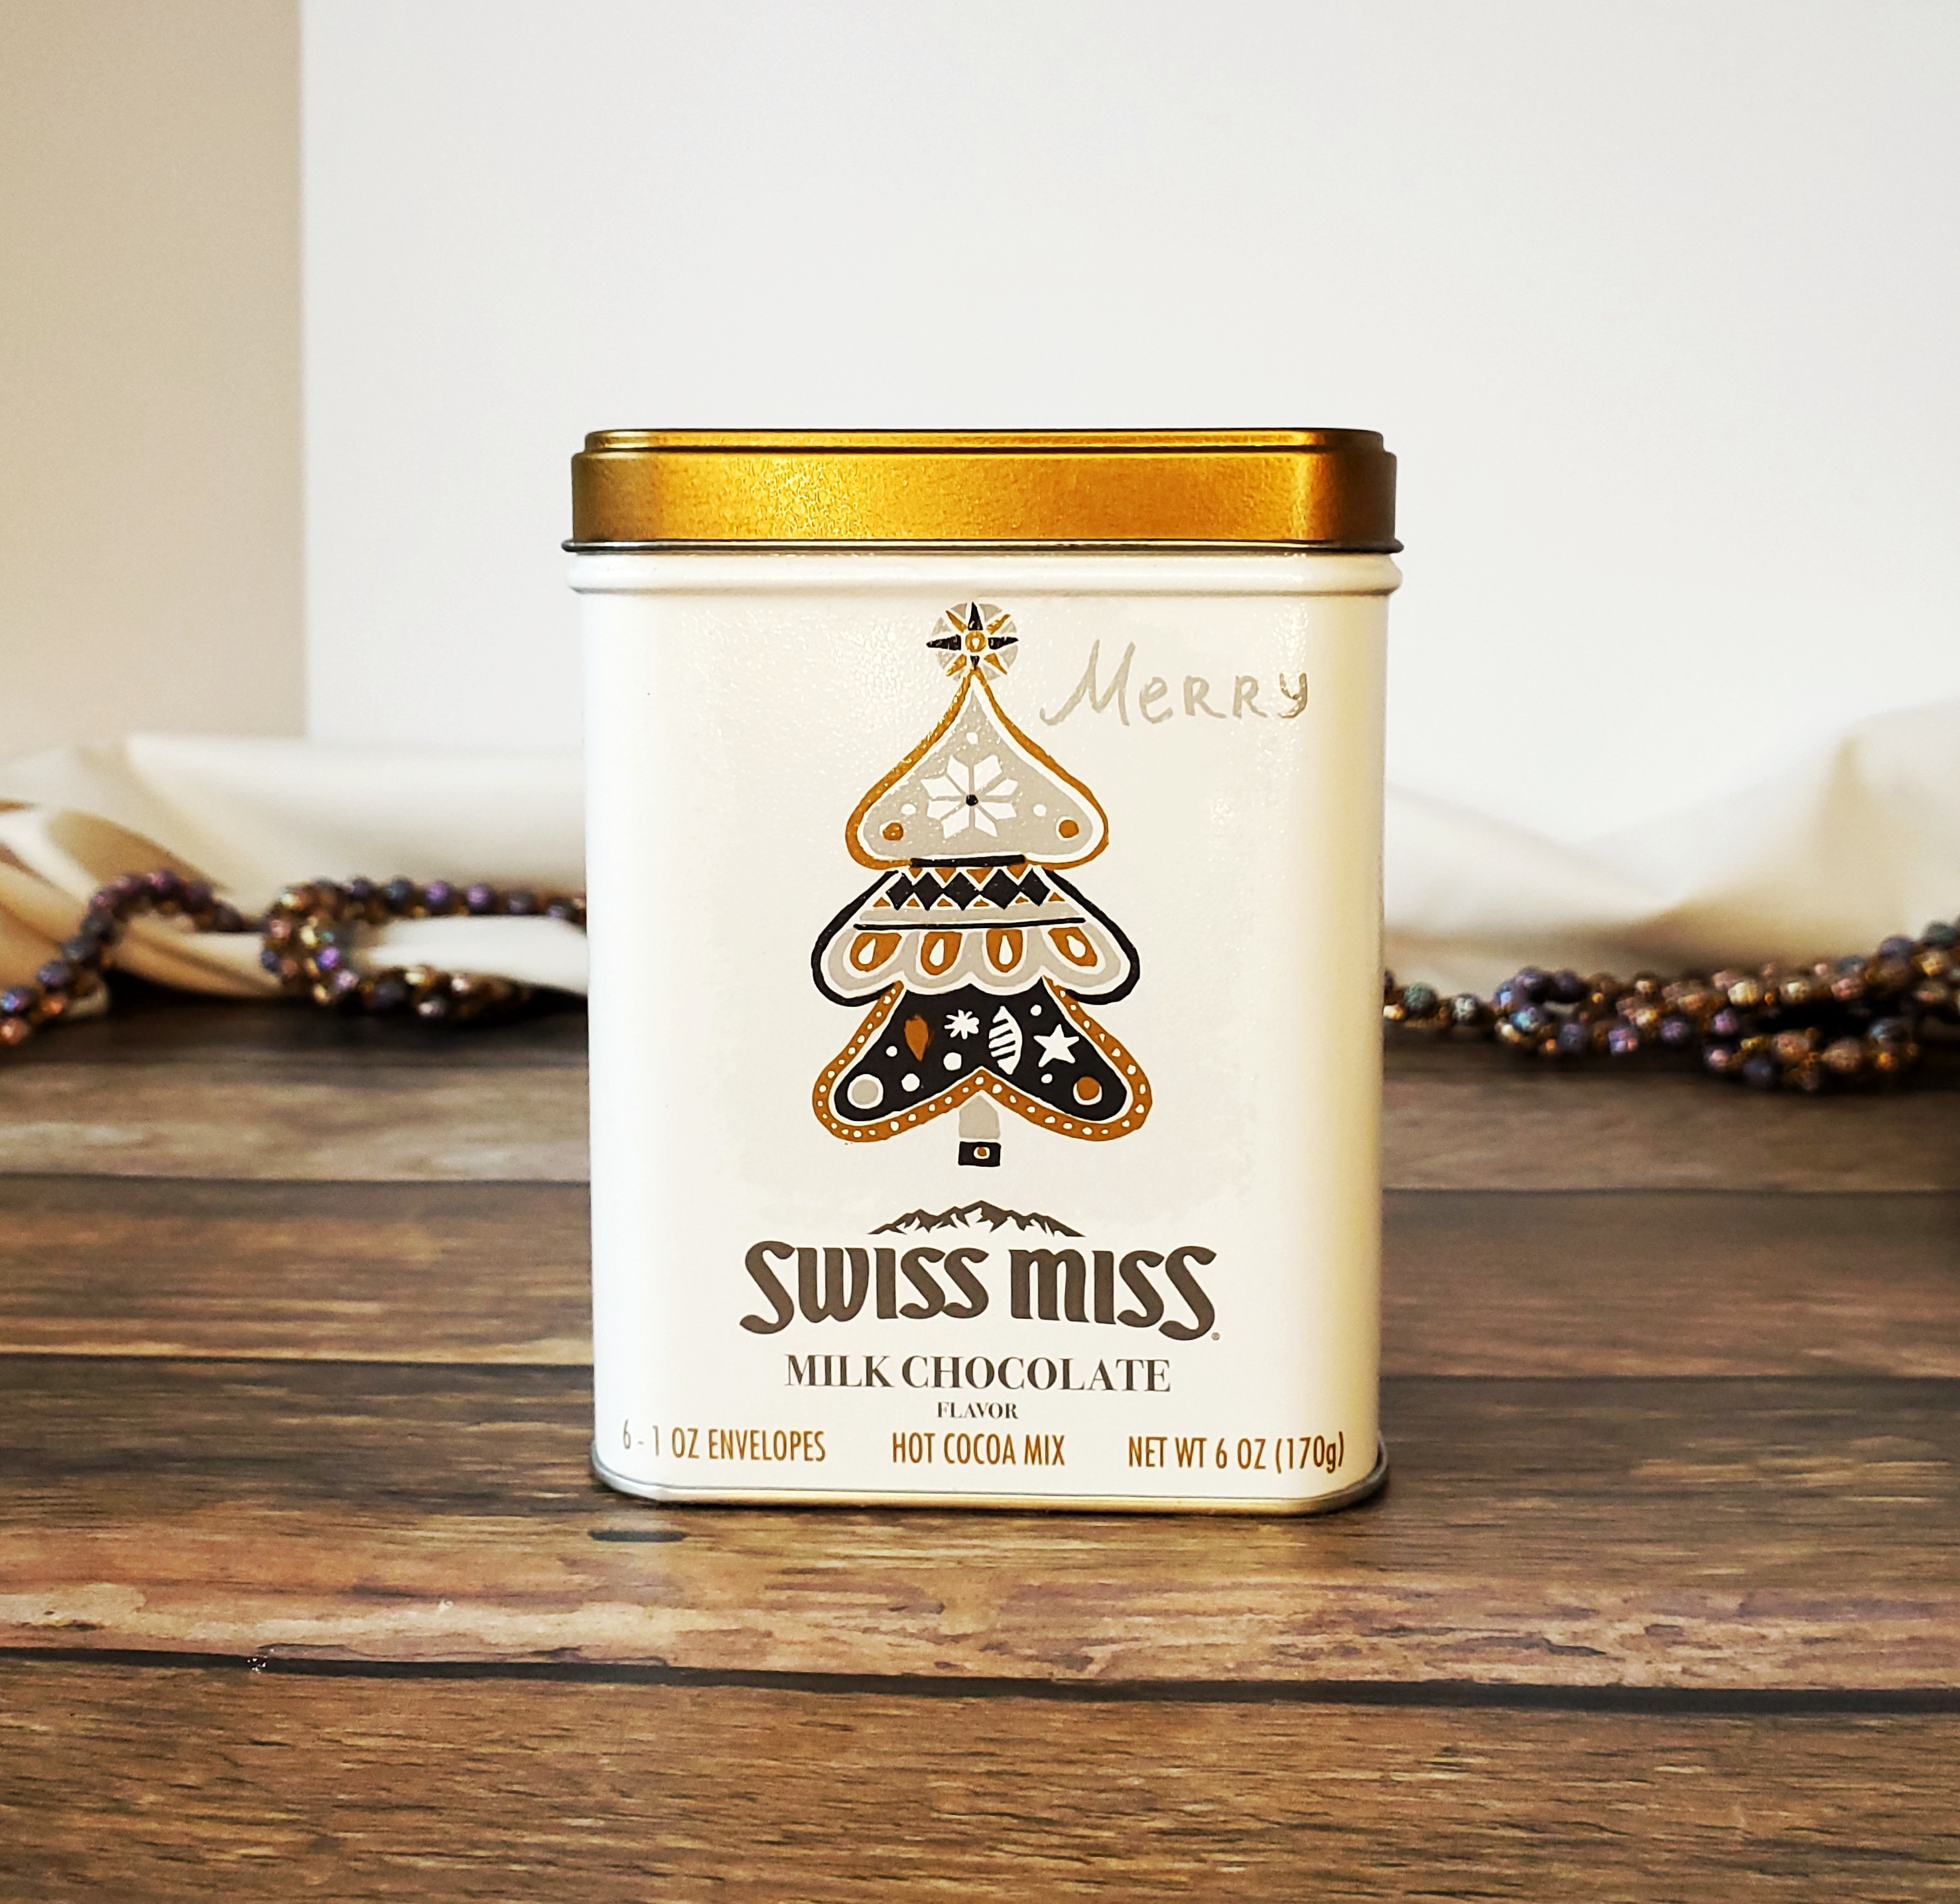
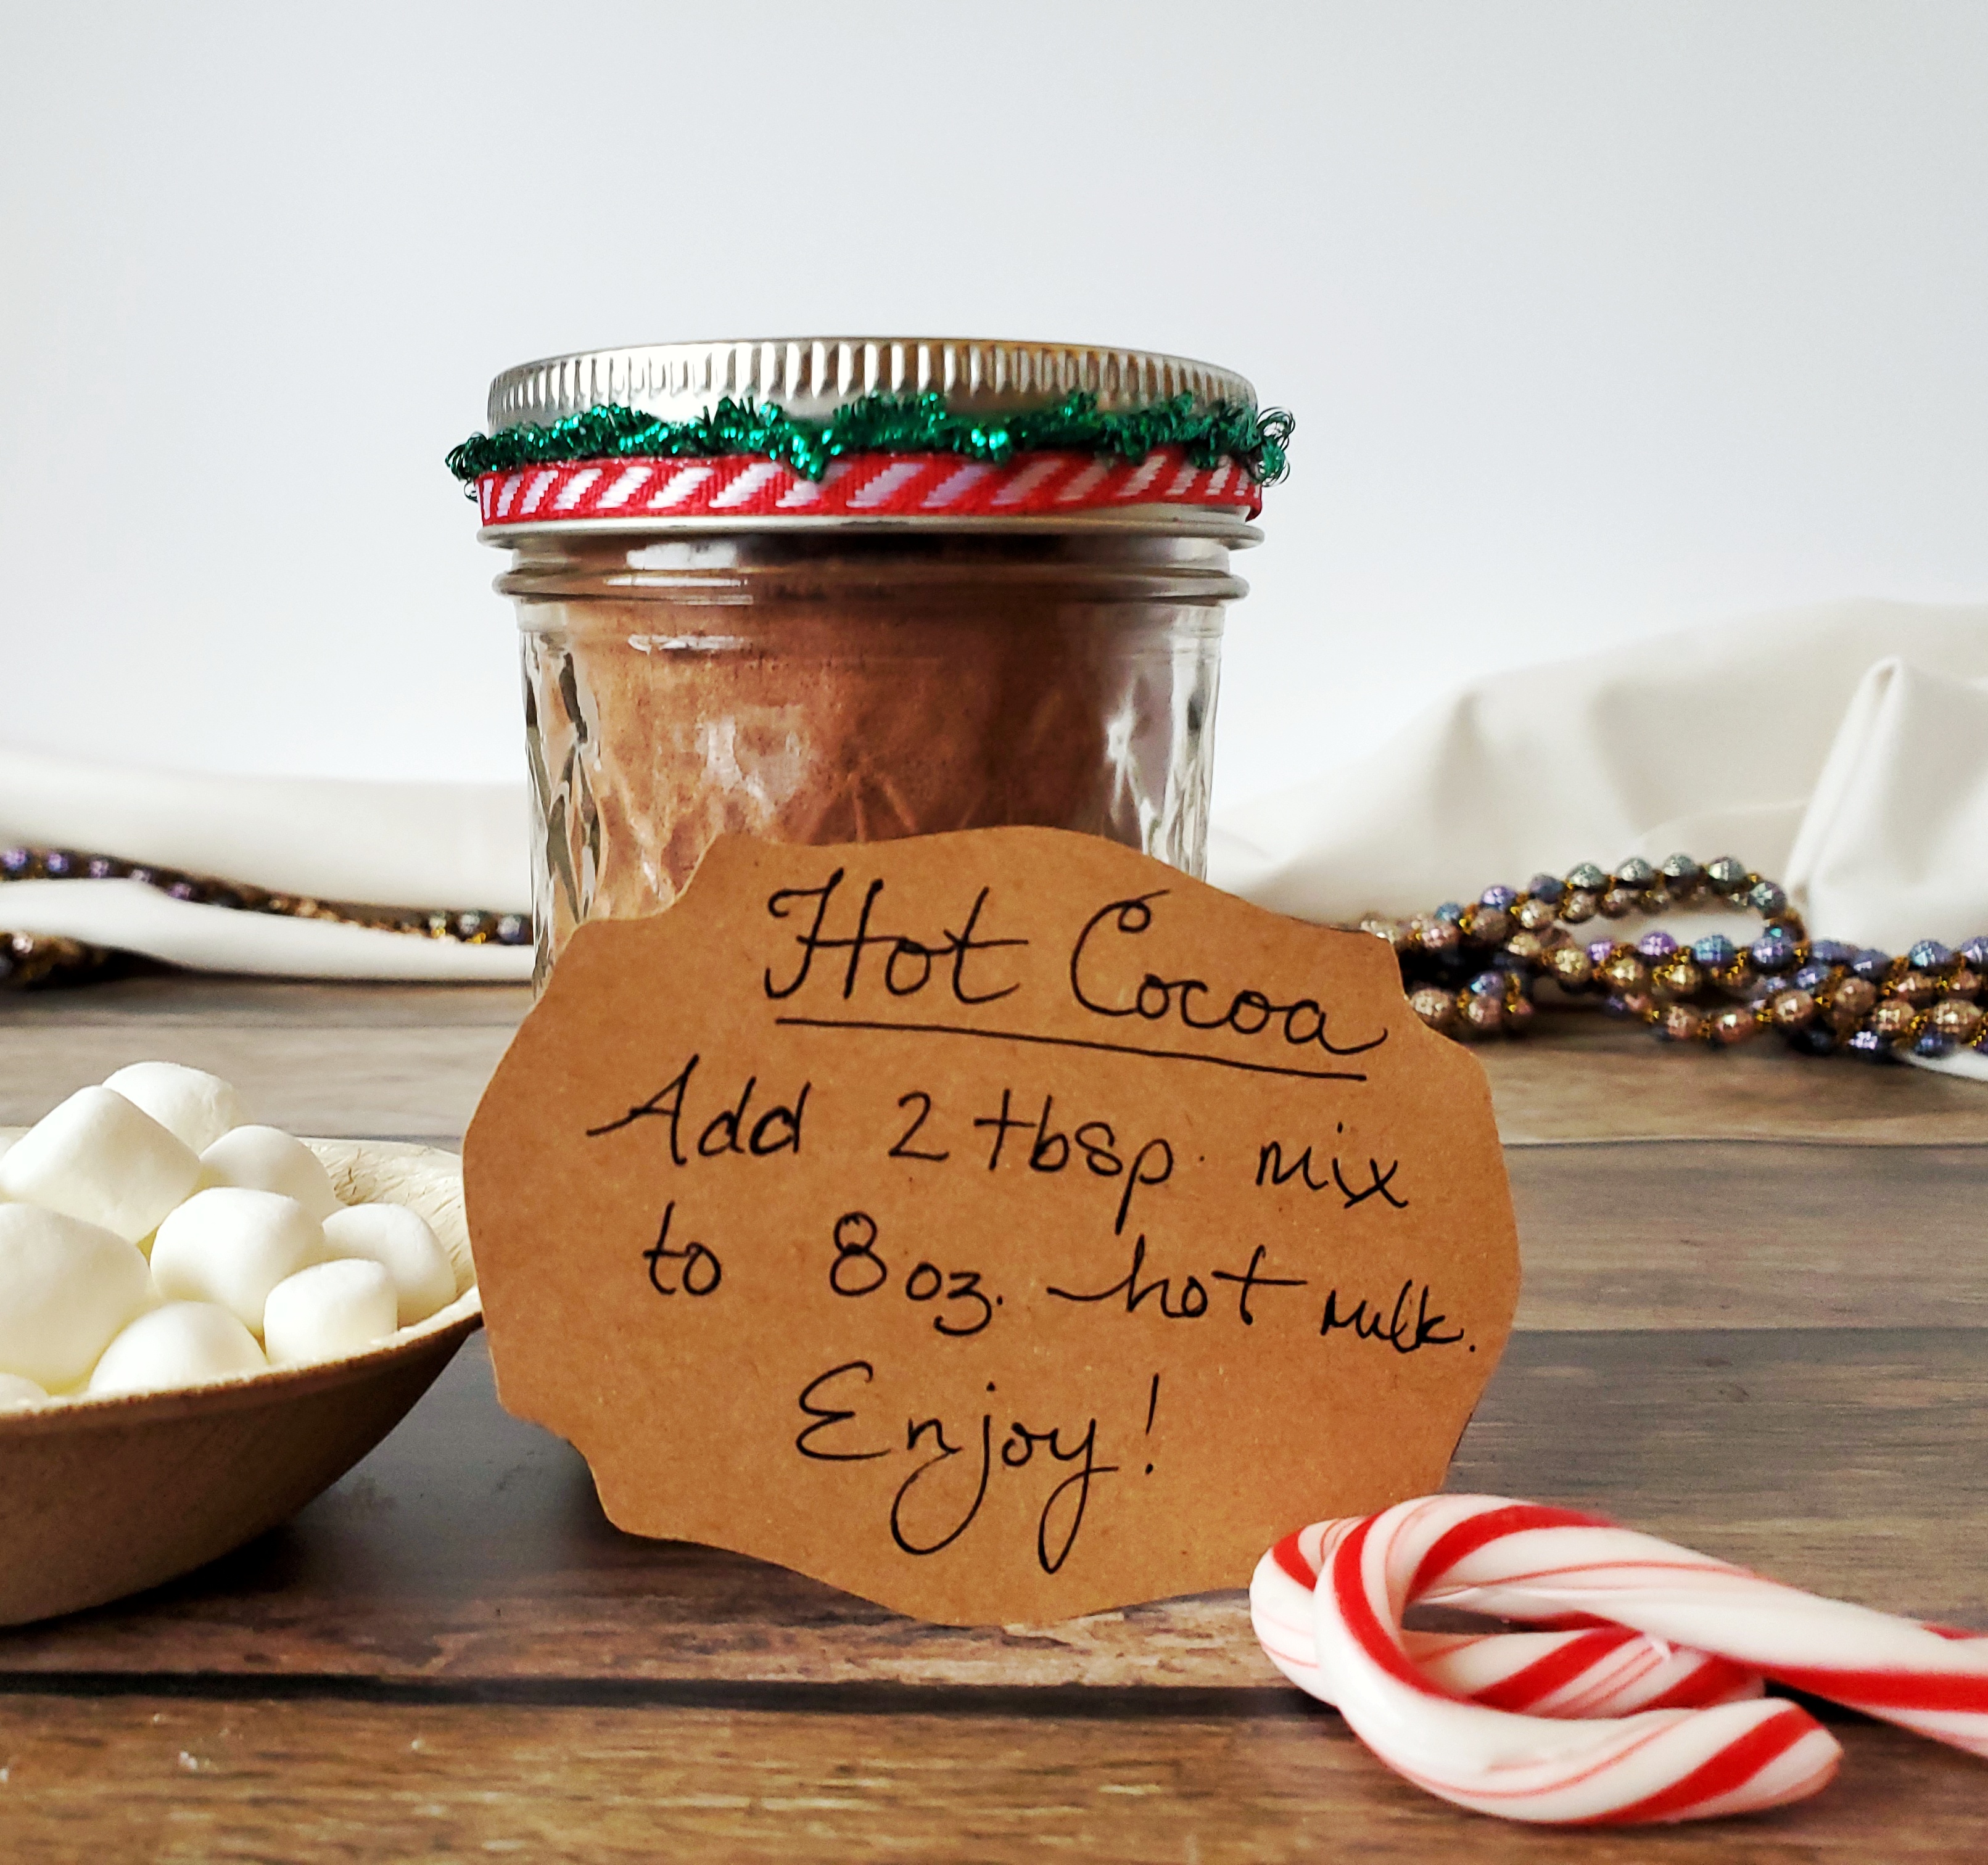
For this mix, make sure you have a good container to keep it in! My aunt sent me this container of Swiss Miss packets a few years ago, and I’m reusing it to hold my hot cocoa mix, since it already says that’s what’s inside!
Level: Easy
Serves: 4 8oz. cups
Time: 5 minutes
Ingredients:
– 1/3 cup unsweetened cocoa powder (I used a Dutched cocoa blend)
– 3/4 cup granulated sugar
– pinch of salt
– 1/2 tsp vanilla powder
Tools:
– container with lid
– whisk
– measuring cups
– measuring spoons
Method:
To make mix:
- Measure out dry ingredients into container, mix with a whisk or fork until well blended.
- Seal container until ready to use. This mix should last for quite awhile as long as it’s kept away from moisture. It might need stirring if it’s been sitting for too long, as the cocoa granules are smaller than the sugar ones, and might settle closer to the bottom.
- Fill mug with desired milk, and microwave on high for 2-3 minutes (watch to make sure it doesn’t boil over). You can also heat the milk in a saucepan over medium-low until desired temperature.
- Starting with 2 tbsp of mix, add to your cup and use a fork or small whisk to blend between scoops. Add less or more based on your desired chocolatey flavor, or the size of your mug. My 16oz. mug needs about 3.5 tbsp.
- Top with whipped cream, marshmallows, or your favorite topping and enjoy!
Notes:
- I recommend heating the milk first, since adding powder to cold liquid doesn’t work very well.
- You can use any milk or milk-substitute in this recipe. I recommend cashew milk, because it has a similar creaminess to dairy milk.
- I don’t know about you but the mugs in my house are definitely bigger than 8 oz. LOL. So feel free to play around with how many tablespoons you add to your milk. I’ve also found that if the powder has little clumps in it after stirring, heating hte milk for one more minute will help dissolve it.
- Feel free to play around with the sugar in this recipe to your liking. I sometimes find it too rich, so I’ll add more milk.

Add the cocoa… 
Add the sugar… 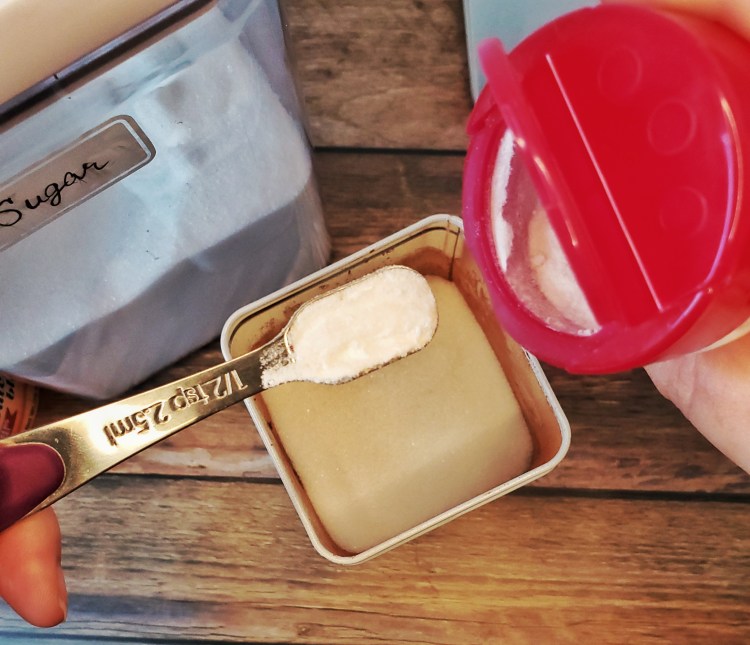
Add the vanilla powder… 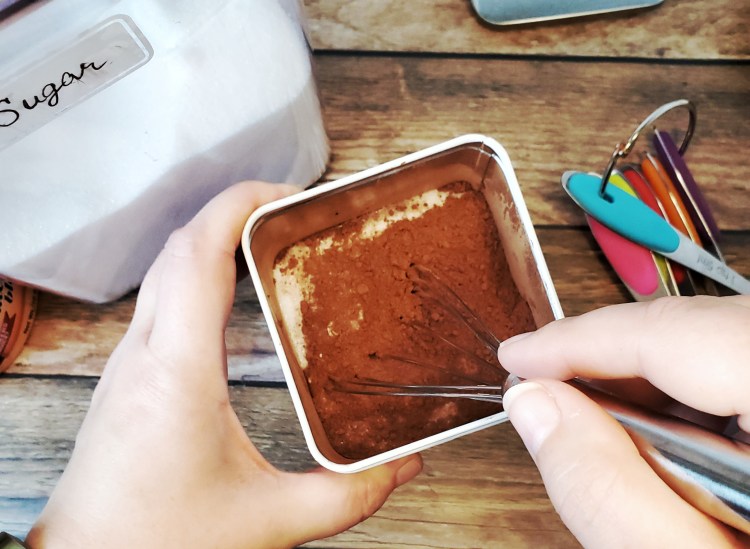
Mix thoroughly! 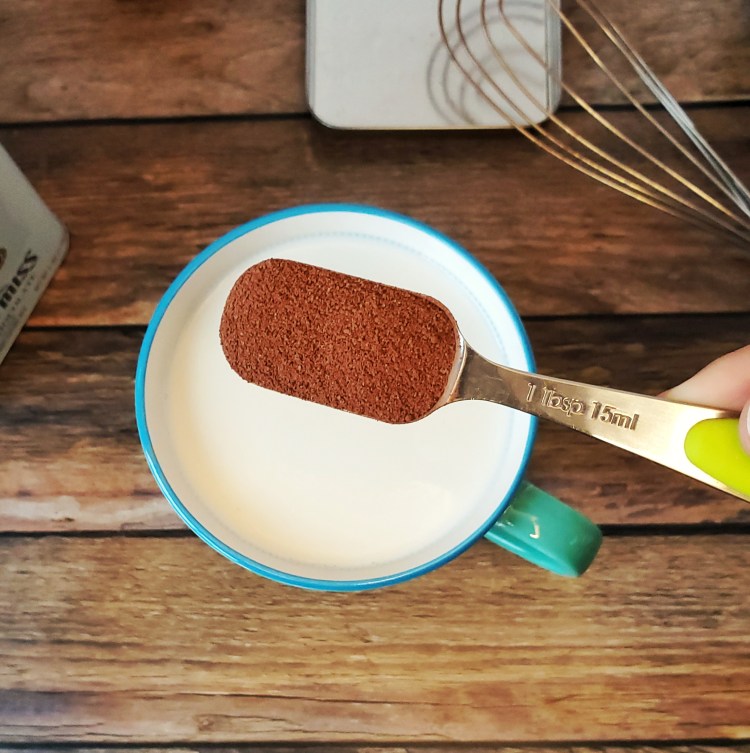
To a hot cup of milk, add one tablespoon of mix at a time… 
Stir gently with a whisk or fork… 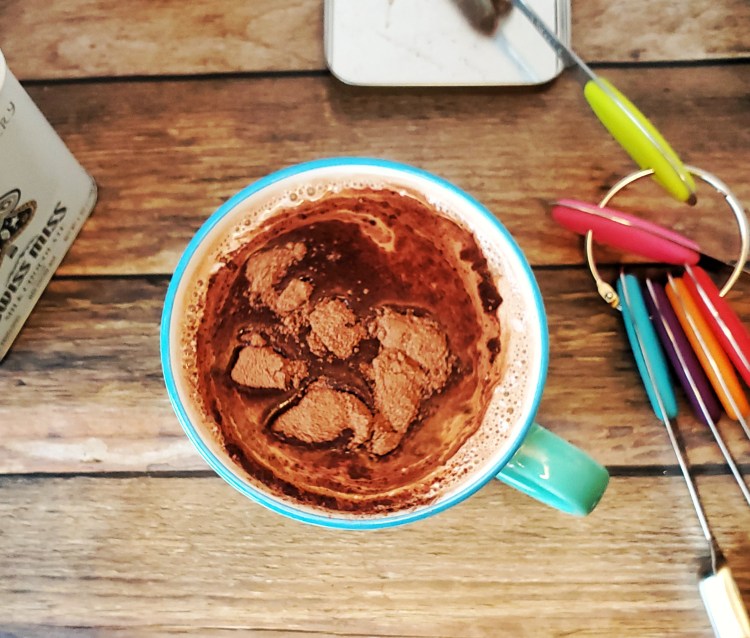
Keep adding mix until it’s perfect… 
You might want to heat the milk for 1 more minute to help dissolve the extra little clumps… 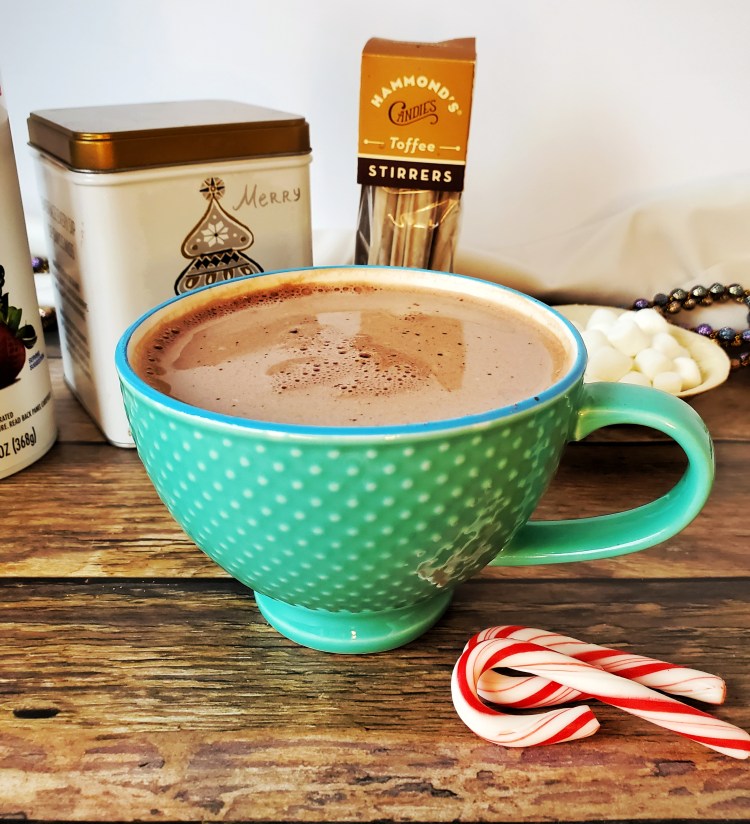
…add your favorite toppings and enjoy!
This mix will make a great gift! Put it in a decorative mason jar or container, add some pretty ribbon, and some directions!
I hope you get a chance to make some of this yummy hot cocoa this winter! I’ll be taking another break this upcoming week because of Yule and Christmas, but I’ll probably be posting on Instagram and Facebook, so please follow me there for non-blog updates!
Stay cozy, safe, and happy! And keep it crafty!
– Raven
